If you just saw the word "FAIL" on your exam results, take a breath.
The California real estate exam is a rigorous barrier to entry designed to ensure only prepared professionals enter the industry. Read more...
If you just saw the word "FAIL" on your exam results, take a breath.
The California real estate exam is a rigorous barrier to entry designed to ensure only prepared professionals enter the industry. At ADHI Schools, I have spent over 20 years helping thousands of students navigate this exact moment.
What happens if you fail the CA real estate exam isn’t the end of your career—it is a reconnaissance mission. You now have firsthand experience with the testing environment and the specific phrasing of the questions. Here is your professional recovery plan to turn this detour into a license.
First: What Failing Actually Means
Procedurally, failing simply means you didn’t hit the required scoring threshold. According to the California Department of Real Estate (DRE) standards:
Salesperson Candidates: Must score at least 70%.
Broker Candidates: Must score at least 75%.
Quick Snapshot: Your Immediate To-Do List
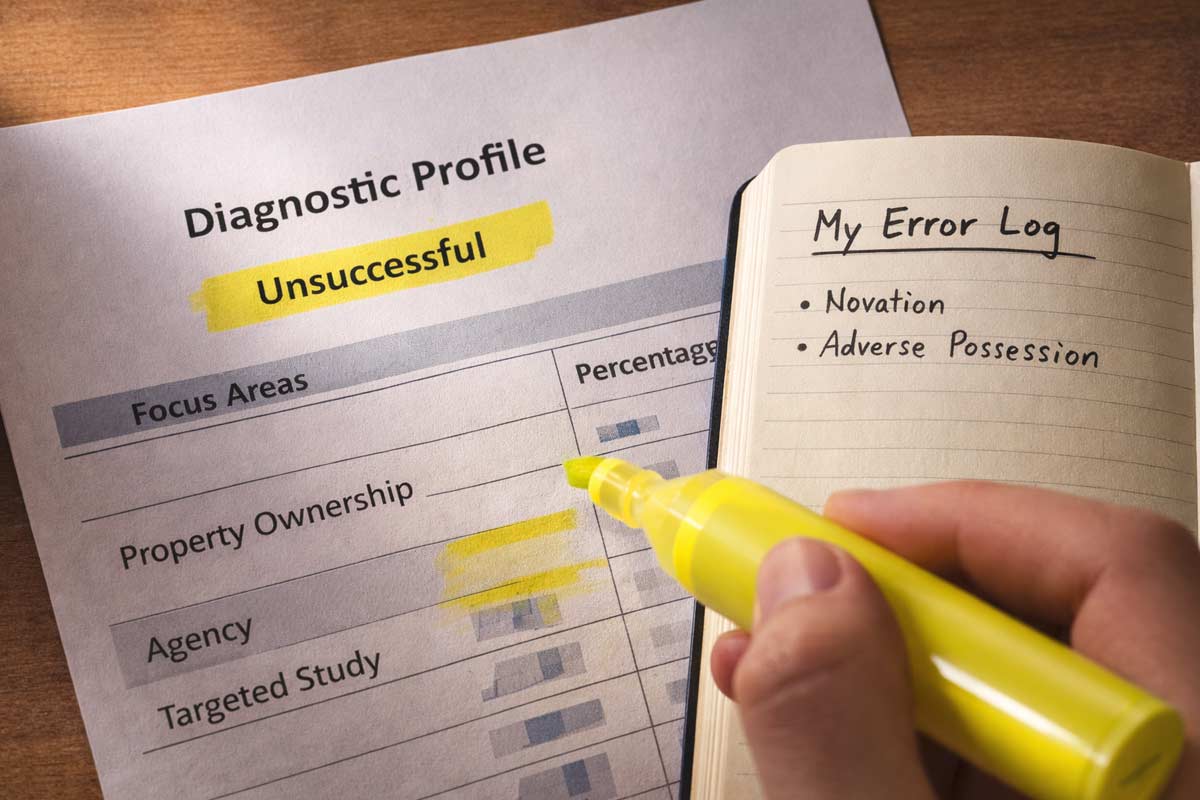
Review Today: Analyze your diagnostic profile to see which of the seven categories (e.g., Property Ownership, Land Use) need work.
Confirm Eligibility: Ensure you are still within your two-year application window.
Wait for the System: Do not attempt to reschedule until the DRE has fully processed your "Unsuccessful" result.
What Happens Immediately After You Fail
In California, you typically receive your results at the testing center. If you didn’t pass, you will receive a notification containing a diagnostic profile. This document is your roadmap; it breaks down your performance percentage in each major category.
The "Golden Hour" Reconnaissance
Before the specific details of the questions fade, perform a "brain dump":
Recall 10 Questions: Write down ten topics or specific questions that confused you.
Analyze Pacing: Did you finish with an hour to spare, or were you rushing to beat the clock?
The "Strategy" Check: Did you change your answers frequently? Real-world scenario: We often see students second-guess themselves from a passing score down to a failing one. Trust your first instinct.
Protecting Your Focus
Avoid a "panic spiral" by staying off unverified forums or Reddit. Every test-taker’s experience is subjective; trust your official diagnostic data over internet anecdotes that may lead to conflicting advice or wasted study time.
How to Retake the Exam
To reschedule the CA real estate exam, you must apply for a re-examination and pay the current fee.
The Re-Examination Rules
The Two-Year Eligibility Window: You must pass the examination within the two-year period following the date your initial application was filed. If you do not pass within this window, your application expires, and you must re-establish eligibility to try again.
Waiting for Results: DRE does not publish a fixed "waiting period" (such as 30 days) between attempts. However, you must wait until your results have been officially processed and received before you are eligible to reapply.
The "Submit Once" Rule: DRE explicitly warns candidates to submit their reschedule application only once—either online or by mail. Multiple submissions can lead to duplicate charges or your records being flagged for review.
One Date at a Time: You can only be scheduled for one exam date at a time. Rescheduling an existing appointment typically removes your current date.
Avoid the "System Flag": Attempting to obtain a new exam date before your previous results are processed can result in your records being withheld and the assessment of additional fees.
Verify Your Logistics
Before you head back, review the Identification Requirements for the CA Exam and the California Real Estate Exam Rules & Testing Policies to ensure no administrative errors disrupt your next attempt.
Why People Fail (and How to Fix It Fast)
Most failures fall into one of four patterns. Identify yours to adjust your strategy:
Failure Pattern
What it looks like
The Professional Fix
The Content Gap
Seeing terms like "Novation" or "Adverse Possession" and feeling lost.
Focus on the glossary. Real estate is a vocabulary test at its core.
The Strategy Gap
Narrowing it to two answers and always picking the wrong one.
Practice the "distractor" method: find why three answers are wrong instead of why one is right.
The Physiology Gap
Crashing or losing focus around question 100.
Build stamina. Take full-length, timed sets to mimic the 3-to-4-hour window.
The Logistics Gap
Arriving stressed due to traffic, ID issues, or prohibited items.
Review What to Bring to the California Real Estate Exam 48 hours early.
The 14-Day Comeback Plan
Don’t wait months to retake. Momentum is your ally.
Days 1–3 (Weakness Blitz): Study the two lowest-scoring categories on your diagnostic profile.
Days 4–7 (The Error Log): Take practice questions and write down why you missed them. Understanding the "why" prevents repeat mistakes.
Days 8–11 (Simulated Testing): Take full-length sets (150 questions for Salesperson, 200 for Broker). Build your sitting stamina for the actual 3-to-4-hour exam window.
Days 12–13 (High-Probability Review): Review Agency, Contracts, and Practice of Real Estate and Mandated Disclosures.
Day 14 (The Reset): Light review only. Confirm your location and pack your ID.
Simulating Success: The CrashCourseOnline.com Method
If your diagnostic profile showed gaps in specific areas, the most common mistake is to "just study more." You don't need more study; you need simulation. While nobody has the exact questions that are on the test, our proprietary system at crashcourseonline.com is engineered to closely simulate the concepts tested on the exam. We categorize our 1,100+ practice questions into the same seven categories found on your official results notice, allowing you to hyper-focus on your weakest subjects.
Frequently Asked Questions
How soon can I retake the California real estate exam?
DRE does not publish a fixed numeric wait time; however, you must wait until your current results are processed and received before the system will allow you to reapply.
How do I reschedule or reapply after failing?
The most efficient method is using the DRE eLicensing portal. You will select "Re-Examination," pay the fee, and select a new date.
Do my pre-license course certificates expire?
No. According to the DRE, pre-license course approvals for the three required college-level courses do not expire. You only need to focus on passing the state exam itself.
What happens if my two-year application window expires?
If you don't pass within two years of your application date, you must submit a new application, pay the initial fees, and re-establish eligibility.
Your Next Steps
This attempt didn't give you a license, but it gave you data. Now, we execute the plan. Once you clear this hurdle—and you will—you can look forward to What Happens After You Pass the CA Real Estate Exam.
For a comprehensive look at the entire journey, consult our California Real Estate Exam Guide.
Step 1: Download your diagnostic profile from the DRE eLicensing portal.
Step 2: Schedule your re-exam once the system allows to lock in your momentum.
Step 3: Start your Error Log based on your 10 "reconnaissance" questions.
Need a hand with the data?
If you have your diagnostic profile and aren't sure how to prioritize your study hours, reach out. We can help you build a targeted schedule based on your specific score breakdown.
|
Last Reviewed: February 2026 (Always verify the latest rules on the official California Department of Real Estate (DRE) website before your exam day.)
Quick Summary (TL;DR): To sit for the California Read more...
Last Reviewed: February 2026 (Always verify the latest rules on the official California Department of Real Estate (DRE) website before your exam day.)
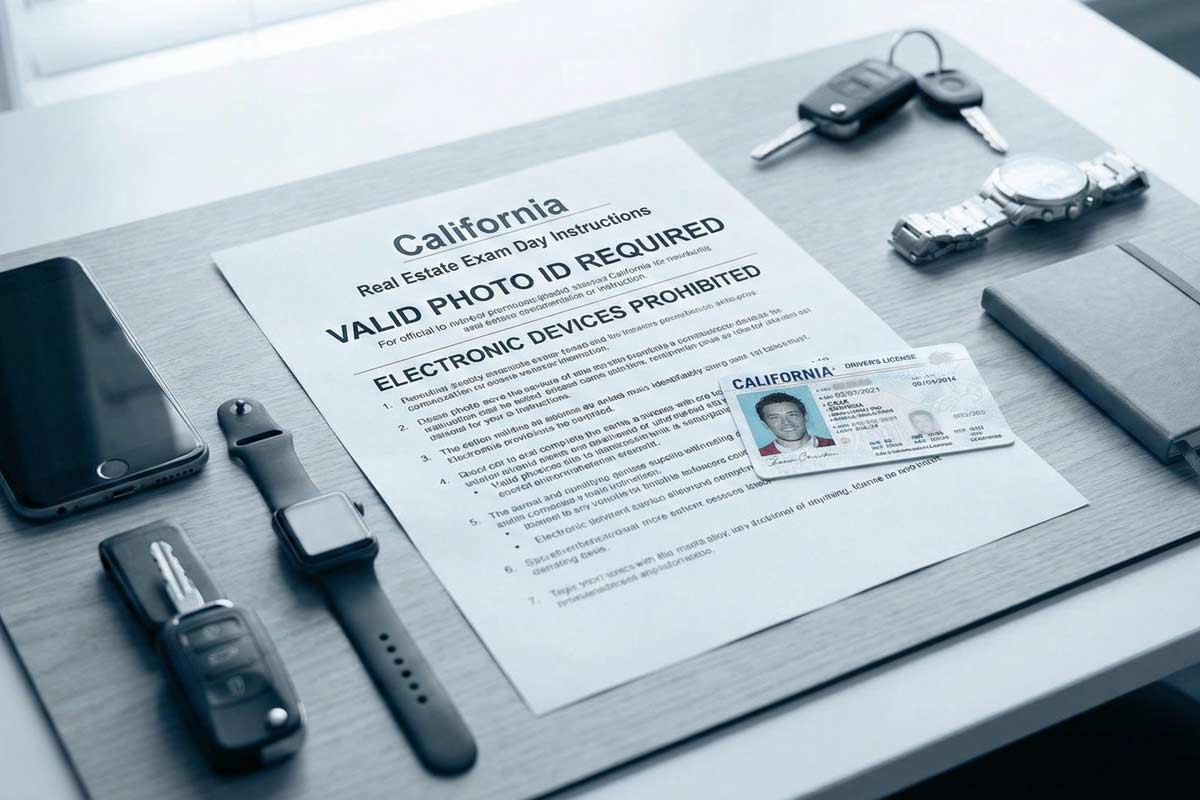
Quick Summary (TL;DR): To sit for the California real estate exam, you must present a valid government-issued photo ID that matches your registration name. Electronic devices—including phones and smartwatches—are prohibited in the testing room. Plan to arrive at least 30 minutes early; severely late arrivals are often denied entry and may need to reschedule.
The biggest obstacle to passing your California real estate exam shouldn’t be the check-in desk. Every year, qualified candidates are turned away or disqualified—not for lack of study, but for violating a small set of non-negotiable exam-day rules.
With over 20 years of preparing candidates, I have seen the preventable errors that delay months of hard work. This guide cuts through the anxiety and gives you the rules you need so your only job on exam day is answering questions.
The 80/20 Rule: The Policies That Most Often Get Candidates in Trouble
Most exam-day issues stem from a handful of avoidable mistakes. Focus your attention here:
Identification issues: An invalid, expired, or unacceptable ID is the fastest way to be denied entry.
Prohibited personal items: Phones, watches, bags, and even your own pens can trigger disqualification if brought into the testing room.
Late arrival: Sessions begin promptly—arrive early or risk being denied entry and potentially forfeiting your exam fee.
Food, drink, and study materials: These are not permitted in the testing environment.
Not following instructions: Proctors enforce exam-security rules strictly.
Identification & Name-Match Policies: Your Non-Negotiable Entry Ticket
Your photo ID is your passport into the exam. The DRE is explicit about what is accepted and what is not.
What you must present
You must show one valid, original, government-issued photo ID from the authorized list:
A current state-issued driver’s license or DMV identification card.
A valid U.S. Passport (or a passport issued by a foreign government).
A valid U.S. Military identification card.
The critical name-match reality
Your registration and application must be under your legal name. Common friction points that lead to entry denial include:
Middle Names: Middle initial on one document vs. full middle name on another.
Life Changes: Marriage/divorce name changes not reflected consistently across your documents.
Shortened Names: Using nicknames like “Mike” vs. the legal name “Michael.”
Pro-Tip: If your identity cannot be verified cleanly against the roster, proctors may deny entry. Reconcile any discrepancies at least two weeks before your exam date.
For a full breakdown of documentation and common mismatch fixes, see Identification Requirements for the CA Exam.
Security Screening & Personal Belongings
Knowing the “logistics of the lobby” reduces day-of stress. Here is the standard flow at many exam sites:
Check-in: A proctor verifies your ID and matches you to the roster.
Storage: You will be directed to store personal belongings (typically in lockers, or a designated storage process if lockers are limited).
The Phone Rule: Phones must be powered off and stored as directed. Possession or use of a phone during the exam session—including during breaks—can lead to immediate disqualification.
Final Entry: Once cleared of personal items, you will be assigned a seat.
Best practice: Leave valuables at home or secured in your vehicle. Bring as little as possible to the site.
Prohibited Items: What Not to Bring
The DRE maintains an “Examination Control Information” list. Bringing prohibited items into the testing room can lead to immediate disqualification.
Category
Prohibited Items
Electronics
Cell phones, smartwatches, fitness trackers, tablets, laptops, cameras/recording devices.
Personal Items
Purses, wallets, keys, backpacks, briefcases, suitcases.
Stationery
Your own pens/pencils, paper, notes, flashcards.
Accessories
Hats/caps, lapel pins, tie tacks, smart glasses.
Consumables
Food, drinks/water bottles, gum, and candy.
"Bring Less, Bring Right" Checklist
To ensure a frictionless check-in, only have these items on your person when you approach the proctor:
Your valid, original government-issued photo ID.
Your car key (if not attached to a bulky keychain).
A light sweater or jacket (testing rooms can be chilly).
If you want the “positive list” of what to bring (so you don’t over-pack), read What to Bring to the California Real Estate Exam.
Timing Rules: Arrival, Late Policy, and Breaks
Arrival: Plan to arrive at least 30 minutes early to allow time for check-in, storage, and security.
Late policy: If you arrive after the session has started, you may be denied entry and required to reschedule (which can mean losing your slot and paying again).
Breaks: The exam is a continuous sitting. If you step out for any reason, assume your exam clock continues and follow the proctor’s procedure.
Test-Day Conduct: Disqualification & “Don’t Do This”
To protect exam integrity, follow these rules:
No communication: Don’t speak to or signal other candidates.
No copying: Don’t look at other screens or attempt to reconstruct questions to share later.
Absolute compliance: Follow proctor instructions immediately and without argument.
Violations can result in the exam being terminated and may affect future licensing applications.
Special Situations: Accommodations and “What If…”
Testing accommodations: If you need accommodations (e.g., extra time), you must request and receive approval through the official DRE process well before your exam date.
Medical/comfort aids: Items like insulin pumps or braces may require advance notice for screening—handle this early.
If you are turned away: Don’t panic. Fix the underlying issue (renew ID, correct name mismatch, etc.) and follow our recovery plan in What Happens If You Fail the CA Real Estate Exam.
Final Exam Day Checklist & Next Steps
If you follow these rules, you’ll clear check-in smoothly and can spend your mental energy on the exam itself.
If you pass, read: What Happens After You Pass the CA Real Estate Exam
For the complete roadmap and context, visit the: California Real Estate Exam Guide
Frequently Asked Questions (FAQ)
1. Can I wear a watch during the exam?
No. Watches (including smartwatches) are commonly prohibited. Plan to rely on the on-screen timer.
2. Can I bring my phone if it stays in the locker?
Yes, but it must be powered off and stored exactly as instructed. Do not access it during breaks.
3. What if my ID expired yesterday?
You will likely not be admitted. Your ID must be valid on the exam date.
4. Can I bring my own calculator?
Typically no. There is no longer any math on the California real estate exam and the testing sites no longer provide calculators or dry erase boards.
5. How early should I arrive?
At least 30 minutes before your scheduled start time.
|
You’ve spent weeks—maybe months—memorizing agency relationships, trust fund accounts, and the intricacies of California land use. You are ready to pass the real estate test. But for many candidates, Read more...
You’ve spent weeks—maybe months—memorizing agency relationships, trust fund accounts, and the intricacies of California land use. You are ready to pass the real estate test. But for many candidates, the biggest obstacle isn't the exam questions; it’s the person standing at the check-in desk.
In my 20-plus years of coaching students at ADHI Schools, I’ve seen incredibly well-prepared candidates get turned away before they even touch a keyboard.
Why?
Because of a simple identification mismatch. This guide is your "proctor-proof" checklist to ensure your ID and records are in perfect alignment.
What is the acceptable ID for the CA real estate exam?
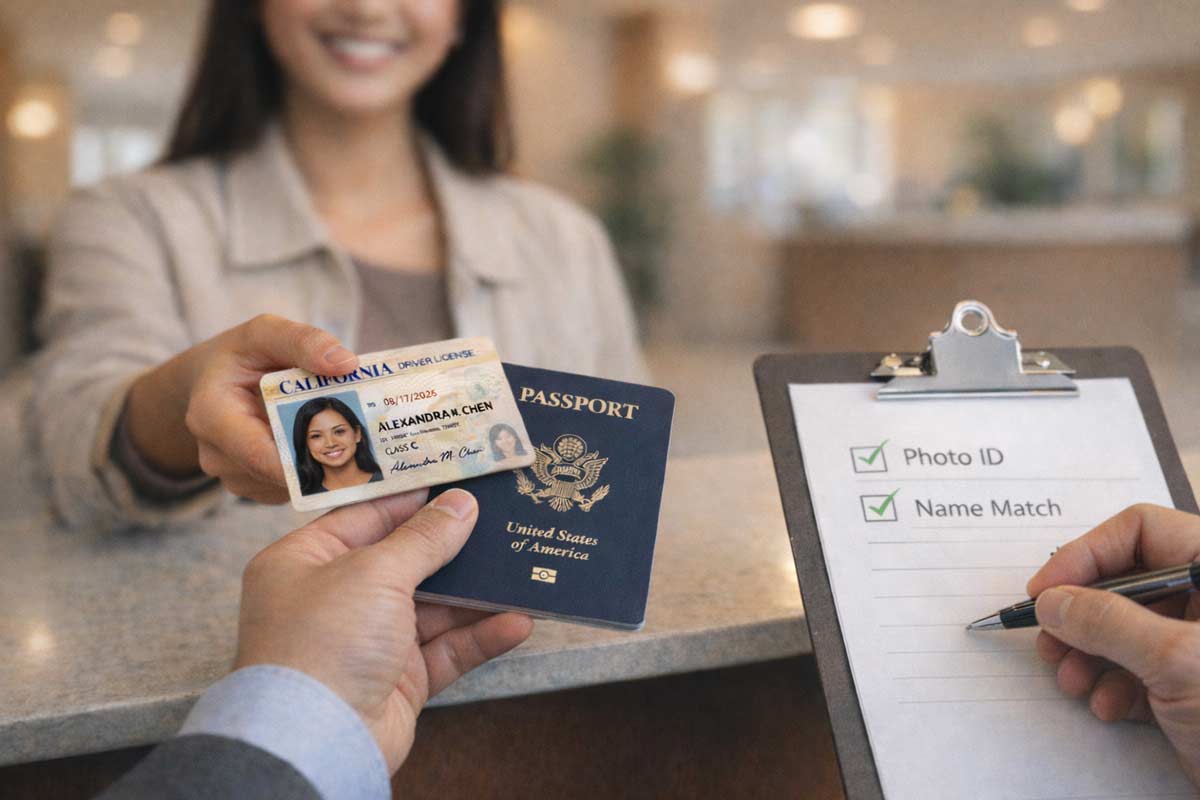
According to the California Department of Real Estate (DRE), you must present a valid, current form of photo identification. Only the following are typically accepted: a current state-issued driver’s license or DMV ID card, a U.S. Passport, a foreign government passport, or a U.S. Military ID. You will not be admitted without one of these specific physical documents.
What happens if my name doesn't match my exam ID?
If the name on your photo ID does not match the name on your exam registration, you may be denied entry. While minor formatting differences like a middle initial could be fine, significant discrepancies—such as nicknames or unrecorded name changes—require you to update your DRE record before your exam date to avoid being marked as a "No Show."
The Core Rule: Validation and Alignment
The absolute "Golden Rule" for exam day is that your identification must be current (valid) and it must match the name on your exam registration. The DRE is the final authority on these policies, and testing center proctors follow their handbook strictly. They are not authorized to make "judgment calls." While minor formatting differences are sometimes accepted, you should assume strict matching is required and resolve any discrepancies weeks before your date.
Name Mismatch Risk Assessment
Scenario
Risk Level
Recommendation
Middle Initial vs. Full Middle Name
Low
Usually fine, but full name is the safest bet.
Two Last Names / Spacing (e.g., De La Cruz)
High
Spacing must match your ID exactly.
Accents / Special Characters (José vs Jose)
Medium
Usually system-normalized, but confirm your portal entry.
Nickname (e.g., "Bobby" instead of "Robert")
High
You must update your DRE record to match your ID.
DRE-Aligned Acceptable ID Types
To be admitted into the examination, you must show a valid form of photo identification. Per current DRE guidelines, only the following forms are accepted:
Current state-issued driver’s license
DMV identification card
U.S. Passport
Passport issued by a foreign government
U.S. Military identification card
Important: The DRE is the source of truth for these policies. Always review the most recent "Taking the Exam" guidance from the DRE website before your scheduled date.
High-Risk Situations: Why People Get Sent Home
1. The Expired ID Trap
Even if it only expired yesterday, an expired ID is invalid for testing purposes.
The Fix: Check your expiration date at least 30 days before your exam.
The Risk: You will likely be forced to reschedule and pay a new exam fee.
2. Temporary or Paper IDs
A temporary or paper receipt from the DMV is often not accepted as a primary form of ID because it lacks the required security features of a plastic card.
The Guardrail: If you are waiting on a new license, the safest backup is a valid U.S. Passport that matches your registration exactly. Do not rely on a paper extension unless you have confirmed it meets current testing center compliance.
3. Damaged or Unreadable ID
If your photo is peeling, the plastic is cracked through your name, or the card is heavily worn, a proctor may reject it. If your ID is in poor condition, replace it now.
The 14-Day "Proctor-Proof" Checklist
Two weeks before your exam, perform this final audit:
Confirm Registered Name: Log into the DRE eLicensing portal. Does the name there match your photo ID character-for-character?
Check ID Expiration: Is your ID valid through the date of your exam?
Verify SSN/ITIN Submission: Double-check your initial application records for any typos in your identification numbers.
Locate a Backup ID: If your primary ID is damaged or nearing expiration, ensure your Passport is ready and available.
Print Your Notice: Have your Exam Schedule Notice/confirmation email printed and ready.
What If You Are Turned Away?
If a proctor denies you entry due to an ID issue, you may be marked as a "No Show." This typically means you forfeit your exam fee and must wait for the DRE to process the status before you can reschedule.
If this happens, stay calm. Visit our guide on What Happens If You Fail the CA Real Estate Exam—the process for rescheduling due to a "No Show" is essentially the same as a traditional failure.
To ensure you don't run into other procedural hurdles, be sure to review our comprehensive list of California Real Estate Exam Rules & Testing Policies.
Moving Toward Your License
Being familiar with the check-in process and knowing what to bring to the exam is critical. By having a look at your ID today, you remove the "what-ifs" from exam day. Once you get that "Congratulations" printout at the desk, find out What Happens After You Pass the California Real Estate Exam to finish your journey.
For a complete look at the application process, scheduling, and study strategies, visit our California Real Estate Exam Guide.
|
You’ve spent weeks, perhaps months, mastering contracts, disclosures, and agency relationships. But the most stressful part of the California real estate exam should be making sure you pass the first Read more...
You’ve spent weeks, perhaps months, mastering contracts, disclosures, and agency relationships. But the most stressful part of the California real estate exam should be making sure you pass the first time, not getting through the front door of the testing center.
Every year, well-prepared candidates are turned away before they even see a single exam question.
Why?
Because they forgot a specific document, brought a prohibited item, or arrived with an ID that didn't match their registration. At ADHI Schools, I have spent over 20 years guiding students through this process, and we’ve seen how a simple oversight can derail a career launch.
This is your definitive "bring / don't-bring" checklist. Use this guide to ensure your exam day is focused on the content, not the logistics.
Quick Checklist Preview
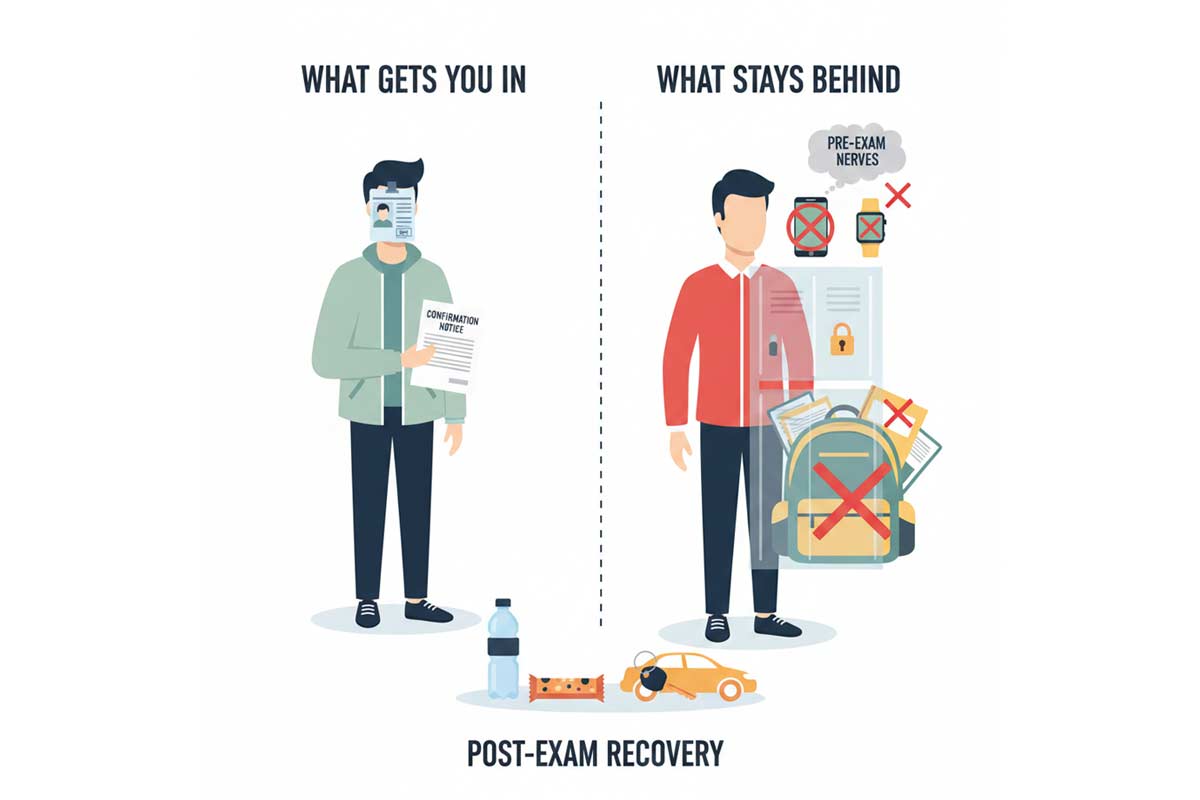
Must Bring: Valid Government-issued Photo ID and Exam Confirmation.
Must Leave: All electronics (phones, smartwatches) and study materials.
Arrive: At least 30 minutes early to handle security and storage.
Can I bring my phone to the California real estate exam?
No. Store it in your locker or leave it secured in your vehicle. Even powered-off devices can trigger a rule violation if they are on your person during the exam.
The 60-Second Checklist (Bring / Don’t Bring)
If you are walking out the door right now, here is the high-confidence version of your day.
BRING THESE
LEAVE THESE (Car or Home)
Valid, current Photo ID
Your Smartphone / Tablet
Printed Exam Confirmation Notice
Smartwatches or Fitbits
A sweater or light jacket
Notebooks, textbooks, or "cheat sheets"
Your car keys (to be stored in a locker)
Bulky backpacks
A calm, focused mindset
Large bags or
Mandatory Items You Must Bring
To sit for the exam, you must prove who you are and that you are authorized to be there. The proctors at the testing center have zero flexibility on these requirements.
1. Valid Government-Issued Photo ID
This is the most common point of failure. Your ID must be current (not expired), contain a recognizable photograph, and—most importantly—the name on your ID must match the name on your exam registration.
For a deep dive on what counts as valid (and what causes a turn-away), see Identification Requirements for the CA Exam.
2. Your Exam Confirmation Notice
While many centers can look you up digitally, having a printed copy of your examination confirmation (obtained via the DRE eLicensing system) is your "golden ticket." It contains your exam date, time, and center location. It serves as your proof of scheduling if there is a technical glitch at the check-in desk.
Optional Items That Help (Without Getting You in Trouble)
While the list of what you can take into the testing room is tiny, these items will make your overall experience significantly better:
Layered Clothing: Testing centers are notorious for unpredictable climates. One room might be a freezer, the next a sauna. Bring a light jacket or sweater (without many pockets) so you can adjust.
Parking Plan and Buffer Time: Don't let a hunt for a parking spot raise your cortisol levels. Map out the center 24 hours in advance and aim to be in the parking lot 45 minutes before your start time.
Water and a Snack: You cannot bring these into the testing room, but keep them in your car. After hours of intense mental focus, your blood sugar will be low. Having a "recovery snack" waiting for you is a pro move.
What Not to Bring (Common Turn-Away Triggers)
The California Department of Real Estate (DRE) and its testing partners maintain strict security protocols. Bringing these items into the testing area is often considered a security violation.
Electronics of Any Kind: This includes phones, tablets, and e-readers.
If you leave your phone in your pocket and it's discovered during check-in—even if it's powered off—it can be flagged as a violation.
Watches and Wearable Tech: Smartwatches are strictly prohibited. Policies on analog watches vary by site; to avoid any confusion or delays, it is best to leave all watches in your locker or car.
Calculators: Calculators are no longer provided at the exam site and you aren’t allowed to bring your own. There is no longer any math on the real estate exam.
Bags and Wallets: Most centers provide small lockers, but they are often only large enough for a set of keys and a slim wallet. Avoid bringing large purses or backpacks.
To avoid accidental rule violations, review California Real Estate Exam Rules & Testing Policies before exam day.
What to Expect at Check-In (So Nothing Surprises You)
Checking in for the exam feels a bit like TSA at the airport. You should arrive at least 30 minutes early to ensure you aren't rushed.
The Security Sweep: You may be asked to empty your pockets, turn them inside out, and show your wrists to ensure no prohibited items are being brought in.
The Storage Reality: You will likely be assigned a small locker for your keys and ID. Note that the DRE and the test center take no responsibility for lost or stolen items—leave everything but the essentials in your locked vehicle.
The Name Match: The proctor will compare your ID to the roster. If the names don't match and you lack the documentation mentioned above, you may not be allowed to test.
If You Get Turned Away (Your Next Move)
If the worst happens—you're late, your ID is expired, or you forgot your documents—take a breath. It feels like a disaster, but it is a fixable mistake.
If you are turned away, you will typically have to reschedule and pay a new examination fee. Once you've processed the frustration, you'll need a recovery plan. If you are unable to complete the exam for any reason, check out our guide on What Happens If You Fail the CA Real Estate Exam to learn how to reapply and get back on track.
After the Exam: What Comes Next
When you finish the exam, the screen will eventually reveal your result. Passing is an incredible milestone, but it’s just the start of the licensing process. If you haven’t done your fingerprints yet you will need to do that and apply for your license.
ADHI Schools recommends the combo exam/license application that allows for the exam and license to be applied simultaneously.
For a step-by-step look at how to turn that passing score into an active license, read our breakdown: What Happens After You Pass the CA Real Estate Exam.
FAQ: California Real Estate Exam Day
What ID do I need to bring to the California real estate exam?
You need a current, government-issued photo ID such as a Driver’s License, State ID card, or Passport.
Do I need to print my exam confirmation to take the test?
While not always strictly required at every center, it is highly recommended. It serves as your "receipt" and contains vital information if there is a scheduling dispute.
Can I bring my phone into the exam room?
Absolutely not. Phones must be powered off and stored in a locker or left in your vehicle.
Are smartwatches allowed during the California real estate exam?
No. Smartwatches are treated as prohibited communication devices.
What happens if I arrive late to the exam center?
Most centers enforce a strict cutoff window. If you arrive late, you may be treated as a no-show and required to reschedule—your exam confirmation notice controls the timing rules.
Is there a locker for personal belongings at the test center?
Most testing locations provide small lockers for essential items like keys and wallets, but they cannot accommodate large bags or laptops.
Your Full Exam Roadmap
Looking for the "Big Picture"? Our California Real Estate Exam Guide is the master hub for scheduling, rules, ID, and what to do after you pass or fail.
Printable Checklist
Primary ID: Current, valid, and matches registration name.
Confirmation Notice: Printed from eLicensing.
The "Light" Setup: No heavy bags, no extra tech.
Vehicle Prep: Phone and watch hidden/locked in the car.
Timeline: Directions saved, arriving 30–45 mins early.
Need a focused prep plan? Explore our www.crashcourseonline.com to get exam-ready once you’ve mastered the logistics.
Or warm up with our Free Real Estate Practice Exam to get familiar with question style before test day.
|
The “Order of Operations” Confusion
The path to a California real estate license is often clouded by outdated advice, social media "gurus," and aggressive brokerage recruiting scripts. This creates Read more...
The “Order of Operations” Confusion
The path to a California real estate license is often clouded by outdated advice, social media "gurus," and aggressive brokerage recruiting scripts. This creates a massive point of confusion: many aspiring real estate professionals believe they must be "hired" before they can even apply for the state exam.
Mistaking this sequence leads to lost momentum and unnecessary procedural errors.
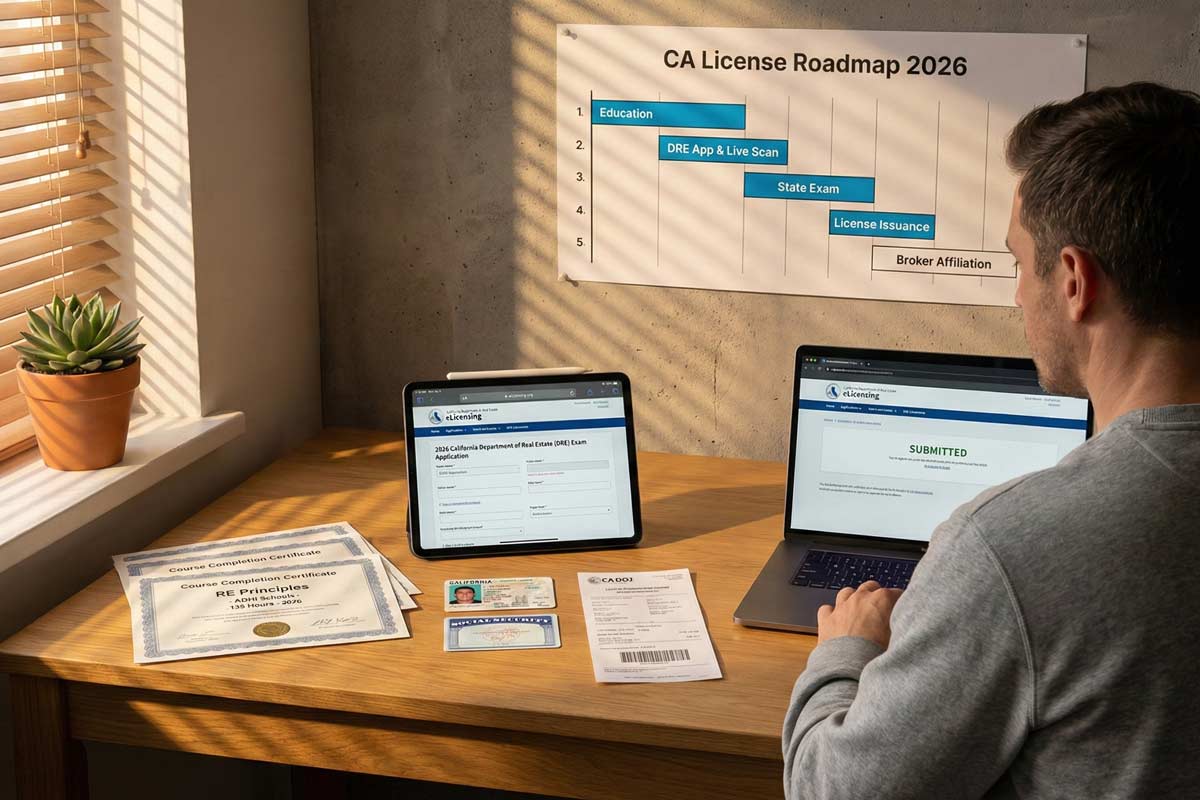
The typical order is: pre-license school → exam application → passing the state exam → license number issuance → brokerage affiliation.
In my 20+ years of guiding thousands of students at ADHI Schools, I’ve seen this confusion cause more delays than the exam itself. This guide provides the exact roadmap to avoid those traps.
Do You Need a Broker to Apply for a California Real Estate License?
No—you don’t need a broker to apply for or take the California real estate exam. You can complete the education and application without a sponsoring broker affiliation. But you can’t legally practice real estate or earn commissions until your license is placed with a supervising brokerage.
Do You Need a Broker to Take the California Real Estate Exam?
Absolutely not. The Department of Real Estate (DRE) allows any individual who has met the 135-hour education requirement to sit for the exam. You are applying as an individual, not as a representative of a firm. You can take the exam as an individual, regardless of brokerage affiliation.
The Correct California Timeline: A Step-by-Step Roadmap
Following the state-mandated order of operations is the only way to ensure you don’t waste time.
Complete Your 135 Hours of Pre-License Education: You must finish three college-level courses. Can You Take the Exam Before Completing All 135 Hours? No—you must have your certificates in hand first.
Apply for the State Exam & Submit Fingerprints: You submit your application and Live Scan fingerprints to the DRE. You do not need a broker’s signature for the exam application.
Note: The biggest avoidable delays are simple mismatches—your name, ID, and course certificates must match exactly.
Pass the California Real Estate Salesperson Exam: This is your primary hurdle.
Receive Your License Number from the DRE: The DRE issues your license number after clearing criminal background. You can complete this entire process independently and without broker affiliation.
Affiliate with a Brokerage to Practice (“Hang Your License”): Once you have a license number, you must place your license with a supervising broker so you can legally practice and earn commissions.
Pro Tip: If you want the full start-to-finish roadmap, use our California Real Estate License Guide.
Key Terms Demystified
Understanding DRE terminology prevents "bureaucratic paralysis."
“Applying for a License” vs. “Practicing”: Applying is between you and the State. Practicing is between you and a Broker. You can do the first without the second.
“Hanging/Placing Your License”: This means officially associating your license with a Broker of Record. This is what moves your license into a status that allows for commissions.
Independent Contractor Reality: You are a 1099 contractor. The broker supervises your licensed activity; however, you generate your own business unless the brokerage specifically provides leads.
What Happens After You Get Your California Real Estate License? The focus shifts from "passing the test" to "building a business."
When (and Why) to Talk to Brokerages Early
Research is smart; commitment is premature. You should interview brokerages while you wait for your exam date to assess:
New Agent Training: Does the broker have a formal mentorship program?
Commission Splits & Fees: What is the actual "take-home" after all fees?
Lead Generation Support: Do they provide leads or just "coaching"?
Compliance Support: Who reviews your contracts to keep you out of court?
Costly Mistakes to Avoid
Waiting to Apply Until You Find a Broker: I’ve watched students wait 90 days "shopping brokerages" while their exam eligibility window and motivation evaporated. Don't wait. Apply the moment you have your certificates.
Choosing a Brand Over Training: I once spoke to an agent who picked a famous global brand for the "vibe," but quit after 4 months because no one showed them how to actually get business. Top Reasons People Fail to Get Licensed in California often trace back to a lack of early support.
Losing Momentum After the Exam: The gap between passing the exam and finding a broker should be days, not months.
Your 7-Day Action Plan
Day 1-2: Finish your current education course module.
Day 3: Draft a shortlist of 3-5 local brokerages to research.
Day 4: Prepare 8 questions to ask future brokers (focus on training and splits).
Day 5: Double-check your DRE exam/license application for errors (name match, IDs, and certificates).
Day 6-7: Submit your application to the DRE.
Frequently Asked Questions (FAQ)
Can I apply for the CA real estate exam without a brokerage?
Yes. Affiliation is not required to apply for or take the exam.
Do I need a sponsor broker for the exam?
No. Sponsoring brokers are required for practicing, not for taking the exam.
Can I interview brokerages before I’m licensed?
Yes, and you should. Most brokers are happy to speak with prospective agents who are currently in school.
What if I join a brokerage now—does it speed up the DRE?
No. The DRE processes applications in the order received, regardless of which brokerage you intend to join.
What if I pass the exam but don’t pick a brokerage?
You will have a license number, but you cannot legally represent clients or collect a penny in commission until you associate your license with a broker.
Can my license expire if I don’t join a brokerage right away?
Your license remains valid once issued, but you must still meet renewal requirements and continuing education deadlines every four years, regardless of whether you are affiliated with a broker.
Next Steps on Your Licensing Journey
The brokerage choice is critical for your success in the field, but it is not a prerequisite for the state exam. Focus on your 135 hours and your application first.
For the complete, step-by-step licensing roadmap (start to finish), use our California Real Estate License Guide.
|
Please be sure to check with your broker/manager on unique circumstances and that you are following local best practices.
The "Paper Trail" Rule: In California real estate, if it isn’t in Read more...
Please be sure to check with your broker/manager on unique circumstances and that you are following local best practices.
The "Paper Trail" Rule: In California real estate, if it isn’t in writing, it didn’t happen. To protect your license and your client’s deposit, you must confirm: deadlines, deposit receipts, disclosure receipts, contingency periods, and repair agreements in the file.
Your buyer wants to write an offer.
Congratulations!
But as the initial rush of adrenaline fades, it’s replaced by a sinking feeling. You’re staring at the C.A.R. California Residential Purchase Agreement (RPA)—the 16-page "operating system" of your deal.
Your client is asking, "What does this paragraph mean?" and your managing broker is asking if you've seen the seller disclosures. I’ve spent over 20 years coaching agents through these moments. This guide is your pseudo-mentor-in-the-room to help you navigate the Residential Purchase Agreement California with confidence.
New Agent Quick-Start: 5 Things to Do Immediately After Acceptance
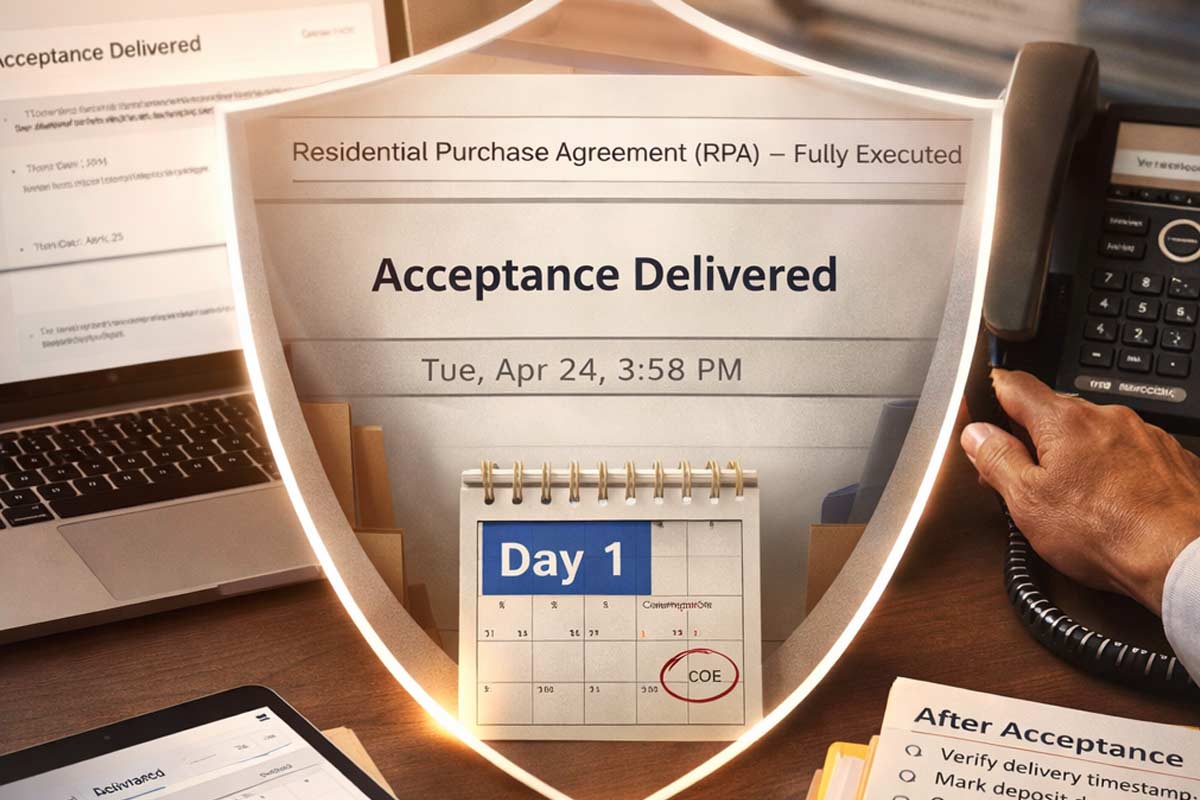
Mark the Calendar: Calculate "Day 1" (the day after acceptance) and circle the COE date.
EMD Verification: Call your buyer and ensure they have a verified phone number for escrow to confirm wire instructions.
Audit the File: Confirm you have a fully executed RPA with all signatures and initials.
Order Inspections: Initiate these immediately to ensure you stay within your investigation window.
Confirm Delivery: Verify that the signed acceptance was delivered to the other side and document the timestamp.
What is the C.A.R. RPA?
The C.A.R. Residential Purchase Agreement (RPA) is the most commonly used standard-form contract used by California real estate agents to facilitate home sales. It acts as the legal "rulebook," outlining price, contingencies, and the specific responsibilities of both buyer and seller.
Main Parts of the RPA Explained:
Agency & Representation Disclosures: Confirmation that the How to Explain Agency Disclosure Form AD was delivered (a separate, mandatory requirement).
Price & Financing Terms: A summary of the purchase price, EMD, and loan details.
Closing & Possession: When the buyer officially gets the keys.
Inclusions/Exclusions: What stays (fixtures) and what goes (personal property).
Allocation of Costs: Who pays for inspections, reports, and home warranties.
Contingencies: The buyer’s "safety nets" for investigation and financing.
Disclosures: The seller's history and knowledge of the property.
Remedies: What happens in the event of a breach of contract.
Coaching Tip: Open your current digital RPA and use Cmd+F (Mac) or Ctrl+F (Windows) to search these specific keywords for quick navigation: Deposit, Escrow, Time Period, Days, Contingency, Investigation, Disclosures, Repair, Possession, Mediation, Arbitration, Liquidated Damages.
The RPA Map: Decisions & Search Terms
Decision you’re making
Search this in the RPA
What it controls
Rookie mistake
Paper-trail proof
Price & Financing
"Purchase Price", "Loan"
Final sales price and loan terms.
Leaving loan terms blank.
RPA + Proof of Funds in transaction file.
Deposit (EMD)
"Deposit", "Escrow"
How much "skin" the buyer has in the game.
Missing the delivery deadline.
Escrow deposit receipt PDF + email confirmation.
Time Periods
"Time Period", "Days"
Every contractual deadline.
Thinking "days" always means business days.
Digital calendar with all dates circled.
Investigations
"Investigation", "Inspection"
The buyer's right to check the home.
Not ordering inspections immediately.
Reports + written agent confirmation.
Appraisal/Loan
"Appraisal", "Lender"
Buyer’s exit if value or loan fails.
Promising "no problem" with value.
Written appraisal/Loan status update.
Disclosures
"TDS", "SPQ"
Seller’s legal history of home.
Late delivery (triggers exit rights).
Signed Receipt of Disclosures acknowledgment.
Repairs/Credits
"Repairs", "Request"
Negotiated fixes or price drops.
Promising repairs verbally.
C.A.R. addendum + contractor receipts.
Possession
"Possession", "Occupancy"
When the buyer gets the keys.
Giving keys before escrow closes.
C.A.R. possession agreement in file.
Disputes
"Mediation", "Arbitration"
How you fight if things go south.
Forgetting to check initials.
Initial sections in signed RPA.
When is the RPA Binding? (Acceptance & Delivery)
California purchase agreement explained: A contract is not binding just because everyone signed it. It is binding once there is Acceptance AND Delivery.
Where to look: Search "Acceptance" and "Delivery."
The Agent Move: Immediately after the final party signs, email the fully executed document to the other agent.
Paper Trail: Save the email confirming acceptance was delivered with a visible timestamp.
Timelines, Days, and Deadlines
In California, time is a contractual commitment.
Where to look: Search "Time Period" and "Days."
The Evergreen Rule: In many contracts, if a deadline falls on a weekend or holiday, performance may roll to the next business day—confirm this in your specific contract and with your broker.
Client Translation: "We treat every deadline as a hard commitment. If we miss one, the other side may gain the right to cancel our deal."
Inclusions & Exclusions: What Stays?
Arguments over refrigerators and chandeliers can kill a deal at the eleventh hour.
Where to look: Search "Inclusions," "Exclusions," "Fixtures," and "Personal Property."
Rookie Mistake: Writing "All appliances included" is too ambiguous.
Paper Trail: Maintain a written list with photo confirmation. If anything is negotiated during the process, document it with a C.A.R. addendum or possession agreement (this could be done on a few different forms so confirm current form name/version with broker).
Contingencies: Inspection, Appraisal, and Loan
Contingencies are your buyer’s exit ramps. For a deep dive on how to manage these forms, see our guide on CAR Forms Every New Agent Should Know.
Where to look: Search "Contingency" and "Investigation."
The Agent Move: Use the RPA contingency removal (Form CR) to document every step.
Client Translation: "These are your safety nets. We have a set period to do our homework. If the house isn’t what we thought, we can walk away with your deposit intact—as long as we act before the deadline."
Disclosures: Managing Risk
Late or corrected disclosures can reopen investigation windows or create new cancellation rights—treat disclosure delivery as a high-risk clock.
Coach Kartik's Experience: I once worked with an agent who delivered a supplemental disclosure two days before closing. Because it revealed a prior roof leak not mentioned in the SPQ, the buyer gained a fresh right to cancel, and they used it to renegotiate a $10,000 credit. Documentation is your shield here.
Where to look: Search "Disclosures" and "TDS."
The Agent Move: Use the California Real Estate Laws & Compliance Guide to ensure your file meets the statutory requirements.
Repairs, Credits, and Allocation of Costs
Where to look: Search "Costs," "Fees," and "Repairs."
The Compliance Rule: Never promise a specific repair outcome until it is signed by both parties. Ensure the scope is in writing: who is doing the work, what is being fixed, by when, and how proof of completion will be delivered.
Cancellations: Notices and Defaults
Cancellations usually happen after a party fails to meet a deadline.
Where to look: Search “Notice,” “Perform,” “Default,” “Cancel,” and “Remedies.”
The Process: If a buyer misses a deadline, the seller typically issues a Notice to Buyer to Perform (NBP). If the buyer still doesn't comply within the window stated in the contract, the seller may have the right to cancel.
Deep Dive: For a full map of this process, see Cancellation Rights in California Transactions.
Possession and Rent-Backs
Where to look: Search "Possession" and "Occupancy."
The Agent Move: If the seller is staying past the close of escrow, you need a C.A.R. possession agreement (confirm the current form name/version with your broker).
Dispute Resolution and Liquidated Damages
Where to look: Search "Mediation," "Arbitration," and "Liquidated Damages."
The Safeguard: Missing a deadline can trigger contractual remedies or cancellation rights—treat deadlines as hard and confirm with your broker.
Wire Fraud Safeguard: I recently saw a spoof attempt where a buyer received "updated" wire instructions via email. Because they followed the rule to call a known number from the escrow company's official website, they realized the email was fraudulent and saved their $50,000 deposit.
The Move: Confirm the last 4 digits of the account verbally before sending. See California Anti-Fraud Rules in Real Estate for more.
RPA Milestone Checklist
Immediately After Acceptance:
Verify Delivery of Acceptance timestamp.
Mark the Deposit Due Date as stated in your accepted RPA (Common example: 3 days).
Within the Investigation Window:
Order all inspections (Home, Pest, Roof, Drainage, etc.).
Log the Disclosure Delivery Target date.
Before Contingency Removal Deadline:
Review appraisal value and loan status.
Confirm contingency removal strategy with client and broker.
Before Close (COE):
Conduct the final walkthrough.
Verify Escrow deposit receipt PDF is saved to the transaction file.
From Agent to Professional
Mastering the RPA is about becoming a diligent project manager. It’s not about being a lawyer; it’s about protecting your client’s interests through every "search term" and "time period."
This guide is just one piece of the puzzle. For the full picture on staying lawsuit-free, visit our California Real Estate Laws & Compliance Guide.
FAQ
What is the C.A.R. RPA?
The RPA is the most commonly used standard-form contract for California home sales, detailing the terms, conditions, and timelines of the transaction.
Is the RPA legally binding?
Generally, yes, once signed by all parties and delivered. However, specific performance depends on meeting all conditions. Consult your broker for edge cases.
What’s the difference between acceptance and delivery?
Acceptance is the act of signing the agreement. Delivery is the act of providing that signed document to the other party (or their agent). Both must occur for the contract to be binding.
What does liquidated damages mean in plain English?
It is a pre-agreed amount (usually capped at 3% for owner-occupied residential property) that the seller can keep as a penalty if the buyer breaches the contract.
What happens if contingencies aren’t removed?
The contract stays alive, but the seller can issue a Notice to Buyer to Perform (NBP). If the buyer still doesn’t remove them within the cure period stated in the contract, the seller may have the right to cancel.
Can the seller cancel after acceptance?
Generally, no. The seller cannot cancel just because they got a better offer. They can usually only cancel if the buyer fails to perform on contractual obligations.
How do I prevent wire fraud in escrow?
Always verify wire instructions via a phone call to a known, trusted number from a prior transaction or the escrow company's official website.
|
Disclaimer: This guide is for educational purposes only and does not constitute legal advice. Real estate laws and DRE regulations are subject to change. Always consult with your supervising broker Read more...
Disclaimer: This guide is for educational purposes only and does not constitute legal advice. Real estate laws and DRE regulations are subject to change. Always consult with your supervising broker and legal counsel regarding specific transaction concerns.
Fraud Isn’t a Mask—It’s a Shortcut
In the movies, fraud often looks like a villain in a dark room. In California real estate, fraud usually looks like a "shortcut" on a Tuesday afternoon. It is the pressure to backdate a signature because the client is "on a plane," or the temptation to omit a minor leak in the disclosures to keep a deal from falling apart.
New agents often believe that if they didn't intend to lie, they aren't committing fraud. However, for the Department of Real Estate (DRE), procedural sloppiness often looks identical to intentional deception.
Your job isn't to be overly paranoid (although there is a saying that “only the paranoid survive”); it’s to be procedurally sharp.
This guide provides a little bit of the "armor" you need to ensure your transactions remain compliant and your license remains secure.
Fraud 101: Intent vs. Negligence vs. Document Integrity
To stay compliant, you must understand how the DRE classifies misconduct. Misrepresentation can be "intentional" or "negligent," but both can trigger serious discipline.
Intentional Fraud: A deliberate, knowingly false statement (or omission) made to induce a party to act.
Negligent Misrepresentation: Making a claim without a reasonable basis for believing it is true (e.g., "The HOA allows ADUs" without checking).
Document Integrity Misconduct: Altering documents, forging initials, or backdating signatures. Backdating to make it appear a deadline was met can be treated as misrepresentation and document tampering and can trigger DRE discipline.
7 Fraud Traps (with Scripts + Next Steps)
1. Wire Fraud / Fake Escrow Instructions
An email arrives from "Escrow" at 4:45 PM on a Friday with "updated" wire instructions.
Red Flags: Grammar errors, extreme urgency, or a "look-alike" email domain (e.g., @escrow-title.com vs @escrowtitle.com).
Do This: "I've received an email regarding wire changes. I am calling the escrow officer at my independently verified office number now to confirm this before we proceed."
Don’t Do This: Forward the email to your client without voice verification. This increases the risk of reliance and complications if the client acts on fraudulent data.
2. Identity Impersonation (Seller/Buyer)
A "Seller" contacts you via text to list a vacant lot they own "free and clear." They are permanently "traveling" and cannot meet.
Red Flags: Refusal to video chat; requests for an immediate, below-market cash sale.
Do This: Request a government-issued ID and a recent utility bill. Send a physical mailer to the tax billing address on file to verify the owner received your listing package.
3. Forged Signatures / “Sign for Me” Pressure
The client says, "I can't get to my phone, just hit 'sign' for me so we don't miss the deadline."
Do This: "For your protection and to maintain the legal audit trail, the signatures must be executed by you through the approved platform. I cannot sign on your behalf."
Don’t Do This: Use a client’s login. This nukes the integrity of the entire file.
4. Altered Terms After Signature
You realize you forgot to check a box for a refrigerator after the buyer signed.
Do This: Use an amendment. Both parties must sign any change to an executed document.
Don’t Do This: "Check the box" yourself. This is a material alteration and can trigger serious discipline.
5. Non-Disclosure Pressure
The seller says, "The roof leak was tiny and we patched it. Don’t mention it so we don't scare the buyer."
Do This: "California law requires us to disclose any material fact that affects value or desirability. If a buyer would want to know, we must disclose it." Review the CAR Forms Every New Agent Should Know to document the history properly.
6. Undisclosed Credits / Side Agreements
The buyer and seller agree to a $5,000 "carpet credit" paid outside of escrow to keep the lender from seeing a low appraisal.
Red Flags: Any agreement involving money that isn't on the final settlement statement.
Do This: "All credits and price adjustments must be disclosed to the lender via a formal addendum. Handling this 'outside of escrow' can be considered mortgage fraud."
Don’t Do This: Facilitate "side letters" or cash-under-the-table repairs. This bypasses the spirit of the purchase agreement and creates liability for all parties.
7. Inflated Repair Invoices / Kickbacks
A contractor offers you a "referral fee" for recommending them for the Request for Repair work so they can charge more and “give you the difference”.
Do This: "I don't accept anything tied to referrals; it may violate RESPA and/or brokerage policy. My recommendations are based on quality of service only."
Don't Do This: Accept gift cards or credits tied to referrals.
The Agent Armor System: A Mechanical Approach to Integrity
Compliance isn't a feeling; it's a system. Use these mechanical rules to protect your license:
The Material Change Trigger: If it changes money, timing, possession, agency, or disclosures, you MUST call your broker before you respond or draft the change.
The "Clean Accept" Rule: Never rely on email-only confirmations for contract terms. Use the proper mechanics to finalize changes through the escrow process.
Version Control Naming: Adopt a strict naming convention to prevent using the wrong draft: 123Main_RPA_v3_2025-12-26_BuyerInitials.pdf.
Verification Rule: Never use a contact number provided inside an email asking for money. Only use independently verified numbers from your brokerage directory.
The "Stop the Thread" Rule: If you suspect an email account is compromised, stop replying in that thread immediately.
CAR Form Sloppiness Trap (Audit Triggers)
Data from the DRE Real Estate Bulletin summary (October 2024) indicates that a large portion of audits uncovered recordkeeping violations. Sloppiness creates the appearance of deception. Avoid these audit triggers:
Missing Agency Timing: You must properly explain Agency Disclosure Form AD before the client signs the contract. Doing it "later" looks like you are hiding a conflict.
Inconsistent Timelines: If the "Date of Delivery" on a notice doesn't match the signature timestamp, you are at risk regarding cancellation rights in California transactions.
Unclear Acceptance Trail: Counters or addenda referenced in the RPA that are not fully executed or dated create "who accepted what, when?" ambiguity.
Unchecked Boxes: Leaving critical boxes blank in the RPA creates ambiguity that an auditor may interpret as a post-closing alteration.
Suspecting Fraud Mid-Transaction: The Response Protocol
If a transaction feels "off," execute this five-step protocol:
Pause. Do not let the "closing pressure" force you into a mistake.
Preserve Evidence. Save email headers and screenshot texts immediately.
Switch Channels. Stop communicating through the suspicious channel. Move to a verified phone call.
Notify Broker. Never "fix it quietly." Your broker is your first line of defense.
Document. Write an internal memo for your file detailing the red flag and the steps you took to verify the truth.
California Real Estate Fraud Prevention Checklist
NEVER backdate a signature (even if the party signed late).
NEVER use "white-out" or cross out terms without all parties initialing.
NEVER provide "side-letters" or credits that aren't disclosed to the lender.
NEVER share your Docusign login with a client.
Protecting Your Moat
Compliance is the moat that protects your career. By maintaining a clean audit trail and prioritizing document integrity, you ensure that your focus stays on growth rather than defense. For a complete look at the regulatory landscape, visit our California Real Estate Laws & Compliance Guide.
FAQ: California Anti-Fraud Rules
Is backdating a signature illegal?
It can be unlawful and is always high-risk. If it changes the truth of the timing to deceive a party or a lender, treat it as strictly prohibited.
What is an agent’s duty regarding material facts?
In California, you must disclose any fact known to you (or that should be known via a diligent visual inspection) that affects the value or desirability of the property. When in doubt, disclose.
Can I be disciplined if my client lied and I didn't know?
Yes, if a "reasonable agent" would have noticed the red flags. You are expected to exercise "due diligence," not just passive acceptance.
|
The Cancellation Moment: From Panic to Procedure
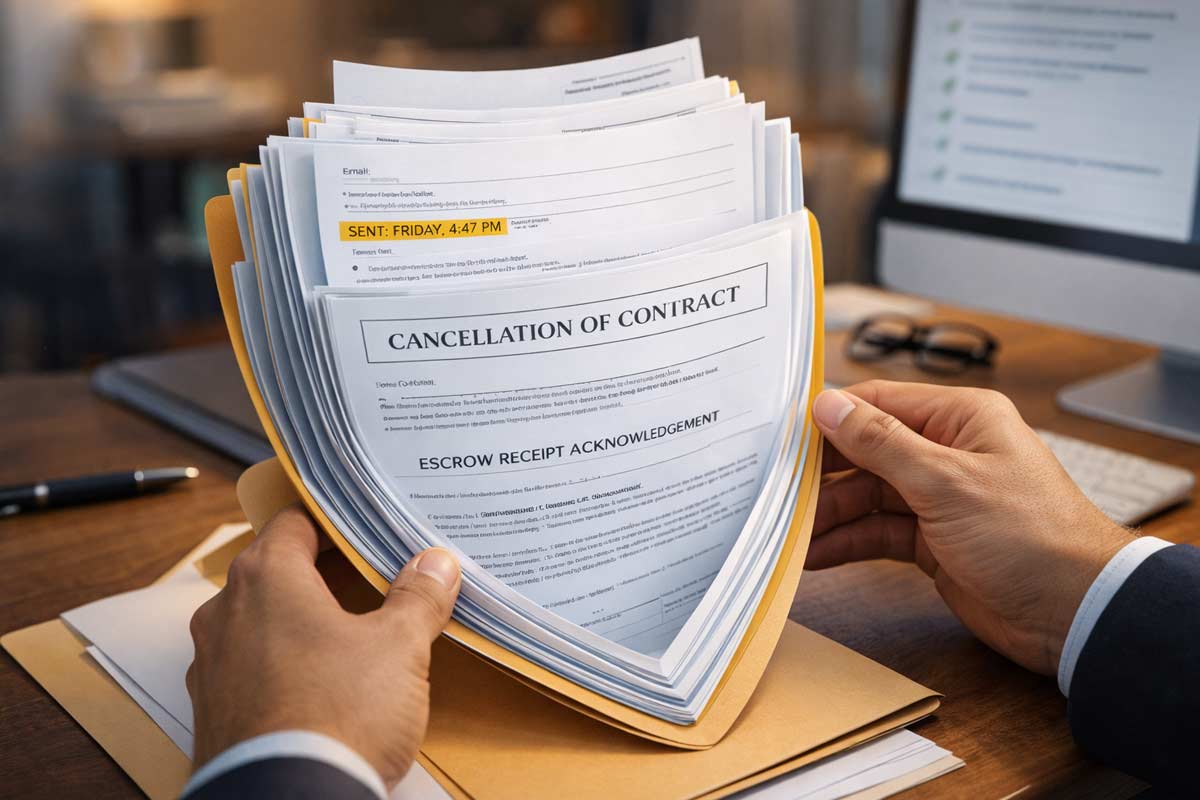
It is 4:45 PM on a Friday. You are heading out for the weekend when a text hits your phone. It’s your buyer: “I can’t do this. My job situation Read more...
The Cancellation Moment: From Panic to Procedure
It is 4:45 PM on a Friday. You are heading out for the weekend when a text hits your phone. It’s your buyer: “I can’t do this. My job situation just got shaky, and I need to get out of the deal. Now.” Or perhaps it’s a seller, frustrated that the buyer is two days late on contingency removals, demanding you “cancel the deal and take the backup offer.”
In these moments, your value as an agent isn’t in your salesmanship; it’s in your ability to remain the calmest person in the room. Having coached agents through thousands of transaction crises over the last 20 years at ADHI Schools, I can tell you that successful cancellations aren’t just about emotions—they are about the clock and the contract.
In California, cancellation is a procedure, not a vibe. Your license, your reputation, and your buyer’s deposit depend on your ability to stop the panic and start the process.
Quick Answer: In California, most cancellations fall into three buckets: (1) active contingency exit, (2) disclosure-related rescission windows (when applicable), or (3) default/breach workflows that require written notice and a cure period. Your job is to identify which bucket you’re in, then build a clean paper trail that protects the client and your license.
The 60-Second Triage: Diagnose the Right to Cancel
Before you touch a single form, you must diagnose which "world" the cancellation lives in. Most disputes happen because an agent used a "breach" workflow for a "contingency" problem. To stay within the California Real Estate Laws & Compliance Guide, you must categorize the situation immediately.
The Three-Worlds Model:
World A: Contractual Exit Paths (Contingencies): The buyer is within their active contingency period and chooses to exit based on findings (e.g., an inspection report or loan denial).
World B: Statutory/Disclosure-Based Rescission: Rights that may be triggered by the delivery of specific disclosures (like the TDS or NHD) after the contract has been signed.
World C: Default & Breach Workflows: One party has failed to perform a contractual obligation. This requires a formal notice and a cure period before anyone can walk away.
The Agent’s Script:
"I understand you want to cancel. To protect you and your deposit, I need to know: Is this about an inspection issue, a loan problem, a disclosure you just received, or something the other side didn’t do?"
Buyer's Playbook: The Procedural Exit Paths
Buyers often have the cleanest exit paths, but only while the clock and contingencies still protect them. To protect your buyer, you must master Purchase Agreement Basics, specifically how contingencies function as a safety net.
Operational Examples:
Inspection Findings: A buyer discovers a foundation issue during their investigation period and decides the repair is cost prohibitive.
Loan Denial: A buyer's lender issues a formal denial letter before the loan contingency is removed.
The Contingency Exit Checklist
Identify the Active Contingency: Ensure the specific contingency has not been waived or removed in writing. Be cautious, as commercial transactions might have “passive” contingency removal.
Check the Clock: Verify the deadline in the contract. Even if a deadline has passed, if the seller hasn't given the buyer a formal “notice to perform”, the buyer may still have an exit path—consult your broker immediately.
Document the Basis: The buyer should be able to document a contingency-related basis consistent with the contract and brokerage standards.
Serve Written Notice: Use the appropriate cancellation and release of deposit forms found in your current brokerage library.
Notify Escrow: Ensure a copy of the signed cancellation is delivered to the escrow holder.
Material Change Trigger: If the issue changes money, timing, possession, or legal rights, pause and escalate to your broker before sending notices.
Seller's Playbook: Rights Are a Process, Not a Power
Sellers often feel trapped, and in some ways they are. In California, a seller cannot simply cancel because they found a better offer or "changed their mind." You must use the CAR Forms Every New Agent Should Know to create a defensible paper trail.
Operational Example:
Missed Deposit Deadline: The buyer fails to deposit the Earnest Money Deposit (EMD) within the three-day contractual window. The seller serves a written Notice to Perform. If the buyer fails to "cure" within the specified timeframe, the seller may proceed to cancel.
What a Seller Generally CANNOT Do:
Cancel because the buyer is slightly late (without first serving a formal notice).
Cancel because they want to sell to a different party.
Unilaterally take the deposit from escrow without mutual instructions or a legal directive.
The Seller’s Escalation Sequence:
Notice to Perform: This is the formal warning. It gives the buyer a specific cure period (often 2 days, but check the contract) to perform the required action.
Wait the Cure Period: You cannot cancel while the clock is running.
Cancel for Default: If the buyer still hasn't performed after the cure period ends, the seller may move to cancel.
The contract may include a seller's contingency allowing them to cancel if they cannot find a new home within a set period. However, even with a Seller's Contingency, they must strictly adhere to the timelines in the SPRP (Seller Purchase of Replacement Property) addendum.
The Earnest Money Matrix: Reality vs. Theory
The contract may suggest who should receive the deposit, but in practice, the money often does not move until there are mutual written instructions or a legal resolution. This is a key point to emphasize when you explain Agency Disclosure Form AD to your clients.
Scenario
What the contract often suggests
What happens in practice
Why it gets stuck
Buyer is Inside Contingency Period
Full refund to Buyer
Escrow holds funds
Seller may dispute the buyer’s basis or timing and refuse to sign a release.
After Removal
Seller (Liquidated Damages)
Given to Seller but may result in a prolonged dispute
Liquidated damages require a properly formed clause and specific statutory limits.
Late Disclosure
Full refund to Buyer
Generally released to Buyer if contract permits
If the seller feels the buyer used the disclosure as a "pretext" to exit.
Seller Default
Full refund to Buyer
Escrow holds funds
Seller may dispute that a default actually occurred.
The Deposit Script:
"Escrow typically requires mutual written instructions or a legal directive to release funds. My goal is to make our paperwork so clean and our timelines so defensible that the other side is pressured to sign the release."
Disclosure Rescission: The Rescission Window
A common myth is that every buyer has a universal "3-day cooling-off period." This is false. This right is typically triggered only when certain statutory disclosures (like the TDS) are delivered after the contract is signed. Failure to handle these correctly can lead to claims involving California Anti-Fraud Rules in Real Estate.
Operational Steps for Rescission:
Confirm Delivery: Note the exact timestamp and method (email, hand-delivery, etc.).
Calendar the Deadline: Rescission periods vary, for example with the TDS based on if it is an entirely new disclosure form or a modification to an already delivered TDS.
Send Notice Promptly: If the buyer chooses to rescind, delivery must happen before the window closes.
The Crisis Checklist
If you are facing a potential cancellation right now, follow these steps in order:
Identify the Bucket: Work with your broker/manager to determine whether this a Contingency exit, a Statutory Rescission, or a Default?
Pull Contract Deadlines: What was the original date for performance?
Confirm Contingency Status: Has a formal contingency removal been signed in writing?
Confirm Disclosure Timestamps: When was the disclosure delivered and how?
Decide Workflow: Do you need a Cancellation form or a Notice to Perform first?
Write + Deliver Notice: Use the contractual method and loop in your broker per office policy.
Notify Escrow: Send the signed documents immediately to stop the clock.
The Paper Trail Rule: Summarize all verbal conversations in a follow-up email. "Per our phone call at 2:00 P.M..."
Compliance Traps: Where Good Agents Get Disciplined
The Backdate Trap: Never backdate a signature to make a deadline look met. This is fraud.
The Verbal Authorization Trap: Never sign a cancellation for a client because they "told you to" over the phone.
The Disclosure Hide Trap: If a buyer cancels because of a negative inspection report, that report generally must be disclosed to the next buyer.
The Pressure Tactic Trap: Threatening a buyer with the loss of their deposit to force them into a deal is high-risk behavior.
Your System Is Your Shield
In California real estate, the difference between a veteran and a novice is how they handle a "dead" deal. A novice sees a crisis; a veteran sees a checklist. By leaning on a strict compliance framework, you turn a high-stakes emotional event into a routine administrative procedure.
Document, Deliver, and Disclose.
Disclaimer: This article is for educational purposes only and does not constitute legal advice. California real estate laws and C.A.R. forms are subject to frequent change. Always consult with your broker or a qualified real estate attorney regarding specific transaction disputes or legal interpretations.
|

Disclaimer: This article is for educational purposes. It is not legal advice. Always consult your managing broker and/or attorney for guidance.
The "30-Second Elevator Pitch" for Clients
In the Read more...
Disclaimer: This article is for educational purposes. It is not legal advice. Always consult your managing broker and/or attorney for guidance.
The "30-Second Elevator Pitch" for Clients
In the high-speed environment of California real estate, paperwork can feel like an obstacle to a deal. However, the Agency Disclosure (Form AD) is not just "another form"—it is a consumer protection shield. For a new agent, the goal is to present this document as a tool for clarity.
Agent Script: "This form answers one question: Who do I work for? It’s not about commission—it’s about loyalty. It explains your options—buyer’s agent, seller’s agent, or dual agency—so you know exactly where my loyalty sits before we go any further."
What Is the AD Form? (And What It’s Definitely Not)
The sole purpose of Form AD is transparency. It educates the consumer on the types of real estate agency relationships available and the "fiduciary duties" (utmost care, integrity, and loyalty) that brokers owe their clients.
Where You’ll See This Form: Agency disclosure rules apply to transactions covered by the statute’s definitions—commonly 1–4 residential sales/leases, and they also extend to commercial real property transactions under the Civil Code definitions.
California licensing law and brokerage policy still require clear disclosure and consent when your role changes—especially regarding dual agency.
Myth vs. Reality
Myth: "If I sign this, I’m officially hiring you as my exclusive agent."
Reality: This is a disclosure, not a contract. It does not "lock" a client into a representation agreement or guarantee payment.
Myth:"It’s just a formality; I can sign it at the end of the escrow."
Reality: Missing this form is a statutory compliance problem. It is the kind of file defect that shows up when a deal blows up: commission disputes, client complaints, or someone picking apart your paperwork. It weakens your file if a fee dispute or complaint ever erupts.
The 3 Agency Relationships Demystified
As we emphasize in our training courses, you must be able to explain the "Big Three" relationships without hesitation.
Agency Type
Who is the Client?
What You Owe
What You Cannot Do
One-Sentence Client Explanation
Seller’s Agent
The Seller
Utmost care, integrity, honesty and loyalty.
Cannot disclose the client’s confidential bargaining position (bottom line, motivations, price flexibility) without permission.
"I represent the Seller's interests exclusively to get them the best terms possible."
Buyer’s Agent
The Buyer
Utmost care, integrity, and loyalty.
Cannot disclose the client’s confidential bargaining position (bottom line, motivations, price flexibility) without permission.
"I am your advocate, focused solely on finding you the right home and protecting your interests."
Dual Agency
Both Parties
Fiduciary duty (utmost care, integrity, honesty, loyalty) to both parties; honest and fair dealing/good faith; reasonable skill and care; disclosure of known material facts; and required confidentiality.
Cannot disclose the client’s confidential bargaining position (bottom line, motivations, price flexibility) without permission.
"I facilitate the deal for both sides, but I cannot use one side's confidential info to advantage the other."
Legal Timing for Agency Disclosure Form AD in California
These are three separate legal requirements. Treat them like three boxes you must check—for every file.
AD Delivery (Civ. Code §2079.14)
Seller: The listing agent must provide the disclosure before entering into the listing agreement.
Buyer: The buyer’s agent must provide it as soon as practicable before (i) a buyer-broker representation agreement is signed and (ii) execution of the buyer’s offer.
Refusal Protocol (Civ. Code §2079.15)
|
If you're gearing up for your California licensing test, one of the most practical details to lock down is the exam's length. How many questions are on the California real estate exam? Knowing the exact Read more...
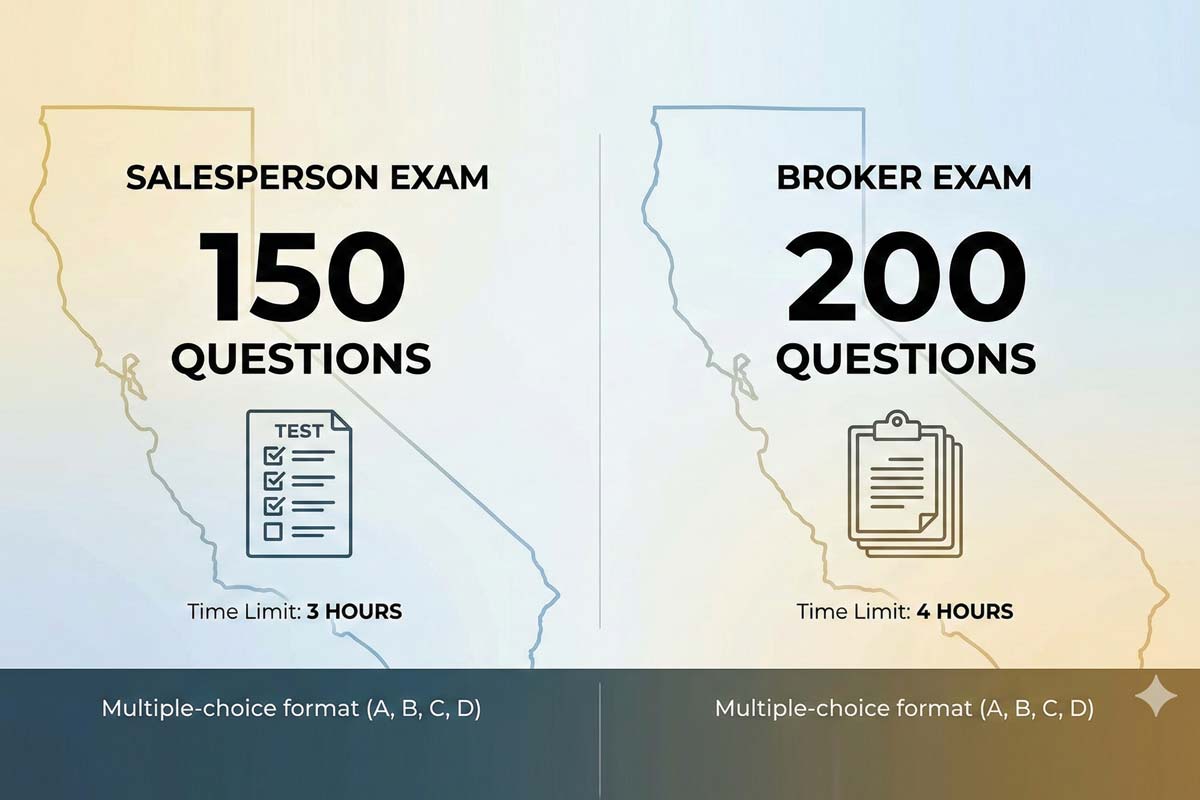
If you're gearing up for your California licensing test, one of the most practical details to lock down is the exam's length. How many questions are on the California real estate exam? Knowing the exact number is the cornerstone of an effective study plan and confident test-day pacing. Here’s the straightforward answer:
The California Real Estate Salesperson Exam contains 150 multiple-choice questions.
The California Real Estate Broker Exam contains 200 multiple-choice questions.
This structure directly influences your time-management strategy. For a full picture of the entire testing process, from scheduling to scoring, our California real estate exam guide walks you through every step. To see how these questions are distributed by topic, review our guide to what’s on the California real estate exam — it outlines all testable areas.
The Salesperson Exam Breakdown (150 Questions)
The salesperson licensing exam is a 150-question test, with every item presented in a multiple-choice format with four options (A, B, C, D). The questions are pulled from specific content areas with predetermined weighting. For example, roughly a quarter of the exam focuses on the Practice of Real Estate and Duties to Clients, while Financing makes up a smaller percentage. Understanding this weighting is critical for efficient study.
The Broker Exam Breakdown (200 Questions)
The broker exam increases in both scope and depth, featuring 200 multiple-choice questions, also in A, B, C and D format. While the core subject categories align with the salesperson test, the broker version delves slightly deeper into areas like real estate law, brokerage management, and trust fund handling. The additional questions reflect the content around supervisory knowledge required for a broker's license.
Time Management: The “Minute-Per-Question” Rule
With standardized time limits, a simple calculation gives you a powerful pacing tool:
Salesperson Exam: 150 questions / 180 minutes = 1.2 minutes per question.
Broker Exam: 200 questions / 240 minutes = 1.2 minutes per question.
This consistent pace is very manageable if you avoid getting stalled. The best approach is to answer known questions quickly, mark uncertain ones for review, and maintain forward momentum. Returning to challenging items at the end ensures you capture all the points available from questions you find easier.
Passing Scores: How Many You Can Get Wrong
It’s a relief to many students that perfection is not required. The passing percentages are clear:
Salesperson Exam: A 70% score means you need 105 correct answers. You can miss 45 questions and still pass.
Broker Exam: A 75% score requires 150 correct answers, allowing you to get 50 questions wrong.
This margin for error is built into the exam design. For a deeper look into the scoring process, including how "equating" questions work, our article on how the California real estate exam is scored provides clarity.
Format Consistency: Every Question Is Multiple Choice
Since the exam sticks to a simple four-option multiple-choice format, you don’t have to adjust your thinking from question to question. Learn one solid strategy and you can use it throughout the test—whether you know the answer or you’re narrowing it down to the best option. Honing this skill is a major part of effective preparation, and a dedicated multiple-choice strategy for the CA real estate exam can significantly boost your confidence and accuracy.
So, to recap: the sales license exam has 150 questions, and the broker test has 200 questions. When you understand the question count, timing, and pass thresholds, the exam stops feeling mysterious and becomes a numbers game you can win. With focused study and smart test-taking tactics, you’re well-positioned for success. For a complete step-by-step journey to your license, your central reference should always be our main California real estate exam guide.
Frequently Asked Questions
Q: Is there math on the California real estate exam? A: No. Since calculators are strictly prohibited, the DRE has removed math calculation questions from the test. You may need to recall specific numbers (like knowing there are 43,560 square feet in an acre), but you will not be asked to perform arithmetic.
Q: Do all 150 questions count toward my score? A: Treat every question as if it counts. While the DRE may include a few unscored "experimental" questions to test them for future exams, they are not labeled.
Q: Is the Broker exam harder than the Salesperson exam? A: Yes, primarily due to endurance. Answering 200 questions over 4 hours is a mental marathon. It also tests supervisory topics that aren't on the salesperson exam.
Q: What happens if I don't finish in time? A: Any blank answer is marked wrong. There is no penalty for guessing, so if you are running out of time, pick a letter and fill in every remaining bubble before the clock stops.
|