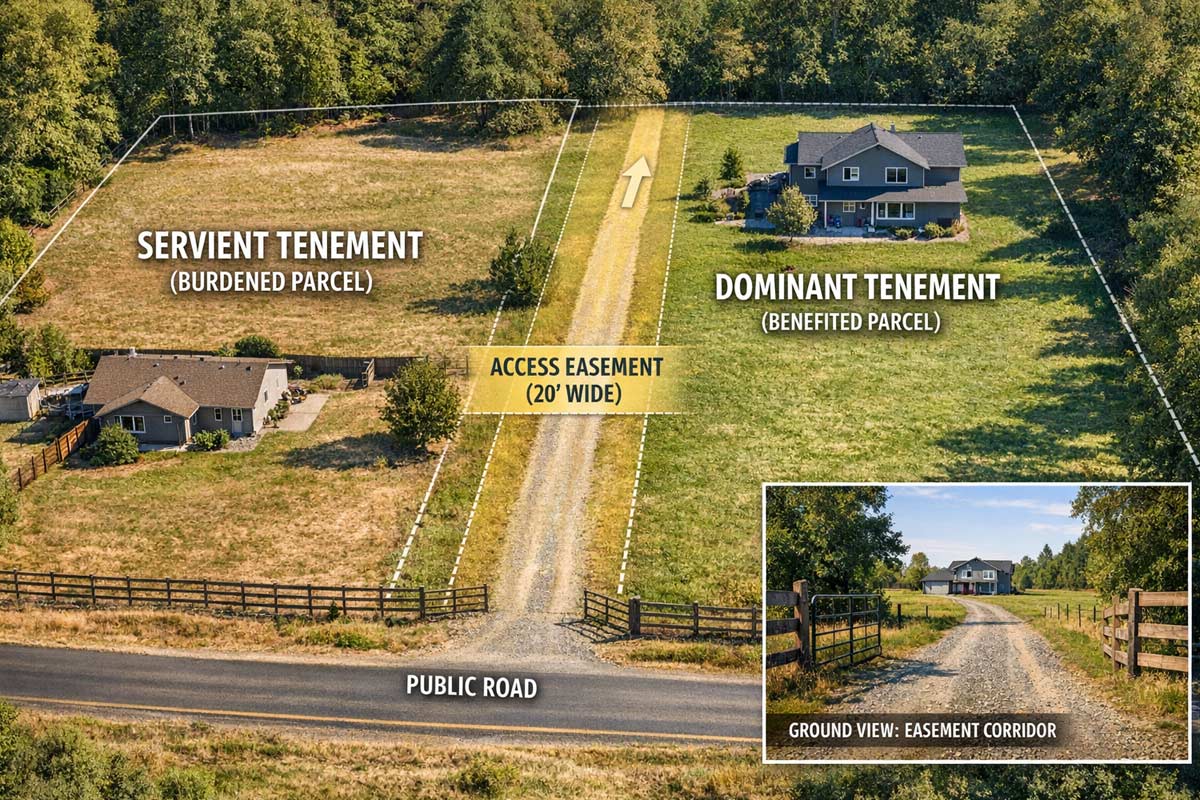
In California real estate, water and access are two of the easiest facts to misstate—and two of the hardest problems to fix after closing. If you market “water rights,” “year-round water,” or Read more...
In California real estate, water and access are two of the easiest facts to misstate—and two of the hardest problems to fix after closing. If you market “water rights,” “year-round water,” or “guaranteed access” without written verification, you’re not just risking a failed deal; you’re risking a misrepresentation claim.
The trap is predictable: agents often confuse legal entitlement with physical reality. A water bill is not the same thing as a legal right to a source, and a driveway you can drive today is not proof of a recorded right to use it tomorrow.
This guide is part of the California Real Estate Laws & Compliance Guide.
Notice: This guide is for informational purposes only and does not constitute legal advice. California water and land-use rules can be highly fact-specific. Always consult the local agency, title/escrow, and a qualified real estate attorney or land-use professional for property-specific guidance.
Fast Answer: Water Rights & Easements in California (What Agents Must Verify)
In California, water service (a meter/account with a district or mutual system) might be different from water rights (a legal claim to use a water source), and physical access is different from legal access (a recorded right to use a path for a defined purpose). Agents reduce liability by verifying: (1) the true water source and any conditions for continued service, and (2) the existence, scope, and map location of any access easement—in writing—before using those claims in marketing.
Verify in writing (minimum):
Water: District/mutual/well source, written confirmation of service availability/conditions, and any fees/limits.
Access: Recorded easement document + scope (ingress/egress, width, permitted uses), plus whether the actual road sits inside the easement boundaries.
Title: Easement exceptions, ambiguous “blanket” easements, or anything requiring a survey and/or legal review.
Water Rights vs. Water Service: The Critical Distinction
The most common mistake is assuming a property has "water rights" just because water is present.
Topic
What it is
What agents should verify
Common marketing mistake
Water Service
Utility delivery (district/mutual)
Service status, transfer requirements, written confirmation of service availability, connection fees, meter availability.
Saying “water rights included” when it’s only a service account.
Water Rights
Legal entitlement/claim to a source
Any documentation/agreements/permits, limitations, transferability, and counsel review when unclear.
Treating a claim as guaranteed capacity or permanent.
Physical Access
A road/driveway exists
Ownership, maintenance responsibility, gates/controls, visible encroachments.
Assuming physical use equals a legal right.
Legal Access
Recorded right to cross land
Recorded document, scope, width, map/exhibit location, and any lender/fire authority concerns.
Saying “deeded access” without reading the easement.
Who This Matters For (High-Risk Scenarios)
Verification is non-negotiable for these property types:
Rural & Ag Parcels: Properties with wells, irrigation, or horse/livestock needs.
Flag Lots & Private Roads: Properties relying on shared driveways or "off-main" access.
Waterfront & Creek-Adjacent: Land bordering natural watercourses where riparian claims may arise.
Development & ADU Sites: Parcels where "legal access" must meet specific fire-code widths or where utility capacity is capped.
California Water Rights Basics
Riparian and Appropriative Concepts
Riparian: Generally tied to land bordering a natural watercourse and typically used on that land; these rights are fact-specific and not something agents should "promise" without appropriate review.
Appropriative: Often tied to priority and permitting. If a property relies on diverted surface water, verification can require complex agency records and legal review.
Groundwater and Wells
Practical Reality: Well performance is a tested condition, not an assumption. Local groundwater rules and basin management can affect drilling, pumping, and long-term reliability.
What Documents Usually Prove What (Quick Reference)
Resource
Evidence/Document to Request
Water District Service
Recent bill + district confirmation of transfer/service status.
Mutual Water
Share certificate + current standing confirmation + transfer rules.
Private Well
Well records (if available) + current yield/flow + potability results.
Shared Well
Written agreement covering access, maintenance, and cost-sharing.
Access Easement
Recorded easement/right-of-way document + map/exhibit showing location.
How to Spot Easements in the Preliminary Title Report (Schedule B)
Your primary defense is the Preliminary Title Report—but only if you treat it like a checklist, not a formality.
Start with Schedule B (Exceptions): This is where easements, rights-of-way, and restrictions can appear.
Pull every referenced document: If an exception cites a recording date/instrument number, ask title/escrow for the actual recorded document—don’t rely on the one-line summary.
Identify scope: Does it allow ingress/egress, utilities, drainage, or something else? Is it limited to certain vehicles or purposes?
Check whether it’s appurtenant or in gross: Does it benefit the parcel (runs with land) or an entity (utility, agency)?
Find the map/exhibit: Many easements live on a plat or exhibit that shows location/width. If the easement isn’t clearly mapped, treat it as a risk flag.
Compare paper to pavement: If the road/driveway doesn’t appear to sit within the easement area, recommend a survey and/or legal review before removing contingencies.
Title Red Flags:
“Blanket” easements that cover large areas without a defined corridor.
Easement exists, but doesn’t connect to a public right-of-way or reach the actual structure.
Language that conflicts with current use (e.g., pedestrian-only vs. vehicle access).
Encroachments (fences/sheds sitting in the easement area).
Agent Workflow: The 6-Step Due Diligence Loop
Ask: Source, history, disputes, and shared agreements.
Pull: Title/prelim + exhibits; read Schedule B and referenced documents.
Confirm: District/mutual status, will-serve terms, and transfer rules.
Test: Yield and potability during contingencies (for wells).
Map: Confirm easement location vs. actual road; survey if needed.
Disclose + Market Safely: Use precise language tied to documents.
Water & Access SOP (Verify in Writing)
Water
Source type: District meter, mutual water company, shared well, or private well.
Transfer requirements: Rules/fees to transfer service or shares; confirm standing with the provider.
Vacant land: Get written confirmation of service availability/conditions (often called a “will-serve” confirmation).
Well properties: Recommend yield/flow and potability testing; ask for prior repair history.
Shared well: Confirm a written agreement exists covering maintenance, cost-sharing, and repair access.
Access / Easements
Recorded document: Obtain and read the recorded easement/right-of-way document.
Scope + width: Confirm permitted uses (vehicle/utility), width, and any restrictions.
Maintenance: Confirm who pays; if shared, verify if a recorded maintenance agreement exists (may be a lender/underwriting concern).
Physical reality: Check for gates, parking conflicts, or fences/encroachments; recommend survey if alignment is unclear.
Local requirements: Confirm emergency access expectations with the local fire authority.
Marketing Language: Safe vs. Risky
Risky Language (Avoid)
Safe Language (Use Instead)
"Unlimited water rights."
"Property served by private well; buyer to verify capacity and rights via current testing."
"Deeded access to the highway."
"Access via recorded ingress/egress easement; see preliminary title report and recorded documents for scope."
"Abundant water for horses."
"Buyer to verify water capacity for specific agricultural needs."
"Easy shared driveway."
"Shared driveway, see recorded maintenance agreement for details."
"Right-of-way guaranteed."
"Recorded right-of-way; see documents for scope and width."
"Build your dream home here."
"Buyer to verify utility availability, permits, and emergency access requirements."
"Water shares included."
"Sale includes shares in [Name] Mutual Water Co.; verify standing."
"Year-round creek access."
"Bordered by [Creek Name]; buyer to verify riparian claims/use."
Navigating the Broader Regulatory Landscape
Understanding the Dominant vs. Servient Tenement relationship is just one piece of the puzzle. This guide is a core component of our larger California Real Estate Laws & Compliance Guide, designed to help agents navigate the state’s complex land-use regulations.
Development and Density Constraints
Easements are often the "make-or-break" factor when a client is looking to increase property value through density. If you want to learn a little more about exploring a lot split, refer to our breakdown of SB 9 Explained for Real Estate Agents; access and utility feasibility are the primary hurdles that can quickly derail development assumptions.
Similarly, when evaluating the addition of secondary units, California ADU Laws Explained will help you distinguish between state-mandated allowances and the real-world water or access constraints that often limit buildable space.
Environmental and Tenant Considerations
For properties in coastal or rural settings, easements often intersect with protected land. Reviewing the Environmental Regulations California Agents Should Know is essential, as these restrictions can strictly limit the grading and drainage work necessary to maintain an easement.
Finally, if you are handling a tenant-occupied property where shared utilities or access rights are in play, our Rent Control Laws in California (Agent Guide) is a vital resource for ensuring that easement maintenance doesn't inadvertently trigger a tenant dispute or a violation of local habitability ordinances.
FAQ
Q: What is a “will-serve” letter?
A: A document from a utility district confirming they have the capacity to serve a property, often under specific conditions or fees.
Q: What’s the difference between an easement and a license?
A: An easement is a general right to use land that runs with the land; a license is personal and revocable.
Q: Can I say “legal access” in marketing?
A: Only if you’ve reviewed the recorded documents (and exhibits) and the claim matches the scope and location; otherwise use “access via recorded easement—buyer to verify.”
Q: What is a “blanket easement”?
A: An easement that isn't clearly defined on a map. It can create major development limits or disputes.
Q: Can a neighbor take away an easement?
A: It is difficult if recorded, but can happen via merger or court action. Always verify with title.
Water and access issues aren’t “rural quirks”—they’re core transaction risks. For the full framework on how agents avoid misrepresentation, read the California Real Estate Laws & Compliance Guide and keep a “verify in writing” file for every listing.
|
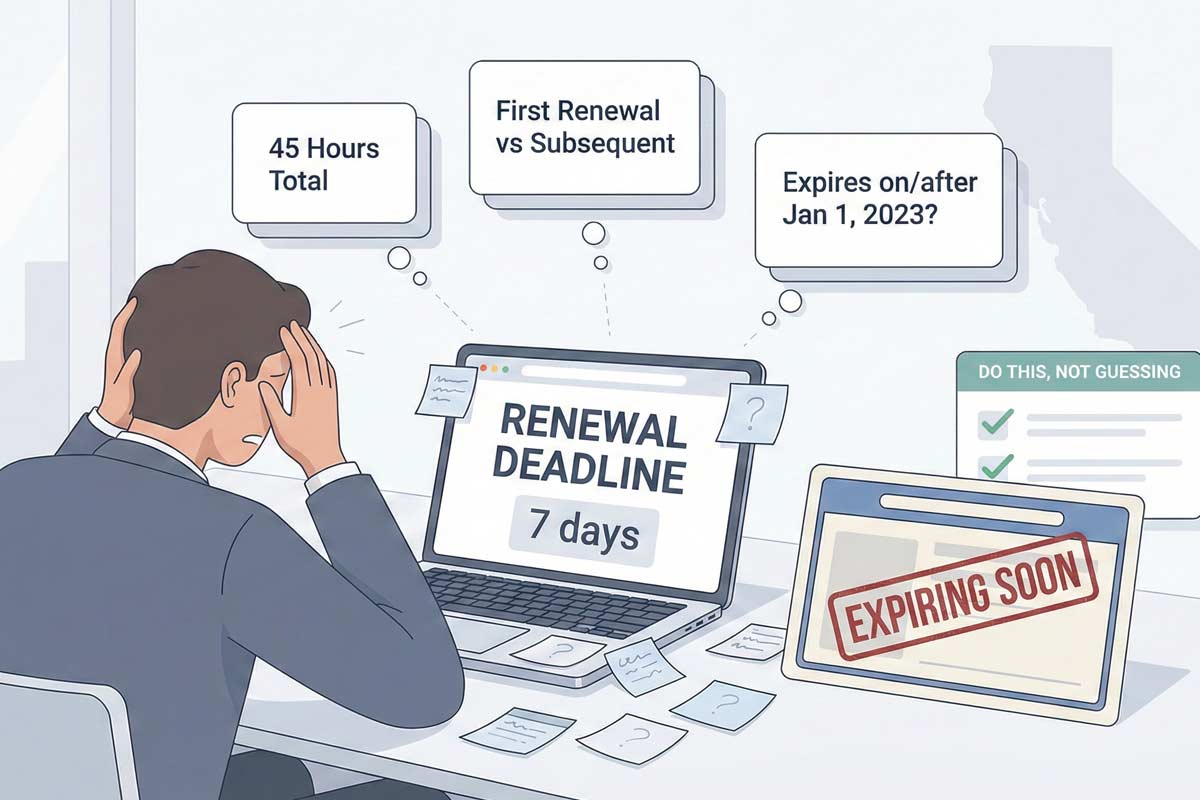
It starts with a notification or a glance at your license. The expiration date is looming—maybe next month, maybe next week—and the panic sets in.
You know you need "Continuing Education," but Read more...
It starts with a notification or a glance at your license. The expiration date is looming—maybe next month, maybe next week—and the panic sets in.
You know you need "Continuing Education," but the rules seem to change every time you check. Do you need the 9-hour survey or separate courses? Is implicit bias required this year? What happens if you take the wrong bundle?
If you are staring at a renewal deadline, stop guessing. Taking the wrong courses can result in a rejected application and a lapsed license—meaning you literally cannot practice real estate until your expired license is renewed.
Here is the no-fluff, compliance-grade breakdown of exactly how many hours you need and, more importantly, which hours count.
Fast Answer: How Many CE Hours Are Required?
The short answer: All California real estate licensees (salespersons and brokers) must complete 45 hours of DRE-approved Continuing Education to renew their license.
The critical nuance: You cannot just take "any" 45 hours. The DRE strictly regulates how those 45 hours are broken down based on three factors:
Your License Type (Salesperson vs. Broker)
Your Renewal Status (First-time renewal vs. Subsequent renewal)
Your Expiration Date (Whether your license expires on/after January 1, 2023, or you are renewing late after that date)
If you just buy the cheapest "45-hour bundle" without checking these factors, you risk taking courses that the DRE will not accept.
Bottom Line: Everyone needs 45 hours. But the composition of those hours changes depending on where you are in your career.
The 45-Hour Breakdown (Make It Simple)
To get your renewal approved, your 45 hours must be stacked correctly. The DRE divides CE into three specific buckets.
Mandatory Subjects: These are the "core" legal topics (like Ethics and Agency). You cannot skip these.
Consumer Protection: You must take a minimum of 18 hours in this category. These courses might cover technical skills like energy efficiency, land use, or valuation.
Consumer Service: These are "elective" topics (like sales skills or marketing).
First Renewal vs. Subsequent Renewals (Where People Get Burned)
This is the #1 source of confusion. The DRE requires first-time renewers to take "separate" courses to ensure they truly learn the basics. Veterans get to choose to take either a "survey" course or each course individually.
Scenario A: First-Time Renewal (Salesperson)
If you are renewing your salesperson license for the very first time, you cannot take the 9-hour survey. You must complete 5 separate 3-hour courses for the mandatory topics.
Your 45-Hour Stack:
Ethics (3 hours)
Agency (3 hours)
Fair Housing (3 hours, must include an interactive participatory component where you role-play as both a consumer and a real estate professional)
Trust Fund Handling (3 hours)
Risk Management (3 hours)
Implicit Bias Training (2 hours)
Consumer Protection (18 hours minimum)
Remaining Hours (Consumer Protection or Consumer Service)
Scenario B: First-Time Renewal (Broker)
Brokers have a higher standard of duty. If you are renewing a broker license for the first time, you have an extra mandatory topic: Management & Supervision.
Your 45-Hour Stack:
All 5 separate courses listed above
PLUS: Management & Supervision (3 hours)
Implicit Bias Training (2 hours)
Consumer Protection (18 hours minimum)
Remaining Hours (Consumer Protection or Consumer Service)
For a complete breakdown of every specific rule, bookmark our master California Real Estate License Renewal Guide.
Scenario C: Subsequent Renewals (All Licensees)
Once you have successfully renewed at least once, you graduate to "Subsequent Renewal" status. This applies to both salespersons and brokers.
Your 45-Hour Stack:
Individual courses or Survey Course: You can choose to take some of coursework either as a bundle or choose to take the courses individually.
Consumer Protection (18 hours minimum)
Remaining Hours (Consumer Protection or Consumer Service)
Warning: If you are a first-timer and you accidentally take the "9-Hour Survey" because it was cheaper or faster, the DRE will reject your renewal. You must take the separate courses.
Do Brokers Have Different CE Requirements?
Yes, but primarily on that first renewal.
As mentioned above, brokers typically need to complete the Management & Supervision course as a standalone 3-hour requirement during their first renewal cycle. The DRE expects brokers to understand how to manage offices and supervise agents from day one.
On subsequent renewals, brokers and salespersons are in the same boat—both can take the survey course, which includes the Management & Supervision module.
For a deeper dive into broker-specific nuances, read Do Brokers Have Different CE Requirements in CA?.
What Counts Toward CE Hours (And What Doesn’t)
Not every real estate class you take counts toward your 45 hours.
1. It Must Be DRE-Approved If you took a weekend seminar on "Luxury Home Marketing" at a hotel, or watched a YouTube series on sales tactics, those likely do not count. Only courses from a DRE-approved sponsor (like ADHI Schools) are valid, and you’ll enter the 8-digit CE course number in eLicensing to prove it.
2. Interactive Fair Housing (The "Interactive" Rule) Since 2023, you cannot just read a PDF on Fair Housing. If your license expires on or after January 1, 2023 (or you are renewing late after that date), your 3-hour Fair Housing course must include an interactive participatory component where you role-play as both a consumer and a real estate professional.
In-Person: This involves live role-play.
Online: This usually involves scenario-based questions where you "act" as the buyer or agent in a digital simulation.
For a full list of valid course types, check out What Courses Count Toward CE in California?
Realistic Time Planning (Stop the Last-Minute Crunch)
I see this happen every month: an agent realizes their license expires in 48 hours and tries to "cram" all 45 hours in one weekend.
This is physically impossible.
Why? Because of the 15-Hour Rule. This isn’t just an ADHI policy—DRE regulations limit correspondence CE to 15 credit hours of final exams in any 24-hour period, which is why true last-minute cramming often fails. These testing periods commence after the maximum of 8 hours per day of study time.
Day 1: Max 15 hours.
Day 2: Max 15 hours.
Day 3: Max 15 hours.
The Math: Including the study time, ADHI’s renewal package requires a minimum of just over 8 days to complete. This means if your license expires tomorrow and you haven’t started, you are going to expire.
My Advice: Start at least 30 days out. Do one course (3 hours) per evening. It’s stress-free, and you’ll actually retain the information rather than just clicking "Next" in a panic.
Common Mistakes That Delay Renewal
Over the last 20 years, we’ve seen thousands of renewals. Here are the most common reasons the DRE kicks them back:
Taking the "Subsequent" Package Too Early: First-time agents love the idea of a 9-hour survey. Don't do it. You need the separate courses.
Missing Implicit Bias: This is a newer requirement (effective 2023). If your bundle is old, check if it includes this. (Read more: Does California Require Implicit Bias Training for Renewal?)
Name Mismatch: If your CE certificate says "Bob Smith" but your license is under "Robert Smith," the eLicensing system might flag it. Ensure your profile matches your certificates.
Letting the license expire: You can renew during the two-year late renewal period, but you cannot perform licensed activity until the DRE renews you. To avoid any lapse, submit before your expiration date.
Assuming the "70/30 Exemption" Applies: Some agents think once they turn 70, they are exempt. You must be 70 AND have 30 years of continuous good standing. If you let your license lapse for a month 10 years ago, that clock might have reset.
To ensure you have the full checklist for this year, review California Real Estate License Renewal Requirements (2026).
Mini-Checklist: "Before You Hit Submit"
Before you log into eLicensing, ensure you have:
45 Hours Total on your certificates.
Correct Mandatory Topics (Separate courses for 1st timers; Survey or individual courses for subsequent).
Implicit Bias certificate (2 hours).
Interactive Fair Housing certificate.
At least 18 hours labeled "Consumer Protection."
Course Numbers (8-digit) ready to type in.
FAQ: California CE Hour Requirements
Is it always 45 hours to renew a California real estate license? Yes. Whether you are a salesperson or a broker, and whether it is your first or tenth renewal, the total requirement is 45 hours. The only exception is for licensees who qualify for the "70/30 Exemption" (70 years old with 30 years of continuous good standing).
Do brokers need more CE hours than salespersons? No, brokers also need 45 hours. However, for their first renewal, brokers must include a specific 3-hour course on "Management & Supervision," whereas salespersons do not. On subsequent renewals, both licensees typically take the same 9-hour survey course.
What if I’m renewing late—do I need extra CE? Generally, no. You can renew late for up to two years after expiration, but you cannot practice while expired. If you don’t complete late renewal within that two-year window, your renewal rights are forfeited.
Does implicit bias training count toward the 45 hours? Yes. The 2-hour Implicit Bias training is part of the 45-hour total. It is a mandatory course, meaning you cannot skip it, but the time spent on it counts toward your total requirement.
Can I finish all 45 hours in one day? No. DRE regulations limit you to completing 15 credit hours of final exams per 24-hour period. This means the fastest you can theoretically complete the 45 hours is over 3 to 4 days after the study period has lapsed.
|
You’re staring at your 45-hour renewal options and you notice a new line item: “Implicit Bias Training.”
The real question isn’t what it is—it’s whether missing it can delay your renewal.
Read more...
You’re staring at your 45-hour renewal options and you notice a new line item: “Implicit Bias Training.”
The real question isn’t what it is—it’s whether missing it can delay your renewal.
For California renewals tied to the post–January 1, 2023 CE rules, Implicit Bias is a mandatory DRE-required topic—and the only “gotcha” is how it must appear on your CE completion records depending on whether this is your first renewal or a later renewal.
This guide clarifies the rules so you can renew your license without a rejection.
Quick Answer: Do I Need This?
Yes. Implicit Bias Training is required as part of California’s renewal CE.
Requirement: 2 hours of DRE-approved Implicit Bias Training.
Does it add hours? No—it's part of your required 45 hours (not extra).
Key difference: First-time renewals must complete a standalone 2-hour Implicit Bias course. Subsequent renewals can satisfy it via the 9-hour survey course or by taking the mandatory topics as individual courses.
Related Resources:
California Real Estate License Renewal Guide
California Real Estate License Renewal Requirements (2026)
Why Is This Required? (SB 263)
This requirement comes from California’s CE rule updates implementing Senate Bill 263, which added a two-hour implicit bias training component and expanded the survey/update course to nine hours to cover the mandatory topics.
The curriculum focuses on understanding historical and systemic housing barriers and providing actionable steps to recognize unconscious bias in client interactions. The goal is risk management: protecting your license and ensuring compliance with Fair Housing laws.
The "First Renewal" vs. "Subsequent" Rule
The Department of Real Estate (DRE) has precise rules for how this training appears on your certificate. This is where most licensees make mistakes.
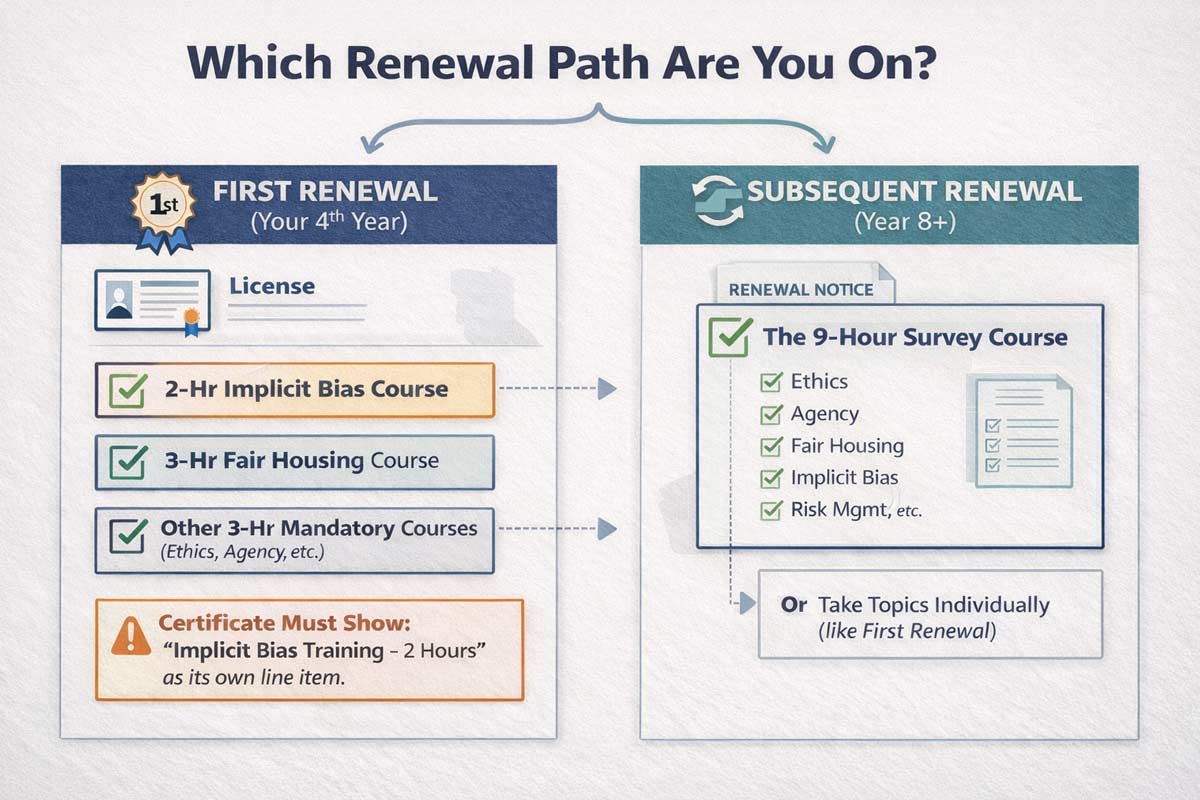
Scenario A: This is Your First Renewal
If you are renewing for the very first time (your 4-year anniversary), you cannot use the "survey course" shortcut. You must take separate courses.
If you are a Salesperson:
Your 45 hours must include:
Four separate 3-hour courses: Ethics, Agency, Trust Fund Handling, Risk Management.
One 3-hour Fair Housing course (with the required interactive component).
One 2-hour Implicit Bias Training course.
At least 18 hours of Consumer Protection, plus remaining hours in Consumer Protection or Consumer Service.
If you are a Broker (or Officer):
The structure is similar, but adds one more mandatory topic:
Five separate 3-hour courses: Ethics, Agency, Trust Fund Handling, Risk Management, Management & Supervision.
One 3-hour Fair Housing course (with the interactive component).
One 2-hour Implicit Bias Training course.
At least 18 hours of Consumer Protection, plus remaining hours in Consumer Protection or Consumer Service.
The Certificate Rule: You need a completion record that clearly shows "Implicit Bias Training – 2 Hours" as its own course line item.
Operator Note: If you want the full breakdown of what counts and how the DRE buckets these hours, read our guide on California Real Estate License Renewal Requirements (2026).
Scenario B: This is a Second (or Later) Renewal
For second and subsequent renewals, you have two compliant paths:
The Survey Option: Take the single 9-hour CE survey course that covers all mandatory topics (including Implicit Bias).
The Individual Option: Take the mandatory topics as individual courses instead of the survey.
Broker licensees will often ask ADHI Schools if brokers have different CE requirements in CA? A key difference is all broker licensees renewing must take a Management and Supervision course, but first time salespersons renewing do not.
Does It Count Toward My 45 Hours?
Yes. Implicit Bias is not "extra" work. It fits inside your existing bucket.
License Renewal Type
Total Hours Required
Does Implicit Bias Count?
First Renewal
45 Hours
Yes (Counts as 2 mandatory hours)
Subsequent Renewal
45 Hours
Yes (Could be taken in a 9-hr Survey course)
Late Renewal
45 Hours
Yes (Same rules apply)
To see exactly how the math works for your specific license type, check our breakdown of how many CE hours are required for CA license renewal?
"Audit-Proofing" Your Renewal
The DRE audits a percentage of renewals every month. If you are pulled for an audit simply follow the requests that the DRE makes and respond in a timely manner.
The Audit Checklist:
Check the Provider: Ensure the course provider is DRE-approved. A "Diversity Training" certificate from your other corporate job does not count. It must have an four-digit DRE Sponsor Number listed on the certificate of completion. Learn exactly what courses count toward CE in California to avoid registering for an invalid course.
Verify the Year: If you took a Fair Housing course in 2021 that didn't have the new interactive component or implicit bias module, it is invalid for a 2026 renewal.
Keep Your Records: Keep your certificates longer than you think. DRE recommends retaining CE completion certificates up to five years in case of audit, and providers are required to maintain participant records for five years.
Common Mistakes That Reject Renewals
We see licensees panic-renew 24 hours before their license expires. That is when mistakes happen.
Mistake #1: The "HR" Course. Submitting a workplace harassment or bias certificate from a non-real estate employer.
Result: Rejected.
Mistake #2: The "Old" Course. DRE rule of thumb: Continuing education credit expires four years from the course completion date, so older certificates can trigger rejection codes during renewal processing.
Mistake #3: Taking Courses From a Provider That is Not Approved. Make sure to ask for the 4 digit sponsor number of any course provider before registering.
Stay Compliant, Stay Active
Implicit Bias training is now a standard part of doing business in California. It isn't just about checking a box; it's about protecting your license and serving a diverse client base professionally.
Don't let a missing 2-hour certificate pause your career. If you are unsure exactly which courses you need based on your license status, check the full roadmap below.
California Real Estate License Renewal Guide →
FAQ
1. Can I take Implicit Bias training online?
Yes. As long as the provider is DRE-approved for correspondence or online study, you can take the course entirely online.
2. Does my Fair Housing course cover Implicit Bias?
No. They are separate requirements. However, if you take the 9-Hour Survey Course (for subsequent renewals), both Fair Housing and Implicit Bias are included in that single 9-hour block.
3. I am over 70 years old. Do I still need this?
If you are eligible for the "70/30" exemption (70+ years old AND 30 years of continuous good standing), you are exempt from all CE, including Implicit Bias. You simply submit the exemption form.
4. What happens if I renew late?
If you renew within your two-year grace period, the requirements are the same: you must complete the 45 hours, including Implicit Bias, before you can reinstate your license and pay the appropriate late fee.
|
The single biggest mistake I see agents make during renewal isn’t failing a test—it’s finishing 45 hours of education only to realize none of it counts.
Just because a class is about real estate Read more...
The single biggest mistake I see agents make during renewal isn’t failing a test—it’s finishing 45 hours of education only to realize none of it counts.
Just because a class is about real estate doesn’t mean the California Department of Real Estate (DRE) accepts it for your license renewal. Your office sales training? Probably doesn’t count. That motivating weekend seminar? Likely doesn’t count.
If you rely on unapproved courses, you risk a lapse in your license status where you cannot legally conduct business.
Here is the no-nonsense guide to exactly what counts, what doesn’t, and how to verify your courses before you spend a dime.
The Fast Answer: What You Need to Know
If you are in a rush, here is the bottom line on course eligibility:
Only DRE-Approved Counts: If the provider doesn’t have a DRE Sponsor Number and the course doesn’t have a DRE Course Number, it does not exist in the eyes of the state.
The Math Matters: You must complete your Mandatory Subjects first, then a minimum of 18 hours of Consumer Protection. Only the remaining hours can be Consumer Service or Consumer Protection.
Interactive Rule: Your Fair Housing course must include an interactive participatory component where you role-play as both a consumer and a professional. A PDF-only read-through is not enough.
Implicit Bias is Mandatory: For licenses expiring on or after Jan 1, 2023, you must complete an Implicit Bias training course.
Verify First: Always check the course number in the DRE database before paying.
Start Here: If you are unsure about the big picture, bookmark our California Real Estate License Renewal Guide for the complete roadmap.
What Does “DRE-Approved” Actually Mean?
For a course to count toward your Continuing Education (CE), it must meet two criteria:
It is offered by a DRE-approved Sponsor (a school or provider).
The specific course has been reviewed and assigned a DRE Course Number.
The DRE measures education in “clock hours.” When we say you need 45 hours, we mean 45 credit hours approved by the state—not necessarily 45 hours of sitting in a chair if you are a fast reader, but the content must match that volume.
Crucial: You must receive an official Completion Certificate featuring an 8-digit certificate number. You should retain these certificates for four years after your renewal in case you are audited.
The 60-Second Decision Tree: What Counts for You?
What you need depends entirely on where you are in your career.
1. Are you a Salesperson renewing for the FIRST time?
What counts: You have a strict list. You need 5 separate three-hour courses in Ethics, Agency, Trust Funds, Fair Housing (with interactive role-play), and Risk Management.
Plus: You need a 2-hour Implicit Bias course and a minimum of 18 hours of Consumer Protection.
Warning: You cannot take the Survey Course yet. You must take separate, dedicated courses.
2. Are you a Broker renewing for the FIRST time?
What counts: Same as the salesperson list above, but you also need a course in Management & Supervision. For a deep dive on this, read Do Brokers Have Different CE Requirements in CA?
3. Is this your SECOND or SUBSEQUENT renewal (Broker or Salesperson)?
What counts: You have more flexibility. You can take a single Survey Course (which covers the mandatory subjects: Ethics, Agency, Trust Funds, Fair Housing, Risk Management, Management & Supervision, and Implicit Bias).
Plus: You need a minimum of 18 hours of Consumer Protection.
Remaining Hours: The rest of your 45 hours can be filled with either Consumer Protection or Consumer Service.
To check the exact math on totals, check out How Many CE Hours Are Required for CA License Renewal?
The Three Buckets: Mandatory, Consumer Protection, and Consumer Service
To build a valid 45-hour package, you need to prioritize the categories in this order:
1. Mandatory Subjects
These are the non-negotiables. The state requires you to stay updated on the laws that protect the public.
The List: Ethics, Agency, Fair Housing, Trust Fund Handling, Risk Management, Management & Supervision, and Implicit Bias.
The “Survey” Shortcut: If you are on a subsequent renewal, a 9-hour Survey Course counts as covering all these topics.
Note: Not sure if the new bias rules apply to you? Read Does California Require Implicit Bias Training for Renewal?
2. Consumer Protection (The "Primary" Elective)
This category is the gold standard for electives.
Requirement: You generally need a minimum of 18 hours in this category.
Definition: Courses that help you protect the client’s interest.
What Counts (Common Examples):
Real Estate Valuation/Appraisal
Property Management logic
Green Real Estate/Energy Efficiency
Real Estate Finance and Truth-in-Lending
Landlord/Tenant Relationships
3. Consumer Service (The "Leftover" Elective)
This is the most confusing category. These are courses that improve your skills but don't necessarily protect the public legally.
The Rule: Consumer Service hours only count after you have satisfied your Mandatory subjects and your 18 hours of Consumer Protection. You can fill the remaining gap with these.
What Counts (Common Examples):
Real Estate Marketing
Negotiation Skills
Computer Applications/Tech for Real Estate
General Sales Skills
My Advice: Stick to Mandatory + Consumer Protection. It’s the safest path to ensure you never accidentally short yourself on the required protection hours.
What Does NOT Count (Don’t Waste Your Money)
I have seen agents spend hundreds of dollars and weekends of time on things that count for zero hours toward renewal.
Training from your Broker: Unless your brokerage is an official DRE-approved CE sponsor and issued you a course number and certificate, that Tuesday morning sales training does not count.
Motivational Seminars: Tony Robbins is great, but the DRE doesn’t care. Personal development is not CE.
Pre-License Courses: You cannot retake “Real Estate Principles” and have it count for CE. Pre-license and Continuing Ed are two different legal buckets.
Out-of-State CE: Licensed in Nevada too? Your Nevada CE usually does not count for California unless that specific provider registered that specific course with the California DRE.
Expired Courses: If you took a CE course 5 years ago, you cannot use it for this renewal. It must be completed within your current four-year license term.
How to Verify a Course Counts (Step-by-Step)
Don’t trust the marketing on a website. Trust the database.
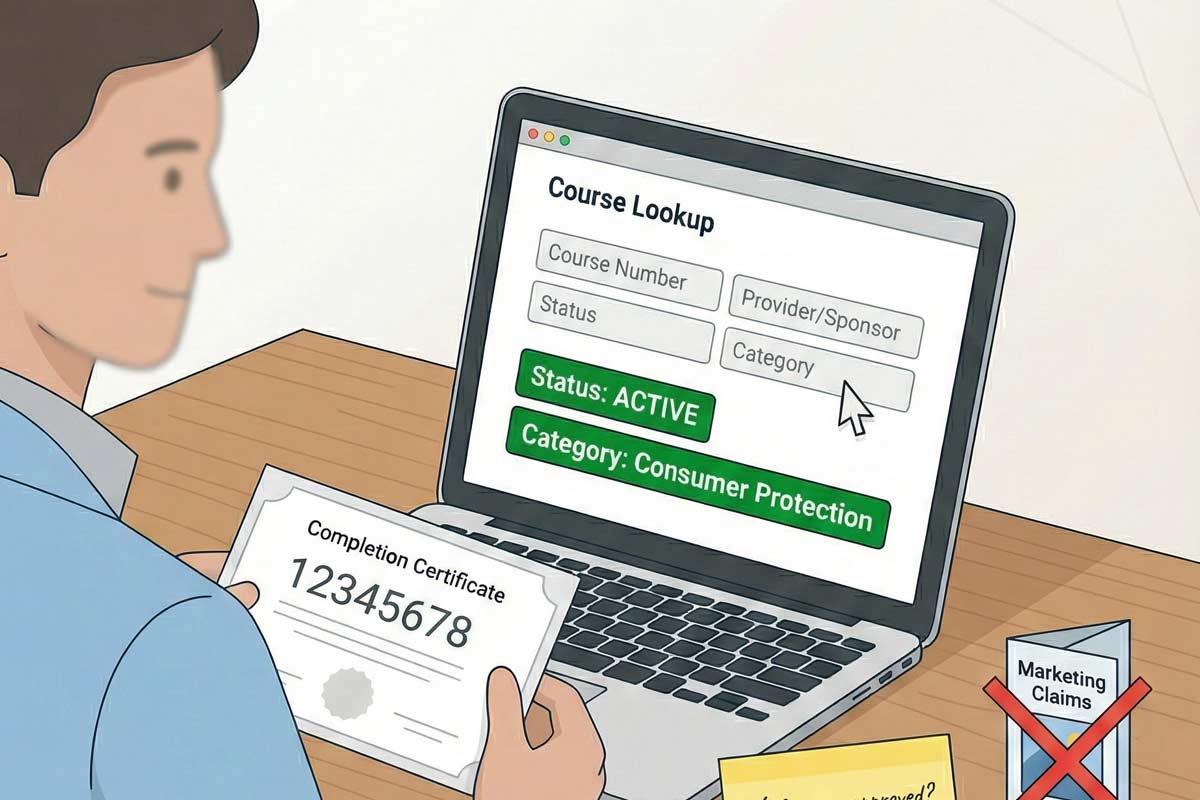
Get the Course Number: Ask the school for the 8-digit DRE course number.
Go to the Source: Visit the DRE’s Approved Continuing Education Courses lookup (on the DRE website).
Search: Enter the course number or the provider name.
Check the Status: Ensure the status is “Active.”
Check the Category: Make sure the category (e.g., Consumer Protection) matches what you need to fill your gap.
Verification Checklist:
Is the sponsor approved?
Is the course status "Active"?
Does the course category match my renewal requirements?
Will I receive a certificate with an 8-digit number immediately upon completion?
Real-World Scenarios: Where Agents Get Stuck
The “Cheap Bundle” Trap Agent Mark found a $30 renewal package online. He finished it in a weekend. When he uploaded it to eLicensing, he was rejected. Why? The bundle was old. The Fair Housing course lacked the required interactive participatory component (role-playing as both consumer and professional), and it was missing the Implicit Bias module entirely.
Lesson: Cheap often means outdated. Ensure the package is current for 2026 standards.
The “I Thought My Designation Counted” Trap Agent Sarah took a grueling 3-day course to get a luxury home designation. She assumed 24 hours of class time meant 24 hours of CE. It turned out the provider never registered the course with the California DRE. She got a nice pin for her lapel, but zero CE credits.
Lesson: Never assume. Check the DRE database.
Frequently Asked Questions
Do webinars count for CE? Yes, BUT only if the webinar provider is DRE-approved and they have a method to verify your attendance (like monitoring your login time or requiring exit quizzes). Live DRE-approved webinars are a valid way to knock out hours.
Can I repeat the same course every renewal? Generally, the DRE allows you to repeat courses in subsequent renewal cycles, provided the course material is still current and approved.
What is the difference between Consumer Protection and Consumer Service? Consumer Protection courses teach you how to protect the client (laws, disclosure, financing). Consumer Service courses teach you how to do your job better (marketing, computer skills). You must have at least 18 hours of Protection; Service hours only count toward the remaining balance.
How do I know if my Fair Housing course is “Interactive”? The course description should explicitly state it includes an "Interactive Participatory Component." The DRE requires this to include role-play as both a consumer and a real estate professional. If you just read a PDF and take a final exam, it likely does not meet the requirement.
What happens if my license expires before I renew? If you submit your renewal application and fees on time (before midnight of your expiration date), you can generally continue operating under B&P Code 10156.2 while the DRE processes it. However, if you are late, you enter a two-year grace period where you can still renew, but you cannot perform any licensed activity until your license is officially renewed.
What if I finish my CE early? That is great. You can upload your courses to the DRE eLicensing system up to 90 days before your expiration date. Do not wait until the last night.
Don’t Risk Your License
Renewing your license is not the time to experiment with unverified courses. The DRE audits renewals, and mistakes can delay your ability to work.
Make sure every hour counts. Stick to approved sponsors, verify your certificates, and get it done early so you can get back to selling.
Next Step: Ready to see the full roadmap? Go to our California Real Estate License Renewal Guide to get started.
|
Environmental issues are the "silent deal killers" of California real estate. A single undisclosed underground tank or a mismanaged mold complaint can trigger five-figure remediation costs and six-figure Read more...
Environmental issues are the "silent deal killers" of California real estate. A single undisclosed underground tank or a mismanaged mold complaint can trigger five-figure remediation costs and six-figure lawsuits.
In practice, your job is to surface red flags, disclose material facts, and document referrals—not to diagnose or guarantee property conditions. This guide provides a practice-based protocol for protecting your license and your clients from environmental liability.
Disclaimer: Informational only, not legal or environmental engineering advice. Rules vary by property and local jurisdiction; consult qualified counsel and environmental professionals.
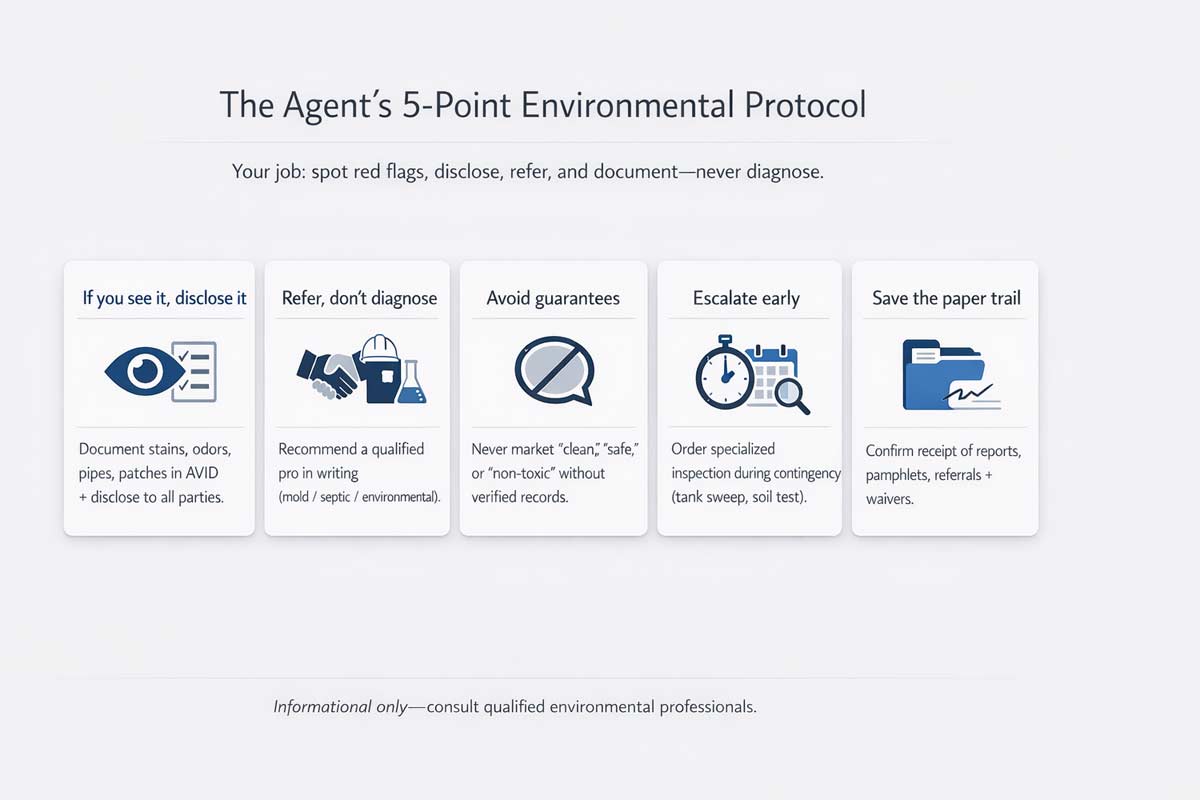
The Agent’s 5-Point Environmental Protocol
If you see it, disclose it: Document visual flags (stains, pipes, odors) in your AVID and disclose them to all parties.
Refer, don't diagnose: Never tell a client "that looks like harmless mildew." Recommend a professional (mold, septic, or environmental pro) in writing.
Avoid Guarantees: Never market a property as "clean," "safe," or "non-toxic" in MLS remarks or conversations.
Escalate Early: Recommend specialized inspections (like tank sweeps or soil tests) during the contingency period, not after.
Save the Paper Trail: 5.Obtain signed receipts for all environmental reports, pamphlets, and written recommendations and any inspection waivers.
The Agent’s "Non-Negotiables"
Problems often stem, not from the hazard itself, but from an agent’s failure to follow these rules:
Rule 1: You are not the expert. Even if you’ve seen a hundred "slurry-filled" oil tanks, do not give an opinion on the safety or cost of removal. Point it out and suggest a specialist.
Rule 2: Perform required visual diligence. Disclose observable red flags where applicable. Missing a blatant red flag can lead to a negligence claim.
Rule 3: Verify claims with records. If a seller says soil is "clean," do not market it as such until you see closure documentation or other credible third-party records (as applicable) and reference those reports in your discussions.
Rule 4: Recommend in writing—even if they decline. If a buyer waives an environmental inspection, send an email (or have them sign a document) confirming they have chosen to assume that risk against your advice.
Hazards: Red Flags
1. Mold & Moisture Intrusion
In California, mold is a primary habitability issue. For rentals, these issues often trigger complex Rent Control Laws in California (Agent Guide) disputes regarding repair timelines and tenant leverage.
Red Flags: Musty odors, water stains, bubbling paint.
Safe Script: "I noticed discoloration; I recommend a mold professional test the air quality."
What NOT to Say: "Bleach will fix it." Do not make health claims like "non-toxic."
2. Asbestos & Lead-Based Paint
In pre-1978 construction, lead based paint may be present. This is a critical consideration before discussing California ADU Laws because construction disturbs suspect materials.
Red Flags: Popcorn ceilings, linoleum, or "shingle" siding in older homes.
Safe Script: "Due to the age of the home, these materials may be present. Consult a specialist before renovating."
Recommend: Delivery of the CalEPA "Environmental Hazards" booklet and other documentation as required by law and your brokerage.
3. Underground Storage Tanks (UST) & Contamination
Red Flags: Metal pipes in the yard, circular concrete patches, or proximity to old dry cleaners.
Safe Script: "This pipe may indicate a former tank; we should recommend a search for closure records."
SB 9 Alert: Feasibility marketing is where agents get sued. Before you market the feasibility of a lot split, ensure environmental constraints don't kill the path for SB 9 Explained for Real Estate Agents.
What NOT to Say: "The tank was definitely removed correctly."
4. Private Wells & Rural Hazards
Environmental due diligence must expand to include water potability, yield, and seasonality.
Red Flags: Nearby industrial sites, agricultural runoff, or "smelly" water.
Safe Script: "Since this property uses a private well, I recommend a professional test for potability and yield."
Pro Tip: Beyond physical service, ensure you understand Water Rights & Easements in California Real Estate.
5. Septic Systems & Leach Fields
Red Flags: Lush green patches in dry weather, soggy soil, or slow drains.
Recommend: Septic inspection, records search, and pumper's report.
What NOT to Say: "It passed before" or "pumping proves it functions perfectly."
6. Former Agricultural Use & Dumping
Red Flags: Abandoned burn pits, distressed vegetation, or historical records of crop spraying.
Recommend: Soil testing by a qualified pro; consult an environmental specialist.
What NOT to Say: "It was just farmland, so it’s clean."
Regulatory Touchpoints
California environmental "regulation" for agents is primarily about disclosure mechanisms:
The NHD Mechanism: The Natural Hazard Disclosure (NHD) flags "zones" (Fire, Flood, Seismic). It does not certify property condition—it only flags state-mapped risks.
Wildfire & Build Feasibility: Treat wildfire exposure as a build-feasibility constraint, especially if your client plans an ADU.
Phase I ESA: A research report used to identify "Recognized Environmental Conditions" (RECs)—signs the property’s history may involve contamination risk.
The TDS: The Transfer Disclosure Statement is where sellers disclose known property conditions, including environmental hazards.
Marketing Language: "Bad vs. Better"
Bad Language (High Risk)
Better Language (Lower Risk)
"No environmental issues"
"Seller reports no known issues; recommend buyer inspection."
"Mold-free home"
"Professional remediation completed [Date]; see attached report."
"Safe well water"
"Water quality to be investigated by buyer during contingency."
"No tank on property"
"No known tanks disclosed; buyer to verify via records/testing."
"Clean Phase I"
"Phase I ESA available for review; buyer to perform due diligence."
Agent Due Diligence Checklist
Review NHD Early: Flag any fire, flood, or fault exposures for the buyer immediately.
Where Relevant, Check Databases: For suspected history, check databases such as GeoTracker or EnviroStor.
Document in AVID: Note all odors, stains, or nearby industrial uses.
Confirm Receipt: Document delivery of all disclosures (NHD, TDS, advisories, and booklets).
Written Referral: Recommend appropriate professional evaluation during contingency; document acceptance/decline.
Frequently Asked Questions
Does "buyer to verify" protect an agent from liability in California?
It is a standard supplement, but it does not absolve you of the duty to disclose a known red flag or material fact.
What should I do if the buyer waives inspections?
Immediately document the waiver in writing. Send an email confirming that you recommended the inspection and they have chosen to assume the risk of the unknown and have the buyer sign a waiver that they are acting against your recommendation.
Is a seller's refusal to allow testing a material fact?
A refusal to allow requested testing is a major red flag and should be communicated to the buyer immediately; ensure this communication is documented in writing.
What is the difference between Phase I and Phase II?
A Phase I is historical research (no drilling). A Phase II involves actual soil or water sampling to determine if contamination exists.
Build Your Compliance System
Environmental risk management is just one piece of a successful real estate practice. If you are building a professional compliance system, start here:
California Real Estate Laws & Compliance Guide
|
Fast Answer: Your 2026 Renewal Snapshot
If you are staring at a real estate license renewal notice (or dreading its arrival), here is the bottom line. Most (there’s an exception I will discuss in Read more...
Fast Answer: Your 2026 Renewal Snapshot
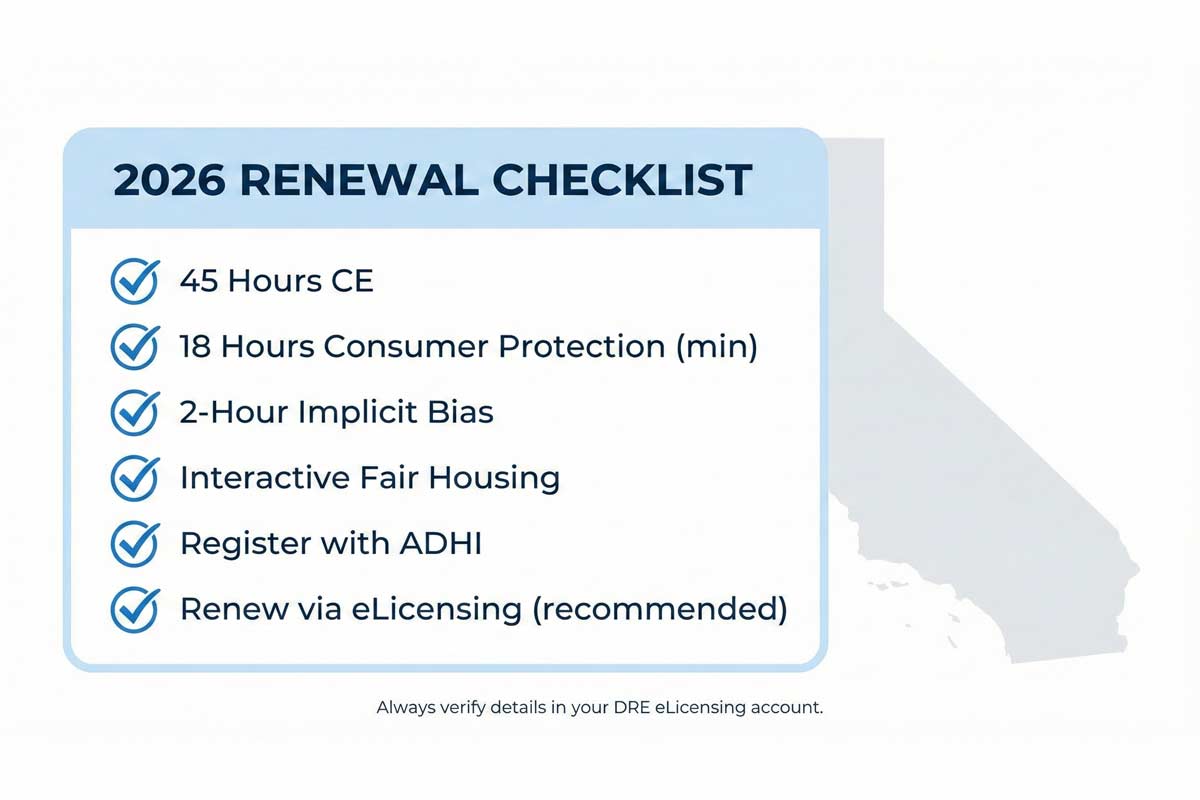
If you are staring at a real estate license renewal notice (or dreading its arrival), here is the bottom line. Most (there’s an exception I will discuss in a bit) licensees cannot renew their California real estate license without checking these boxes.
Total CE Hours: 45 hours (generally required, unless you qualify for the 70/30 exemption).
Renewal Cycle: Typically every 4 years.
The "New" Standards: If your license expires on or after Jan 1, 2023, you must have the 2-hour Implicit Bias course and the Interactive Fair Housing course. (Older certificates without these specific components will not satisfy current renewal requirements).
Submission Method: DRE eLicensing system (recommended and fastest) or mail (slower).
Earliest You Can Renew: Often about 90 days before expiration (check your eLicensing account for your specific window).
Absolute Minimum Time to Complete CE: ADHI Schools’ renewal program can be completed in about 8 days from the time of registration to completion. CE providers enforce a limit of 15 credit hours per 24-hour period to prevent "speed clicking" under DRE rules. This means you cannot cram 45 hours of course completion into a single weekend.
Who This Applies To (Read This First)
Before you buy a package, verify your status. The California real estate license renewal requirements for 2026 differ depending on where you are in your career.
First-Time Renewal vs. Subsequent Renewal
First-Time Salesperson: You cannot take the shortcut "Survey" course. You must take five separate 3-hour courses (Agency, Ethics, Trust Fund Handling, Risk Management, Fair Housing) plus the 2-hour Implicit Bias course, and at least 18 hours of Consumer Protection.
Subsequent Renewal (2nd, 3rd, etc.): You are eligible for the 9-hour Survey Course. Per DRE rules, this single course covers all 7 mandatory topics (the five above, plus Implicit Bias and Management & Supervision). It is streamlined, but you still must enter the completion details for the remaining hours.
Broker vs. Salesperson
Brokers: You must include "Management & Supervision" in the required subject set on your first renewal.
Salespersons: For subsequent renewals, Management & Supervision is effectively required because it is included in the standard 9-hour Survey Course.
Kartik’s Insider Note: "I’ve seen veteran agents assume they know the rules because they’ve renewed five times. Then they get flagged because they missed the Implicit Bias requirement or took a Fair Housing course that lacked the 'interactive' component. Don't coast on autopilot."
For a complete breakdown of the entire process from start to finish, bookmark our master California Real Estate License Renewal Guide.
The 2026 Renewal Requirements (Detailed Breakdown)
The DRE (Department of Real Estate) is strict about course validity. If your course completion dates or course numbers don't match the current requirements, your renewal may be flagged.
1. The 45-Hour CE Requirement
Most licensees must complete 45 hours of DRE-approved Continuing Education. These hours are broken down into Mandatory Subjects and Consumer Protection (with a limit on Consumer Service hours).
How Many CE Hours Are Required for CA License Renewal?
First-Time Salespersons: 5 separate 3-hour courses (Ethics, Agency, Fair Housing, Trust Funds, Risk Management) + 2-hour Implicit Bias + 18 hours Consumer Protection + remaining hours (Consumer Service max 27 hrs).
First-Time Brokers: 6 separate 3-hour courses (Adds Management & Supervision) + 2-hour Implicit Bias + 18 hours Consumer Protection + remaining hours.
Subsequent Renewals (All): 9-hour Survey Course or individual courses (covering mandatory topics) + 18 hours Consumer Protection + remaining hours.
2. The "Must-Have" Courses (Current Standard)
Two specific requirements trip people up the most:
Implicit Bias Training (2 Hours): This is non-negotiable. Does California Require Implicit Bias Training for Renewal? Yes, effective Jan 1, 2023.
Interactive Fair Housing: You cannot just read a PDF. The course must include an "interactive participatory component." While DRE mandates role-play, in online on-demand courses, this is typically built in as scenario-based interactions (you generally aren't performing live, but you must actively engage with the module).
3. Broker-Specific Rules
If you hold a broker license, you must ensure you are covered on "Management & Supervision."
Do Brokers Have Different CE Requirements in CA? Yes, specifically on the first renewal. Brokers must take "Management & Supervision" as a standalone 3-hour course. (On subsequent renewals, it is included in the 9-hour survey for everyone).
Timeline: When to Start (Don't Ignore This)
Real estate is stressful enough without losing your license because you forgot a deadline.
60 Days Out: Check your eLicensing account. Is your email address current? Do you have any citation fines outstanding?
45 Days Out: Purchase your CE package. Give yourself a buffer.
14 Days Out (The "Safe Zone"): Finish your exams. DRE systems can go down for maintenance. Certificates can get misplaced. Do not be the person finishing their exam at 11:30 PM on your expiration date.
Expiration Date: If you submit your renewal on time (before midnight), you can typically continue operating even if the processing takes a few days (under B&P Code 10156.2). However, if you miss the deadline, you are late. Once late, you cannot legally perform licensed activities until the renewal is fully processed.
Common Mistakes That Delay Renewal
After helping thousands of students, here are the real-world scenarios where I see agents get stuck.
Scenario A: The "Fast Reader" Trap
The Situation: Agent Mike waits until 3 days before his license expires. He buys a 45-hour package and tries to power through it in one weekend.
The Result: The renewal will be late. DRE rules require CE platforms to enforce a limit of 15 credit hours per 24-hour period once the exams are unlocked to prevent "speed clicking." Mike’s license expired because the platform physically wouldn't let him take the final exam in time.
Scenario B: The "Wrong Course" Disaster
The Situation: Broker Sarah takes a generic "Fair Housing" course from a cheap provider that wasn't updated for California's interactive requirement.
The Result: She submits her renewal. A week later, the DRE flags it: "Missing Interactive Component." She has to find a new course, pay again, and re-submit. What Courses Count Toward CE in California? Only those with specific DRE approval numbers that meet current legislative standards.
Step-by-Step: How to Renew Without Drama
Verify Your Expiration Date: Log into DRE eLicensing.
Complete Your 45 Hours: Ensure your provider gives you course completion certificates for each course. You will need the 8-digit Course Number for the next step.
Log in to eLicensing: Select "Renew License."
Enter Course Numbers: Use the 8-digit number printed on your CE completion certificate (the one eLicensing asks for) and the completion date exactly as they appear on your documents. Don’t share these secret codes with anyone.
Pay the On-Time Fee:
Salesperson: Check DRE fee schedule (approx. $350).
Broker: Check DRE fee schedule (approx. $450).
Print Your Receipt: If your application is on time and clean (no background issues), your status should update to "Licensed" with a new 4-year expiration date often immediately.
FAQ: Quick Renewal Answers
Q: Can I renew my license after it expires? A: Yes. You have a two-year "grace period" (Late Renewal). You must pay a higher late fee and you cannot practice real estate during this gap until the renewal is fully processed and your status shows "Licensed" again.
Q: Do I need to submit my printed certificates to the DRE? A: Usually, no. You enter the course numbers into eLicensing under penalty of perjury. However, the DRE can audit you. Keep your PDF certificates for at least 4 years.
Q: I am over 70 years old. Do I still need CE? A: Maybe not. If you are 70+ and have been licensed in good standing for 30 continuous years, you can apply for the "70/30 Exemption."
Q: How much does the renewal cost in 2026? A: Fees are subject to change. Always check the DRE fee schedule directly before paying.
Q: What is the difference between Consumer Protection and Consumer Service? A: Consumer Protection courses cover topics that directly protect the public (like laws and disclosures). Consumer Service courses focus on professional skills (like marketing). You must have at least 18 hours of Consumer Protection, meaning you are limited to a maximum of 27 hours of Consumer Service.
Don't Let a Paperwork Error Cost You a Commission
Renewal shouldn't be a guessing game. If you are approaching your deadline, get your CE done with a trusted provider like ADHI Schools, and get your application in early.
Need a deeper dive on the forms, fees, and reinstating a lapsed license? Read the full California Real Estate License Renewal Guide next.
|

AI Has Become the California Agent’s Competitive Edge
California real estate never slows down. Between lead generation, open houses, disclosures, deadlines, and client communication, most agents Read more...
AI Has Become the California Agent’s Competitive Edge
California real estate never slows down. Between lead generation, open houses, disclosures, deadlines, and client communication, most agents feel like they’re working three jobs at once.
In 2026, AI isn’t replacing agents—it’s amplifying them.
Top producers use AI not as a shortcut but as a force multiplier that handles repetitive tasks so they can focus on negotiation, relationships, and solving problems.
Below are 7 categories of AI tools that help California agents save hours every week—without crossing legal boundaries that could jeopardize a license.
1. AI-Powered CRMs & Lead Nurturing
What It Is
AI-enhanced CRMs automate follow-up, score leads, and guide you on when to call, text, or email.
Productivity Payoff
No more stale leads or forgotten tasks. AI organizes everything so you stay top of mind with buyers and sellers.
Tools to Explore
Follow Up Boss – Smart workflows
Chime – Predictive AI lead scoring
Sierra Interactive – Behavior-based follow-up
Pro Tip for California Agents
Segment your leads by micro-markets (Ontario ≠ Upland ≠ Rancho Cucamonga). AI tagging helps you tailor communication to hyper-local trends.
2. AI Listing Description & Marketing Copy Generators
What It Is
AI tools draft listing descriptions, social posts, ads, and open house scripts instantly.
Productivity Payoff
Save hours per listing while producing cleaner, more polished marketing.
Tools to Explore
ChatGPT – Listing copy, scripts, edits
Jasper – Persuasive marketing language
Copy.ai – Rapid-fire short-form copy
Pro Tip for California Agents
Fair Housing is non-negotiable.
AI may unintentionally generate biased phrases like:
“Great for families”
“Safe neighborhood”
“Walking distance to church”
Remove anything that could be interpreted as steering, preference, or demographic targeting.
3. AI for Visuals, Virtual Staging & Photo Enhancement
What It Is
AI generates virtual staging, enhances photos, and builds floor plans or digital twins.
Productivity Payoff
Turn raw photos into polished marketing immediately—no waiting on designers.
Tools to Explore
Matterport – 3D tours
REimagine Home – AI staging
Virtuance – AI image enhancement
Pro Tip for California Agents
Label virtual staging ON the photo, not just in the caption.
The DRE considers unlabeled virtual staging a form of “misleading advertising.”
4. AI Chatbots for Instant Lead Engagement
What It Is
Chatbots respond instantly to new leads, capture info, and schedule appointments—even when you’re at a showing.
Productivity Payoff
You never miss a lead, and automation boosts speed-to-lead dramatically.
Tools to Explore
ManyChat
Rechat
Drift
Pro Tip for California Agents
Treat chatbots like unlicensed assistants:
They can schedule, collect info, and greet prospects—but cannot:
Discuss price or terms
Explain contingencies
Compare properties
Suggest negotiation strategies
Anything crossing into “licensed activity” exposes you to DRE violations.
5. AI Market Analysis & Pricing Tools
What It Is
AI-enhanced CMA tools that digest thousands of data points to estimate value and trends.
Productivity Payoff
Better listing presentations, fewer pricing disputes, and faster CMAs.
Tools to Explore
CloudCMA – Dynamic CMA reports
RPR – MLS-linked property analytics
HomeByte – Predictive price modeling
Pro Tip for California Agents
AI is helpful, but California pricing is hyper-local.
A lot split, a new ADU, or an unpermitted conversion on one block may not exist on the next block. Always verify with public record.
6. AI Video Tools: Scripting, Editing & Personalized Outreach
What It Is
AI writes scripts, processes raw footage, and automates personalized video messages.
Productivity Payoff
Turn one hour of work into a month of video content.
Tools to Explore
Descript – Edit video by editing text
Loom – Personalized client explainer videos
Synthesia – AI-presenter video creation
Pro Tip for California Agents
Use 45-second AI-scripted updates for clients in competitive markets. Sellers and buyers care more about timeliness than cinematic production values.
7. NEW: AI for Risk Management & Disclosures
What It Is
AI tools that guide clients through complex disclosures and help agents avoid omission errors.
Productivity Payoff
Reduces back-and-forth, cuts risk of mistakes, and lowers liability exposure—especially in California where disclosure requirements are the strictest in the nation.
Tools to Explore
Glide – Smart TDS, AVID, SPQ workflows
DisclosureIO – Organized disclosure package sharing
Pro Tip for California Agents
Even with AI assistance, you must review every page of TDS, SPQ, AVID, and local disclosures.
AI is a helper, not a shield. Omission = lawsuits, not excuses.
8. AI Email & Communication Assistants
What It Is
AI improves email clarity, tone, and grammar.
Productivity Payoff
No more rewriting emails five times. Stay polished and consistent.
Tools to Explore
Grammarly
Lavender
Superhuman
Pro Tip for California Agents
Never paste sensitive client information (SSNs, tax returns, bank statements) into public AI tools.
Use encrypted assistants only.
Human vs. AI: What Each Does Best
AI Handles
Agents Handle
Drafting emails & scripts
Negotiation
Scheduling & reminders
Emotional intelligence
Draft CMA comparisons
Pricing strategy explanation
Data entry
Relationship-building
Photo editing & staging
Reading buyer/seller motivation
Initial lead engagement
Problem-solving & conflict management
Disclosure prep workflows
Final review & legal responsibility
AI is the assistant.
You are the fiduciary.
Why California Agents Are Still Irreplaceable
AI can stage a room.
AI can analyze comps.
AI can respond instantly.
But it cannot:
Understand probate nuances
Protect a client from a bad deal
Interpret a tricky local disclosure
Negotiate with a difficult seller
Read human intentions
Catch subtle red flags
Uphold a fiduciary duty
That skill set comes from education, training, and experience—not algorithms.
AI will define the next generation of California agents—but only those who pair technology with a strong foundation in California real estate law will thrive.
AI can draft a contract.
AI can organize your day.
AI can help prevent errors.
But AI cannot keep you out of court.
Only you can—if you fully understand the laws you’re practicing under.
At ADHI Schools, we prepare California agents to use modern tools safely, effectively, and confidently.
If you’re ready to build a career that blends technology with real-world expertise:
Explore our state-approved pre-license and continuing education courses today.
|

As a real estate agent, you might encounter the misconception that the holiday season is a slow time for selling homes. With people busy with festivities and travel, it's easy to assume that listing a Read more...
As a real estate agent, you might encounter the misconception that the holiday season is a slow time for selling homes. With people busy with festivities and travel, it's easy to assume that listing a property during this time could be challenging. But don't let that common belief deter you! The truth is, the holiday season offers unique advantages that you can leverage to benefit your clients. Let's debunk this myth and explore why listing during the holidays can be a winning strategy for you and your sellers.
Less Competition - Your LIsting Shines Even Brighter
As a real estate agent, you can use the reduced competition during the holidays to your advantage. Many sellers mistakenly believe it's a bad time to list, perhaps due to misconceptions or advice from those who haven't had the benefit of a quality real estate license school. This leads to lower inventory, with the National Association of Realtors reporting a 15% drop in listings in December compared to the spring selling season. This presents a golden opportunity for you. With fewer homes on the market, your listings are more likely to grab attention and attract serious buyers.
Serious Buyers - Ready to Make a Move
While there might be fewer buyers overall during the holidays, those actively searching tend to be highly motivated. These buyers often have specific needs or timelines driving their search, such as year-end tax breaks, job relocations, or a desire to settle into a new home before the new year. Their urgency can translate into quicker closings and better offers.
Holiday Spirit - Capture the Magic
As a real estate agent, you can capitalize on the inherent charm of the holiday season. Encourage your clients to enhance their home's appeal with tasteful decorations, festive lights, and even the enticing aroma of freshly baked cookies. This creates a warm and inviting atmosphere that resonates with potential buyers on an emotional level, making the property more memorable and desirable. To maximize this effect, suggest professional staging that incorporates festive touches while maintaining a clean and spacious feel. Also, work with your clients to ensure their listing photos highlight the cozy holiday ambiance without appearing cluttered. This will help your listings stand out and attract more interest.
Favorable Timing for Sellers - Minimize Disruption, Maximize Opportunity
As a real estate agent, remember to highlight the advantages of holiday listings for your clients. With fewer showings, they can enjoy the festivities with minimal disruption to their routines. Plus, if they're planning to buy in the spring market, selling now allows them to secure their next home before the competition heats up. This strategic timing, something you likely learned in your real estate license school, can give them a real advantage and provide a smoother transition.
Considerations Before Listing - Plan for Success
When advising clients about holiday listings, be sure to address potential challenges while emphasizing the overall benefits. Acknowledge that limited showing schedules due to holiday gatherings and travel might require flexibility. Reassure them that with careful planning and open communication, these obstacles can be easily managed.
Ultimately, position holiday listing as a strategic move. Highlight the unique opportunities it presents, from reduced competition and motivated buyers to the captivating allure of a festively decorated home. By guiding your clients through the dynamics of holiday home selling and implementing effective marketing strategies, you can increase their chances of a successful and timely sale, further solidifying your value as their trusted real estate advisor.
So, are you ready to embrace the holiday season as a prime time for real estate success? By understanding the unique dynamics of the market during this period, you can effectively guide your clients and turn the "slow" season into a win-win for everyone. Remember, a well-prepared agent is a successful agent, and a quality real estate license school can equip you with the knowledge and skills to thrive in any market condition.
Want to learn more about maximizing your potential in the real estate industry? Contact us today or visit our website to explore our comprehensive real estate training programs and discover how we can help you achieve your career goals.
Love,
Kartik
|
Assembly Bill 1033 has created a new class of real estate in California: the sellable ADU. In jurisdictions that opt in, homeowners can now convert their property into a condominium, allowing the ADU to Read more...
Assembly Bill 1033 has created a new class of real estate in California: the sellable ADU. In jurisdictions that opt in, homeowners can now convert their property into a condominium, allowing the ADU to be sold separately from the main residence. This unlocks a brand-new listing category for agents but also brings the complexities of condo law, lender sign-offs, and extensive disclosures into what would otherwise be a simple residential sale. This guide provides the essential details you'll need to navigate these transactions confidently.
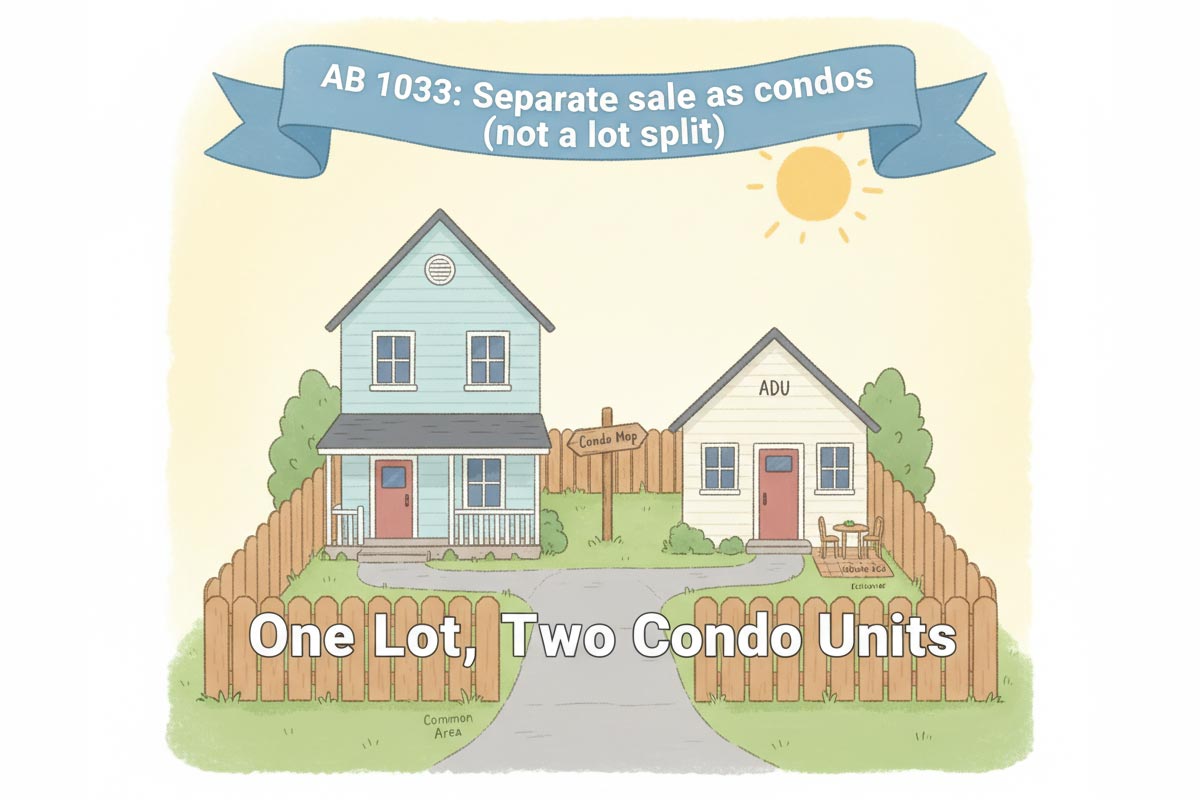
What AB 1033 Actually Does (and Why It's Not a "Lot Split")
AB 1033 allows cities and counties to pass an ordinance that lets a homeowner sell their ADU separately from the primary residence. However, it's critical to understand the legal method: this is not a lot split. Instead, you are creating a common interest development—essentially, a small, two-unit condominium project.
Here’s the practical distinction:
A lot split divides the land itself, creating two or more legally independent parcels. Each new lot is owned outright.
An AB 1033 conversion keeps the original lot intact. The land becomes a "common area" jointly owned by the owners of the main home and the ADU with each owner holding a separate interest in their airspace unit.
This brings up a common question: "Won't the two units have different Assessor's Parcel Numbers (APNs)?"
Yes, they most likely will. Once the condominium is legally created, the county assessor will typically assign a separate APN to each unit (the main home and the ADU). However, this is done for property tax purposes only. Since the units can be owned by different people, the county needs a way to send two separate tax bills. The assignment of an APN is an administrative function for taxation and does not change the legal fact that the property is a condominium on a single, shared lot—not two separate lots.
Ultimately, the state law only provides the framework; this entire process is only possible when a local city or county officially opts in and defines the specific local rules.
Where This Is Live (and why adoption is uneven)
Because AB 1033 is opt-in, the map is patchy. San José moved first —adopting an ordinance in July 2024 and green-lighting the state’s first ADU condo sale in August 2025. That milestone proved the concept and kicked off copycat discussions in other cities. Always verify local status before you market or write offers.
The Path for Sellers: From ADU to “micro-condo”
Think of the conversion as three intertwined tracks—legal mapping, habitability sign-off, and lender consent—followed by a familiar marketing and escrow period.
Confirm opt-in & pull the city checklist. If your city hasn’t adopted, you’re done. If it has, the checklist will mirror state guardrails but add local steps and forms.
Assemble the deal team early. You’ll need a land-use or condo attorney, title, a surveyor, and someone who can draft CC&Rs that divide maintenance and spell out access, parking, utilities, noise, and exclusive-use areas.
Plan the disclosure stack. In addition to the standard residential TDS and NHD and other mandated disclosures, the buyer will need condo docs (CC&Rs, bylaws, operating budget/reserves), the condo map/plan, any shared-elements easements, and recorded lienholder consents (more on that below).
Meet the safety inspection requirement. Before the map records, AB 1033 requires proof of a safety inspection—either a certificate of occupancy issued by the local agency or a HUD Housing Quality Standards (HQS) report by a certified inspector. Build time for this into your timeline.
Secure lender consent (non-negotiable). The condo map cannot record without written consent from each lienholder. Lenders can refuse or require conditions (e.g., refinancing, reserve thresholds, or revised collateral language). The consent must include specific statutory language and be recorded with the county. Start these conversations early—this is where otherwise clean deals can stall.
Sort utilities and notify providers. Separate meters may be required by local policy or utility providers; if not, the CC&Rs must clearly allocate costs, access, and shut-off rights. Upon condo creation, the homeowner must notify utility providers of the separate conveyance.
Record, list, and close. Once the map and consents are recorded, market the ADU as a condo. Expect the county assessor to assign separate APNs post-conveyance (timing varies by county). Underwriting, comps, and buyer expectations look different from a standard condo—see below.
The Buyer’s Reality: Financing, monthlys, and resale
Financing. These are condominium loans, and the smaller the unit, the more attention lenders pay to project questionnaires (reserves, insurance coverage, owner-occupancy mix, litigation). Be ready to provide the new HOA budget and reserve plan. Underwriters will model HOA dues and reserves into DTI.
Monthlies. Coach buyers on the full monthly picture: mortgage + taxes + HOA dues (with reserve contributions), potential special assessments, and shared insurance mechanics (e.g., master policy + HO-6). That clarity prevents cold feet at contingency removal.
Resale. Micro-condos trade more like cottages than flats: private entries, small footprints, and the presence (or absence) of exclusive-use outdoor space, storage, and parking drive value. Your comp set will be tiny condos, cottage courts, and—ideally—local ADU-condo comps as they emerge.
Some Documents That Protect Your Client (and you)
Statutory disclosures: TDS (Civ. Code §1102) and NHD (Civ. Code §1103 et seq.) still apply.
Condo packet: recorded CC&Rs, bylaws, operating budget and (if available) reserve study/plan, condo map/plan, shared-elements easements, utility agreements, lienholder consents, and any city notices or checklist forms.
AVID & over-disclosure: Map shared systems (sewer laterals, water lines, shared roofs/driveways) and note any open permits or variances. It’s hard to over-disclose on a first-generation product category.
HOA landmines (and how to avoid them)
Most post-closing drama comes from maintenance responsibility and use rules. Avoid ambiguity by:
Drawing a maintenance matrix that names each component (roof, siding, foundation, shared driveway/gate, landscape, fences, trash enclosure, shared meters) and assigns responsibility and inspection cadence.
Being explicit about exclusive use (patios, side yards, storage sheds) versus common area.
Setting realistic noise and parking expectations in the rules—especially where units are close.
Checking short-term rental rules at both city and HOA levels; do not imply rental income without verifying.
Utilities, access, and parking: the practical stuff
AB 1033 recognizes that upon separate conveyance, a local agency or utility may require a new or separate utility connection (and proportionate connection fees) where it wasn’t otherwise required for a standard, non-separately-conveyed ADU. If services remain shared, the CC&Rs need crystal-clear language on access, meter reading, maintenance, and billing. Record any access and utility easements so future owners—and lenders—aren’t guessing.
Pricing and positioning a micro-condo
Treat these like livable, detached cottages with condo paperwork. Price on privacy and function: no shared corridors, ground-level entries, outdoor space, light, and acoustic separation. Include a to-scale floor plan and a simple site plan (labeling the unit, parking, trash, and paths of travel). For buyers coming from apartment-style condos, the single-story cottage experience can command a premium per square foot despite smaller size.
Compliance notes your clients will thank you for
Don’t oversell “automatic.” Everything depends on local opt-in and meeting statutory conditions (inspection, mapping, consents).
Be precise about the past. Prior law had a narrow nonprofit exception; AB 1033 adds a broad condo pathway via local ordinance.
A quick case study: San José’s “first”
San José’s early adoption set the pattern: pass a clear ordinance, publish a homeowner-facing conversion guide, and coordinate internal teams (planning, building, and code enforcement). The city then approved the first recorded ADU condo in August 2025—an example that has helped normalize lender and title workflows statewide. Use that precedent when socializing the concept with your local stakeholders, but always cite your own city’s ordinance in contracts and disclosures.
What to do this week (agent checklist)
Build a local “opt-in” tracker. Keep links to city ordinances and checklists in one doc.
Collect a lender short-list. Identify originators who’ve already closed small-unit condos and will engage early on questionnaires and reserves.
Template your condo packet. Create a repeatable binder: TDS/NHD + CC&Rs + budget + map/plan + easements + utility agreements + lienholder consents.
Educate your farm. A one-page explainer for ADU owners can generate listing calls months before they’re ready to convert. Make sure to check with your broker on advertising compliance.
Bottom line: AB 1033 turns some backyards into starter homes—but only in jurisdictions that opt in, and only when you clear the condo law hurdles. The agents who win here will be the ones who master the process (mapping, inspection, lender consent), package the disclosures cleanly, and set expectations early on financing and HOA realities. Check with legal counsel and your broker to make sure you are staying compliant and you’ll be the first call when your market’s homeowners decide their ADU is ready for the big leagues.
|
Real‑estate transactions live and die by what is written—and signed—in the contract. Yet nearly every deal, from a starter‑home purchase to a multimillion‑dollar commercial lease, must be tweaked Read more...
Real‑estate transactions live and die by what is written—and signed—in the contract. Yet nearly every deal, from a starter‑home purchase to a multimillion‑dollar commercial lease, must be tweaked after that first signature. That’s where two deceptively similar tools come in: the addendum and the amendment. Because the terms sound alike, many buyers, sellers, and even new agents mix them up—sometimes with expensive consequences.
This guide cuts through the confusion. You’ll learn the fundamental difference, see practical language examples, spot common pitfalls, and walk away knowing exactly which document to use, when, and why.
The Core Distinction: Adding vs. Altering
.table{
border: 1px solid gray !important;
border-collapse: collapse !important;
margin: 10px !important;
padding: 10px !important;
font-size: 16px !important;
}
th, td{
border: 1px solid gray !important;
border-collapse: collapse !important;
margin: 10px !important;
padding: 10px !important;
font-size: 16px !important;
}
th{
text-align: center !important;
}
@media(max-width:428px){
.table-responsive{
max-width: 100%;
overflow-x: scroll;
}
}
Tool
What It Does
One‑Sentence Analogy
Addendum
Supplements the contract by adding entirely new terms, conditions, or disclosures without touching existing text.
Like attaching a new appendix to a report.
Amendment
Modifies the contract by changing, deleting, or replacing language that is already there.
Like editing a paragraph in the report’s body.
Addendum Defined
An addendum (sometimes called a “rider” or “attachment”) is a separate, signed document that becomes part of the original agreement, but nothing in the original contract is struck, deleted, or replaced.
Analogy: You finished your book and later decide to add a bonus chapter—the original chapters stay exactly as written; you just hand readers an extra section.
Amendment Defined
An amendment rewrites part of the original agreement. You are altering the existing language—price, dates, contingencies, or even simple typos.
Analogy: You catch a typo in Chapter 3 of your book. Instead of adding a new chapter, you open the manuscript and correct that specific sentence.
When to Use Which: Practical Applications
Below are the most common scenarios you’ll encounter in both residential and commercial deals. For each, notice whether new material is added (addendum) or existing material is changed (amendment).
A. Addendum Scenarios & Examples
.table{
border: 1px solid gray !important;
border-collapse: collapse !important;
margin: 10px !important;
padding: 10px !important;
font-size: 16px;
}
th, td{
border: 1px solid gray !important;
border-collapse: collapse !important;
margin: 10px !important;
padding: 10px !important;
}
th{
text-align: center;
}
Scenario
Example Property Type
“Before” (excerpt)
Addendum Language (conceptual)
New contingency
Rural residence
Contract silent on septic system.
“This agreement is contingent on Buyer’s receipt and approval of a satisfactory septic inspection report on or before August 5.”
Personal property inclusion
Suburban home
Contract lists fixtures only.
“Seller shall include the following personal property at no additional cost: LG washer, LG dryer, and GE refrigerator (Model XYZ).”
Disclosure attachment
Pre‑1978 home
Contract mentions lead‑based paint but no form attached.
“Lead‑Based Paint Disclosure (EPA‑approved form) is attached hereto as Addendum A and incorporated herein.”
Lease pet clause
Apartment lease
Lease prohibits pets.
“Notwithstanding Paragraph 10, Tenant may keep one spayed cat under 15 lbs; Tenant assumes all liability for pet damage.”
Typical timing: Often drafted with the initial offer or immediately post‑acceptance (e.g., delivery of mandatory disclosures).
B. Amendment Scenarios & Examples
Scenario
Example Property Type
“Original Clause”
Amendment Language (conceptual)
Price change
Residential purchase
“Purchase Price: $500,000.”
“Paragraph 2 is hereby amended to state: ‘Purchase Price: $490,000.’”
Closing‑date extension
Vacant land
“Closing Date: July 30 2025.”
“Closing Date is amended to August 15 2025.”
Repair credit
Condo
“Seller to repair roof leaks.”
“Seller shall instead credit Buyer $7,500 at closing in lieu of repairs; Paragraph 12 is amended accordingly.”
Loan‑type switch
Single‑family home
“Buyer financing: FHA loan.”
“Paragraph 5 is amended to read ‘Conventional 30‑year fixed loan.’”
Scrivener’s error
Commercial lease
Suite number misstated as 320.
“Suite number corrected from 320 to 302; all other terms remain unchanged.”
Typical timing: After the contract is executed when inspections, financing, or negotiations reveal the need to alter agreed‑upon terms.
Quick‑Decision Flowchart – Addendum or Amendment?
Is the information completely new and not addressed anywhere in the contract?
Yes → Addendum
Are you changing, deleting, or replacing wording that already appears in the contract?
Yes → Amendment
Need to do both?
Use both documents (e.g., add a new contingency and extend closing).
Proper Formatting & Language Tips
Best Practice
Why It Matters
Reference the underlying contract by date, parties, and property address at the top of the addendum or amendment.
Prevents arguments over which agreement the change attaches to.
Number each addendum/amendment (e.g., “Addendum #1”).
Aids tracking when deal requires multiple modifications.
Use clear headings such as “Purchase‑Price Adjustment” or “Inspection Contingency Addendum.”
Improves readability for all parties and attorneys.
State the effective date (often the last dated signature).
Clarifies when obligations begin.
For amendments, quote the original clause before showing the revised language (or cite the paragraph number).
Reduces ambiguity over what is being altered.
Obtain signatures from every party to the contract (and their spouses if required by local law).
An unsigned modification is unenforceable.
Common Mistakes & How to Avoid Them
Using the wrong document: Adding a new contingency with an amendment may accidentally overwrite existing clauses.
Leaving blanks or ambiguous wording: Courts interpret vagueness against the drafter.
Missing deadlines: An addendum or amendment delivered after a contingency expires may be ineffective.
Relying on verbal agreements: In most states, real‑estate contracts must be in writing (Statute of Frauds).
Failing to attach required disclosures: Violations can trigger rescission rights or fines.
Pro Tip: Keep a running “contract log” noting each modification, date sent, date signed, and current key dates (closing, inspection, loan approval).
State‑Specific Variations
While the concepts of addendums and amendments are universal, forms and statutory disclosures vary:
California: The Residential Purchase Agreement (RPA) uses a “Contract Addendum” (CAR Form) for new terms and a separate “Amendment of Existing Terms” for changes; specific addenda are mandatory for HOA docs, Mello‑Roos, etc.
Texas: The Texas Real Estate Commission (TREC) publishes promulgated addenda (e.g., Third‑Party Financing Addendum) and employs a universal “Amendment to Contract” form.
New York: Attorneys often custom‑draft riders (addenda) at contract formation; later changes are typically handled via attorney letters that serve as amendments.
Always consult local forms and professionals to ensure compliance.
Key Takeaways
Addendum = Add. Amendment = Alter.
Use addendums to introduce brand‑new terms without disturbing the original text.
Use amendments to change terms that are already written.
Clear drafting, proper referencing, and obtaining all signatures are non‑negotiable.
Laws and standard forms differ by state—check locally.
Beyond your time in real estate school, understanding the difference between an addendum and an amendment gives you powerful leverage in negotiations and protects you from costly missteps. If you are a buyer, remember that before signing—or sending—either document, consult your real‑estate agent and, for complex or high‑value transactions, a qualified real‑estate attorney. With the right tool and sound advice, you’ll keep your deal on track and your interests safeguarded.
Love,
Kartik
|

Your Blueprint for Referrals and Repeat Business
The moment you receive your real estate license marks the beginning, not the end, of your professional journey. While our real estate school teaches Read more...
Your Blueprint for Referrals and Repeat Business
The moment you receive your real estate license marks the beginning, not the end, of your professional journey. While our real estate school teaches you the fundamentals of property law and transaction mechanics, the true art of building a career centered on client retention lies in what happens after the closing.
In today's competitive market, the most successful agents understand a fundamental truth: relationships are a form of currency. The cost of acquiring a new client can be five to seven times higher than nurturing an existing one. Yet many agents, caught in the endless cycle of chasing new leads, overlook the goldmine sitting in their past client database. This shift from transactional thinking to cultivating luxury client relationships isn't just good karma—it's innovative business that generates consistent real estate referrals, repeat transactions, and a personal brand that stands the test of time.
For newer agents fresh out of real estate school, developing this client-centric mindset early establishes the foundation for long-term success. Seasoned brokers will find advanced strategies here to deepen existing relationships, particularly within luxury markets where discretion and personalization are paramount.
Mastering Client Engagement: Tech-Powered, Human-Centric
Forget the old days of just holiday cards. Today's top agents blend cutting-edge tech with authentic human connection to create systematic, personalized client touchpoints that scale.
Develop a tiered communication rhythm. In the first 30 days post-closing, check in weekly. These aren't sales calls; they're genuine inquiries about their move, new home, or local recommendations. As time goes on, these touchpoints become less frequent but more valuable, shifting from problem-solving to relationship-building.
Modern CRM systems like Follow Up Boss, Chime, or HubSpot, supercharge this process. They use AI to analyze client behavior, predict needs, and suggest optimal contact times. These platforms segment your database by transaction type, property value, communication preferences, and even life events. Imagine your CRM alerting you that a past client's child is nearing college age—perfect for discussing downsizing or investment properties. Tech handles the remembering and organizing, freeing you to focus on the human connection.
The real magic is when high-tech efficiency meets high-touch authenticity. Your CRM prompts the outreach, but the message should feel like it's from a friend.
Send a handwritten note within 48 hours of closing—it speaks volumes in our digital world. Mark home purchase anniversaries not with a generic email, but with a personalized video message showing their home's appreciation.
Creating Value Beyond the Transaction
Your digital presence should position you as a trusted advisor and community connector, not just another agent flooding social media with listing photos. Think about what your past clients need and want to know. They're not shopping for homes anymore—they're living in them. They're wondering when to refinance, how to maximize their home's value, which local contractor won't overcharge them, and where to find the best pizza in their new neighborhood.
This is where your content strategy becomes crucial:
Social Media Excellence: Share seasonal home maintenance tips that save them from costly repairs. Spotlight the local coffee shop owner who remembers everyone's order, or the family-run hardware store that still offers personalized service. Celebrate community events and milestones. When you position yourself as a curator of local knowledge and lifestyle enhancement, you remain valuable long after the sold sign comes down.
Newsletter Mastery: Your monthly newsletter shouldn't read like a market report designed for economists. Instead, translate those statistics into stories your clients care about. Rather than simply stating that home values increased 8%, explain what this means for their family's wealth-building journey. Include practical guides like "Five Weekend Projects That Add $10,000 to Your Home Value" or "The Hidden Gems of [Neighborhood Name] Only Locals Know About."
Website as Resource Hub: Transform your website from a listing showcase into a comprehensive resource center. Create downloadable seasonal maintenance guides, maintain a vetted vendor directory, and publish neighborhood insights that keep past clients returning for valuable information.
The Art of Memorable Client Appreciation
Moving beyond generic closing gifts requires understanding what creates lasting impressions. That standard gift basket gets regifted or forgotten, but the client who loves cooking will remember the private chef who prepared a gourmet meal in their new kitchen. The wine enthusiast will talk for years about the sommelier-led tasting you arranged at their housewarming. The family with young children will be touched by the custom treehouse plans you commissioned for their backyard oak.
These thoughtful gestures extend beyond closing day. When you learn through your ongoing conversations that a client received a promotion, send congratulations. When their child graduates, take a moment to acknowledge the milestone. When they mention training for their first marathon, surprise them with a gift certificate to the local running store. These moments of recognition build emotional equity that no competitor can match.
Creating exclusive experiences amplifies this effect exponentially. Your annual client appreciation event shouldn't feel like a networking mixer—it should feel like a reunion of friends. Some agents host summer barbecues in local parks where clients' kids play together while adults swap renovation stories. Others organize holiday cookie decorating parties that become cherished traditions.
For luxury clientele, discretion is paramount. Ensure your outreach respects their privacy, providing value without intrusion. The bar for experiences rises accordingly: private art gallery tours with the curator, sunset yacht cruises, or exclusive wine harvest experiences at boutique vineyards. The key to these events isn't their extravagance—it's their authenticity combined with impeccable attention to privacy preferences.
Building Your Referral Engine
The most successful agents never have to ask for referrals—they create experiences so remarkable that clients naturally want to share them. However, there's an art to facilitating this process without appearing pushy or transactional.
The best moments for referral conversations arise organically during your regular touchpoints. When a client expresses gratitude for your help resolving a post-sale issue, that's your cue. When they mention at your summer barbecue that their coworker is house-hunting, that's your opportunity.
Here's a simple script that works: "Thank you so much for your trust in working with me. If anyone you care about mentions real estate—whether buying, selling, or just curious about the market—I'd be honored if you'd pass along my contact information. I'm never too busy for your referrals."
Make referring effortless by providing these tools:
Digital business cards they can text instantly
Pre-written introduction emails like: "I wanted to connect you with [Your Name], who helped us find our dream home. They made the entire process smooth and stress-free, and I think you'd appreciate their approach."
Social media templates for sharing experiences
QR codes linking to your testimonial page
When legal and ethical, some agents enhance referral relationships through thoughtful incentives that strengthen bonds rather than create obligations. Consider donating to a client's favorite charity in their name as a reward for successful referrals or as a way to provide exclusive experiences, such as tickets to local cultural events. The key is to ensure that any incentive feels like a natural extension of your relationship, not a transaction.
Becoming the Indispensable Advisor
The transformation from a transaction-focused agent to a trusted advisor occurs when you expand your value proposition beyond buying and selling. Offer annual home equity reviews that help clients understand their growing wealth. Provide market updates contextualized to their investment strategies. Connect them with resources for renovations, refinancing, or navigating real estate implications of significant life changes.
Sarah, a luxury agent specializing in equestrian properties, exemplifies this approach perfectly. When clients close on horse properties, she doesn't just hand over keys—she delivers custom stable signs featuring their property name and includes a year's membership to the local riding club. Her monthly "Saddle Up" newsletter has become a must-read in the equestrian community, featuring regional event calendars, seasonal property maintenance tips tailored to horse facilities, and spotlights on trusted veterinarians and trainers.
But Sarah's genius lies in her "Equestrian Services Directory"—a carefully vetted list of providers from farriers to fence contractors, all offering preferred rates to her clients. She introduces each client to relevant providers, hosts quarterly "Boots & Bourbon" networking events at a local ranch, and has positioned herself as the hub of the luxury equestrian real estate community.
The result?
Sixty percent of her business comes from referrals and repeat clients; she commands premium commissions, and she has built a list of potential clients who seek her out specifically.
Measuring What Matters
Success in relationship-based real estate isn't measured solely in transaction volume. Here's how to track what truly matters:
Referral Rate: Aim for 20-30% of new business from past client referrals. Track this through your CRM by tagging lead sources and running quarterly reports to monitor progress.
Client Lifetime Value (CLV): Calculate total revenue per client relationship using this formula: Initial transaction commission + repeat transaction commissions + referral-generated commissions. Most CRMs can automatically generate these reports.
Repeat Business Rate: Monitor the percentage of clients who complete multiple transactions with you. Set up annual reviews in your CRM to track this metric over time.
Engagement Metrics: Use email marketing platforms to track open rates (target 25%+), click-through rates, and event RSVPs. Tools like Mailchimp or Constant Contact can provide detailed analytics.
Net Promoter Score (NPS): Send quarterly surveys using tools like SurveyMonkey or Google Forms, asking: "On a scale of 1-10, how likely are you to recommend me to a friend?" Scores of 9-10 indicate strong advocates.
These metrics tell a story far more valuable than monthly sales figures. They indicate whether you're building a sustainable practice or just churning through transactions.
Your Path Forward
Your real estate license opens doors, but your relationships determine how far you'll walk through them. In an industry where lots of agents fail within five years, those who thrive understand that each closed transaction isn't an ending—it's the beginning of a potentially lifelong professional relationship.
The lessons from our real estate school lay the foundation, but applying these relationship strategies truly builds the skyscraper of your career. This approach requires a fundamental mindset shift. Instead of viewing your database as a list of past clients, see them as your professional community. Instead of measuring success by the number of new leads generated, measure it by the relationships deepened. Instead of chasing the next transaction, invest in creating such remarkable experiences that transactions naturally follow.
The choice is yours: continue the exhausting chase for cold leads, or invest in the warm relationships already in your sphere. Your future success in real estate isn't determined by how many people you meet—it's defined by how many relationships you nurture.
Take a moment today to revisit your past client list. Identify five clients to reconnect with this week—perhaps send a handwritten note, share a relevant market update, or check in on how they're enjoying their home. Your future business depends on these small but significant actions.
Love,
Kartik
|

1 | Why Video Now?
Video: A Game-Changer for New Real Estate Agents
In today's attention-driven market, video is crucial for new real estate agents. Social media algorithms favor video Read more...
1 | Why Video Now?
Video: A Game-Changer for New Real Estate Agents
In today's attention-driven market, video is crucial for new real estate agents. Social media algorithms favor video content, with short real estate clips often getting more than twice the engagement of simple still images.
More importantly, video helps build trust. When prospective clients can see your face and hear your voice, it significantly shortens the sales cycle. This is especially beneficial for newer agents looking to establish credibility quickly. Instead of just relying on written advice or static images, showcasing properties, explaining market trends, or sharing client testimonials through video can rapidly build rapport and confidence with potential buyers and sellers.
2 | Before You Hit Record
The best lens in the world can’t fix a fuzzy objective. Before you even open the camera app, answer three questions and tape the answers to your tripod:
Defining Your Video Strategy as a New Real Estate Agent
Before you even hit record, taking a few minutes to plan your video will save you hours in editing and wasted ad spend. Here's a quick framework tailored for new real estate agents:
.why-video-now-one-table{
border: 1px solid gray !important;
border-collapse: collapse !important;
margin: 10px !important;
padding: 10px !important;
}
.why-video-now-one-table th,.why-video-now-one-table td{
border: 1px solid gray !important;
border-collapse: collapse !important;
margin: 10px !important;
padding: 10px !important;
}
.why-video-now-one-table th{
text-align: center;
}
Question
Example Answer for New Agents
Who is the target viewer?
First-time homebuyers in your local area (e.g., Rancho Cucamonga)
What action should they take?
Schedule a free consultation or attend your next open house
How will you measure success?
New client inquiries or sign-ups for your open house
3 | Pre-Production Toolkit for New Real Estate Agents
Planning is where your creative ideas meet practical research. For new real estate agents, a solid pre-production workflow is essential to create effective video content without breaking the bank. Here are some tools to help you get started:
AnswerThePublic (freemium): Use this tool to uncover common questions your target audience is searching for, such as "What do I need to know about buying my first home in Rancho Cucamonga?" Incorporating these questions directly into your video scripts will ensure you're addressing your viewers' needs.
ChatGPT or Google Gemini (free to paid tiers): These AI tools can help you draft compelling video hooks, YouTube titles, and calls-to-action that align with your brand's voice. They can save you significant time in crafting engaging copy.
Teleprompter apps (free to $29): Apps like PromptSmart or Teleprompter Pro scroll your script automatically and even pause when you do, making it easy to deliver your lines naturally and avoid that "reading off a cue card" look. This is especially helpful when you're just starting out and want to appear confident and polished on camera.
Simple Storyboard Template: Before you shoot, sketch out your video plan. A basic template with columns for "Scene #," "Location," "Shot Size," "Audio Notes," and "B-roll ideas" can keep you organized. While offering a PDF opt-in is great for brokerages, for a new agent, simply using this as an internal planning tool will ensure a smoother shooting and editing process.
By using these tools, you'll be well on your way to creating professional and impactful videos that help you connect with clients and grow your real estate business. What kind of video are you thinking of creating first?
4 | Filming Toolkit
Picking Gear by Growth Stage
.why-video-now-two-table{
border: 1px solid gray !important;
border-collapse: collapse !important;
margin: 10px !important;
padding: 10px !important;
}
.why-video-now-two-table th,.why-video-now-two-table td{
border: 1px solid gray !important;
border-collapse: collapse !important;
margin: 10px !important;
padding: 10px !important;
}
.why-video-now-two-table th{
text-align: center;
}
Category
Starter (≤ $50)
Growth (≤ $300)
Pro (> $300)
Camera
Latest smartphone
Sony ZV‑1
Full‑frame mirrorless (Canon R8)
Stabilization
Mini tripod
DJI Osmo Mobile SE
Zhiyun Crane M4
Lighting
12″ ring light
Two‑light LED kit
Aputure Amaran 60x
Audio
BOYA BY‑M1 lav
Rode Wireless GO II
Sennheiser AVX
Drone¹
—
DJI Mini 3 Pro
DJI Air 3
¹Always verify Part 107 licensing requirements; see Section 6 for compliance.
Why tiers? Because the last thing a new agent—or a real estate‑license student moonlighting as a creator—needs is a $4,000 rig before the first transaction closes. Start where you are and upgrade only when video revenue or referral traffic—not gear envy—warrants it.
5 | Post‑Production Toolkit
Editing is where raw footage becomes a trust‑building asset for your brokerage or real estate school:
iMovie (Mac) or Clipchamp (Windows): Drag‑and‑drop simplicity for “just sold” reels.
CapCut Desktop: Auto‑generates captions; exports ratio presets for every social network.
Descript: Edit video by editing text—delete filler words with a keystroke.
Canva Pro: Batch‑create on‑brand thumbnails (1280 × 720) that match the color palette of your real estate school or brokerage.
Caption everything. Captions boost watch‑time by ~12 % and help satisfy ADA accessibility guidelines.
6 | Compliance & Legal Must‑Knows
.why-video-now-three-table{
border: 1px solid gray !important;
border-collapse: collapse !important;
margin: 10px !important;
padding: 10px !important;
}
.why-video-now-three-table th,.why-video-now-three-table td{
border: 1px solid gray !important;
border-collapse: collapse !important;
margin: 10px !important;
padding: 10px !important;
}
.why-video-now-three-table th{
text-align: center;
}
@media(max-width: 428px){
.table-wrapper{
max-width: 100%;
overflow: scroll;
}
}
Topic
Common Mistake
Quick Fix
Drone footage
Flying over people without an FAA Part 107 license
Pass the $175 Remote Pilot test or hire a licensed pilot
Music
Using Top‑40 tracks
Subscribe to royalty‑cleared libraries such as Artlist or Epidemic Sound
Occupied properties
No written release from sellers
Use a standard location‑release form
Fair‑housing language
Saying “family neighborhood”
Stick to facts: “three‑bed, two‑bath near Lincoln Park”
A robust compliance framework not only protects your brokerage but also models best practices to your real‑estate‑license students.
7 | Distribution, SEO, & Accessibility
Where to Host?
.why-video-now-four-table{
border: 1px solid gray !important;
border-collapse: collapse !important;
margin: 10px !important;
padding: 10px !important;
}
.why-video-now-four-table th,.why-video-now-four-table td{
border: 1px solid gray !important;
border-collapse: collapse !important;
margin: 10px !important;
padding: 10px !important;
}
.why-video-now-four-table th{
text-align: center;
}
Platform
Pros
Cons
YouTube
Unmatched reach and Google SEO benefits
Competing ads and suggested videos
Vimeo
Clean, brandable player; swap files without changing URLs
Monthly subscription
Wistia
Heat‑maps and built‑in lead‑capture forms
Higher cost
Five‑Point SEO Checklist
Front‑load your keyword: e.g., “Video marketing tips — Adhi Schools’ real estate license school.”
500‑character description peppered with local terms—“Los Angeles real estate license,” “Orange County broker.”
Chapters: 00 : 00 Intro, 00 : 45 Pre‑production, etc.
Tags: “real‑estate video,” “real estate license,” “real estate school.”
SRT captions: Improve accessibility and Google indexing.
8 | Measuring Success: Analytics in 10 Minutes
Metric
Where to Find
Improvement Tip
Audience Retention
YouTube Studio → Content tab
Insert B‑roll at the 30‑second drop‑off
Click‑Through Rate
YouTube Studio → Overview
A/B‑test thumbnail copy
Leads Generated
Google Analytics 4 + UTM links
Give each video its own landing page so ROI is unmistakable
Allocate ten minutes every Friday to review these metrics. Then create one small experiment—new title, fresh hook, different thumbnail—and implement it before Monday.
9 | Advanced Gear Roadmap
Once your video channel starts generating predictable business—or when your real estate school wants to film premium coursework—consider:
A motorized slider (~$499) for buttery parallax kitchen shots.
A Godox SL60W key light with soft‑box for cinematic interviews under $300.
A Blackmagic Pocket 6K body when annual marketing revenue exceeds $250 k; shoot in BRAW to unlock professional color‑grading latitude.
10 | Emerging Formats to Watch
Vertical shorts (Reels, TikTok): Fifteen‑second teasers that funnel viewers to your full YouTube tour.
Live‑streamed open houses: Field buyer questions in real time; archive the replay to compound reach.
Interactive 3D tours: Pair a Matterport scan with voice‑over for an “always‑open” showing.
AI‑assisted clipping: Premiere Pro’s Text‑Based Editing feature finds quotable moments and auto‑exports them as micro‑content.
These formats are already part of curriculum refreshes at ADHI Schools.
11 | Key Takeaways for New Real Estate Agents
To truly leverage video in your burgeoning real estate career, keep these core principles in mind:
Lead with strategy, not gear. Don't get caught up in buying the most expensive camera. A clear plan for what you want to achieve and who you're speaking to is far more important than 8K resolution. Your smartphone is likely more than capable of producing excellent content.
Audio and lighting beat high resolution every time. Even if your video isn't shot in cinematic quality, clear audio and good lighting make your message understandable and professional. Invest in a simple lavalier microphone and understand how to use natural light or basic ring lights to your advantage.
Stay compliant. This is crucial for new agents. Be mindful of regulations around drone usage (especially in areas like Rancho Cucamonga), copyright for music, and ensure all your language adheres to fair housing guidelines. Ignorance is not an excuse for non-compliance.
Optimize every upload around your target audience's search terms. For instance, if you're showcasing homes in Rancho Cucamonga, use keywords like "Rancho Cucamonga real estate," "homes for sale Rancho Cucamonga," or "first-time homebuyer guide Rancho Cucamonga" in your video titles, descriptions, and tags. Think about what your ideal client is typing into search engines.
Measure and iterate. Don't just post and forget. Pay attention to your video analytics. Which videos get the most views? Which ones lead to inquiries? Learn from what works and what doesn't, and continuously refine your approach. This iterative process is key to long-term success in real estate video marketing.
Ready to Level Up?
This guide provides a practical roadmap for new real estate agents, taking you from initial concept to analyzing your video's performance. Whether you're focused on securing your first listing, building your personal brand, or simply looking to connect with potential clients, understanding video strategy is essential in today's market.
For more in-depth coaching, editable templates, and strategies to help you start filming faster and closing sooner, consider exploring specialized marketing resources tailored for new agents. These resources can accelerate your growth and establish your presence in the competitive real estate landscape.
Love,
Kartik
|

You've enrolled in our real estate license school, studied diligently and successfully passed your real estate exam —congratulations! Many people mistake this license for the finished product, but it’s Read more...
You've enrolled in our real estate license school, studied diligently and successfully passed your real estate exam —congratulations! Many people mistake this license for the finished product, but it’s more accurate to think of it as the plot of land on which you will build your career. It grants you the legal right to build, but the land is currently empty - Now, it's time to build the house.
Transitioning from a newly licensed professional to a fully thriving one requires shifting from a student's mindset to that of a business owner. The reality of real estate can be challenging, but with the right skills and strategies, you can position yourself for lasting success.
Here are 13 essential and actionable skills every new real estate agent should master.
1. Set Clear Goals and Action Plans
In a commission-only profession, you are your CEO. Without a boss setting deadlines or a guaranteed paycheck providing structure, it's easy to drift. Setting clear, measurable goals moves you from a reactive to a proactive state, giving you a roadmap and a way to hold yourself accountable. Establish specific targets for client outreach, open houses, and social media engagement, reviewing your progress regularly to make necessary adjustments.
Action Step: Utilize goal-setting tools, such as the SMART (Specific, Measurable, Achievable, Relevant, Time-bound) framework for setting goals and don’t be afraid to use technology to track your progress.
2. Build a Financial Cushion and Manage Income Wisely
Real estate commissions fluctuate dramatically, and it's not uncommon for a new agent to take 3-6 months to close their first transaction. A financial cushion is not a luxury; it's a foundational business tool that allows you to make decisions from a position of strength, not desperation. This prevents you from taking on bad clients or making poor long-term choices to get a quick commission check.
Action Step: Use budgeting tools and automate monthly deposits into a separate savings account to build your emergency fund.
3. Embrace Technology for Efficiency
As a solo agent, your time is your most valuable asset. Technology provides leverage, enabling you to automate repetitive tasks and manage more clients than would be possible manually. A good Customer Relationship Management (CRM) system acts as your digital assistant, reminding you who to call and when, while other tools can streamline your marketing, freeing you up for income-producing activities.
Action Step: Invest in free or low-cost online tutorials to master key real estate tech tools, such as your CRM and a social media scheduler.
4. Develop Emotional Resilience
Rejection is a daily reality in real estate—offers get denied, buyers change their minds, deals collapse in escrow, and potential clients choose a different agent. Resilience isn't about not feeling disappointment; it's about processing it quickly and not letting one setback derail your momentum for the entire week. Viewing each "no" as data or a learning experience is key to long-term survival and motivation.
Action Step: Regularly engage with resources—such as books, articles, or talks—that focus on building resilience and developing a growth mindset to persevere through challenges.
5. Acquire Transaction Process Expertise
Your licensing exam taught you the law, but it can’t teach you the practical flow of a deal. Actual expertise means understanding the intricate dance between lenders, appraisers, inspectors, title officers, and the opposing agent. Knowing what happens when, who is responsible for what, and how to anticipate and solve problems is what makes you an invaluable guide for your clients.
Action Step: Attend continuing education seminars and workshops, and establish relationships with experienced professionals in related fields who can provide answers to your questions.
6. Honest and Transparent Communication
Trust is the currency of real estate. Many new agents, to please, are tempted to overpromise on a home's potential sale price or understate the market's challenges. This strategy inevitably backfires. Setting realistic expectations from the beginning, even when the news is not what the client wants to hear, builds a foundation of trust and establishes your reputation as a credible, honest professional.
Action Step: Create scripts or templates for common communications, such as market updates and negotiation strategies, to ensure you are always transparent and consistent.
7. Strategic Marketing on a Limited Budget
Effective marketing isn't about having the most significant budget; it's about having the most innovative strategy. The goal is to establish your brand as a knowledgeable, trustworthy local authority. Consistently providing value—through neighborhood highlight videos, blog posts on the buying process, or community event updates—attracts clients to you, shifting the dynamic from chasing leads to creating inbound opportunities.
Action Step: Plan your marketing with a quarterly content calendar and track your results using analytics tools to see what resonates with your audience.
8. Master Quick Responsiveness
In a world of on-demand everything, clients expect prompt communication. A quick response, even if it's to say, "I've received your message and will get back to you with details this afternoon," signals that you are professional, attentive, and that they are a priority. In a competitive situation, your responsiveness can be the single factor that makes a client choose you over another agent.
Action Step: Enable smartphone notifications for business inquiries and use apps like WhatsApp Business or Slack for efficient client interactions.
9. Understand Your Local Market Deeply
Online portals can provide anyone with data; your value lies in offering insight. Deep market knowledge means understanding the nuances that algorithms can't—why one side of the street is more valuable than the other, the reputation of local builders, upcoming zoning changes, or the traffic patterns around a specific school. This is the irreplaceable expertise that clients are paying for.
Action Step: Subscribe to local news alerts, regularly review new MLS listings and recent sales, and attend local open houses to deepen your firsthand expertise.
10. Choose the Right Brokerage
Your choice of brokerage is one of the most profound decisions for your career trajectory. This is your foundational support system. A brokerage isn't just a name on your sign; it dictates your training, access to mentorship, commission structure, and the overall culture you work in. Some larger brokerages offer brand recognition and extensive tools, while smaller boutique firms may offer more hands-on guidance.
Action Step: Conduct informational interviews with managers at multiple brokerages to evaluate their value proposition and identify the best fit for your career goals.
11. Master Lead Generation Techniques Lead generation is the engine of your business and the most direct income-producing activity you can perform. Successful agents do not passively wait for business to come to them; they build and work systems to make the phone ring. Whether you focus on your existing network (SOI), a specific neighborhood (geographic farming), or online ads, dedicating non-negotiable time to prospecting is essential.
Action Step: Schedule regular lead-generation activities into your calendar, like weekly SOI outreach calls, monthly neighborhood mailings, or regular participation in local community events.
12. Navigate Compliance and Legal Pitfalls
A real estate license gives you the power to handle what is often someone's most significant financial asset. That power comes with immense responsibility. A single mistake on a contract, a missed disclosure, or a violation of fair housing laws can result in a lawsuit that ends your career and damages your reputation. Meticulous attention to legal detail isn't optional; it's the bedrock of a professional practice.
Action Step: Regularly review your state's real estate regulations, participate in legal compliance workshops, and consult with your broker or an attorney for complex transactions as needed.
13. Find a Mentor or Join a Team
Real estate can be an isolating "every person for themselves" business, but it doesn't have to be. Joining a team or finding a mentor accelerates your learning curve exponentially. It allows you to learn from the successes and mistakes of others, provides a sounding board for difficult situations, and offers a collaborative environment to help you close your first deals with confidence.
Action Step: Actively seek mentorship through your brokerage or attend local real estate association events to connect with experienced professionals who are willing to share their knowledge.
By mastering these 13 actionable skills and strategies, you'll be far better equipped to overcome the inevitable challenges, build a sustainable and profitable business, and truly thrive as a real estate professional.
Love,
Kartik
|

Embarking on a career in real estate is an exciting venture, but the path to success can sometimes feel overwhelming for new agents. As you navigate the complexities of lead generation, marketing, transactions, Read more...
Embarking on a career in real estate is an exciting venture, but the path to success can sometimes feel overwhelming for new agents. As you navigate the complexities of lead generation, marketing, transactions, and client management, you'll undoubtedly encounter two common terms: real estate coaching and real estate training. While often used interchangeably, they offer distinct benefits and cater to different needs. Understanding the nuances between the two is crucial for new agents looking to invest in their professional development wisely.
Real Estate Training: The Foundation of Knowledge
Think of real estate training as the classroom education for your real estate career. It's about acquiring fundamental knowledge, learning industry best practices, and understanding the "how-to" of the business.
Key characteristics of real estate training:
Structured Curriculum: Training programs typically follow a predefined curriculum, covering topics like contracts, agency relationships, ethics, marketing strategies, negotiation tactics, CRM software usage, and local market trends.
Broad Applicability: The information provided in training is generally applicable to a wide range of agents, regardless of their individual strengths or weaknesses.
Focus on Information Transfer: The primary goal is to impart knowledge and skills. This often involves lectures, webinars, workshops, manuals, and online modules.
Group Setting: Training can occur in a group setting, allowing for peer learning and questions.
Often Transaction-Focused: Many training programs focus on the mechanics of a real estate transaction, from listing to closing.
Examples: Pre-licensing real estate courses, broker-provided onboarding programs, real estate software tutorials, continuing education classes, and workshops on specific topics like social media marketing or and workshops on specific topics like open house strategies.
Who benefits most from real estate training?
New agents who are still learning the ropes, need to understand the legal and ethical frameworks of the industry, or require instruction on specific tools and processes will find training invaluable. It provides the essential building blocks for a successful career. Even experienced agents can benefit from training if it is timely and relevant to current events in the real estate industry.
Real Estate Coaching: Personalized Guidance for Growth
Real estate coaching, on the other hand, is meant to be a more personalized and iterative process focused on helping agents apply their knowledge, overcome specific challenges, and achieve their individual goals. It's less about what to do and more about how to do it effectively in the unique situation of an individual agent.
Key characteristics of proper real estate coaching:
Individualized Approach: Coaching is tailored to the agent's specific needs, strengths, weaknesses, and aspirations.
Action-Oriented: Coaches work with agents to develop actionable plans, set measurable goals, and hold them accountable for their progress - This personal accountability piece is an important distinction.
Focus on Application and Mindset: Coaching helps agents translate theoretical knowledge into practical application, address limiting beliefs, improve time management, and develop a winning mindset.
Problem-Solving and Strategy: Coaches help agents troubleshoot challenges, refine their strategies, and identify opportunities for growth.
Ongoing Support and Accountability: Coaching relationships are typically viewed as ongoing, with regular check-ins and performance reviews.
Examples: One-on-one sessions with a real estate coach, accountability partnerships, and personalized business planning sessions.
Who benefits most from real estate coaching?
New agents who have a grasp of the basics but are struggling with implementation, feeling stuck, or looking to accelerate their growth will benefit immensely from coaching. It's for those who want to refine their approach, develop stronger habits, and achieve higher levels of success.
A Word of Caution
Real estate coaching can turbocharge your career—but only if your coach has actually fought in the trenches. Beware of self-proclaimed 'gurus' who’ve never closed a deal themselves. These charlatans often dazzle with slick marketing and empty promises of overnight success, peddling textbook strategies they’ve never tested.
Real estate isn’t a theoretical playground—it’s a fast-paced, cutthroat industry defined by shifting markets, high-stakes negotiations, and emotionally charged clients. A coach without skin in the game can’t grasp these realities, leaving you with generic advice that crumbles under real-world pressure.
Steer clear of upselling imposters. If they haven’t survived a market crash, outmaneuvered a bidding war, or rebuilt their pipeline from scratch, their guidance is worthless. Demand proof of their sales track record: closed transactions, client testimonials, and battle scars.
Your career isn’t a lab experiment. Invest in coaches who’ve done it, not just taught it.
The Interplay: Why Both Are Important
It's not a matter of choosing one over the other; rather, real estate training and real estate coaching are complementary forces that contribute to a well-rounded and successful real estate career.
Training provides the knowledge base. You can't effectively implement strategies if you don't understand the fundamentals.
Coaching helps you apply that knowledge effectively. It bridges the gap between theory and practice, helping you navigate real-world scenarios.
For new agents, a common progression might look like this:
Initial Training: Complete pre-licensing courses and broker-provided onboarding to gain foundational knowledge and skills.
Early Coaching: Once you've entered the field, consider engaging a coach to help you set up your business, generate your first leads, and overcome initial hurdles.
Ongoing Training: Continue to attend workshops and continuing education to stay updated on market trends, legal changes, and new technologies.
Ongoing Coaching: As your business evolves, a coach can help you scale, refine your niche, improve your sales process, and navigate market shifts.
Making the Right Choice
When deciding between training and coaching (or how to incorporate both), consider the following:
Your current knowledge level: Are you completely new, or do you have a basic understanding?
Your specific challenges: Are you lacking fundamental knowledge, or are you struggling with implementation or mindset?
Your learning style: Do you thrive in structured learning environments, or do you prefer personalized guidance?
Your budget: Training programs often have a fixed cost, while coaching can be an ongoing investment.
By understanding the distinct roles of real estate coaching and real estate training, new agents can strategically invest in their professional development, build a strong foundation, and accelerate their journey towards a thriving career in real estate.
Love,
Kartik
|

Congratulations—you completed the real estate license courses, passed the real estate exam and landed your license! Now the real work begins: prospecting, showings, more than a little paperwork, and Read more...
Congratulations—you completed the real estate license courses, passed the real estate exam and landed your license! Now the real work begins: prospecting, showings, more than a little paperwork, and a CRM that won't fill itself. Trying to do it all solo is the fastest route to 14-hour days.
The fix?
Delegate smart, even if your business is getting off the ground.
You might think, "I just got my license, and now I need to think about delegation?" The answer is a resounding "yes!" While our real estate license school focused on the essential knowledge to get you started, mastering the art of delegation early on is crucial for scaling and long-term growth as a businessperson.
Delegation doesn’t necessarily mean that you have a huge team - it's really about establishing efficiency right away.
Key Takeaways
Delegate Early, Not Later: Freeing up hours lets you close your first few deals faster—without the late-night inbox grind.
Start Simple: Begin by offloading administrative tasks or transaction coordination.
Leverage Cloud Tools: Simple online platforms can streamline communication and task management from the start.
Why Delegation is Your New Best Friend (Even as a Rookie Agent)
Your plate is likely full of learning the ropes: familiarizing yourself with the MLS, practicing your sales pitch, and getting comfortable with whatever CRM you have chosen. If every single administrative detail bogs you down, you'll burn out before closing your first few deals. Delegation, even in its simplest forms, means strategically offloading tasks so you can focus on revenue generating activities.
Focus on Client Connections: While our real estate license school taught you the legalities, remember that genuine client relationships are built on time and attention.
Hone Your Sales Acumen: The more you focus on lead generation, showing properties, and negotiating, the faster you'll build expertise and finalize transactions.
Build a Sustainable Business: Instead of just surviving, you build your foundation for consistent growth.
Delegation isn't just about handing things off; it's about innovative task management to ensure everything gets done accurately and efficiently, allowing your business to flourish.
Starting Smart: What to Delegate First
Even as a new agent, you can start identifying tasks that, while necessary, might be consuming valuable time you could be using to connect with potential clients or learn more about the market. Think about the areas that might be slowing you down:
Top Time-Drains to Delegate First
Early Transaction Prep: Even before a deal is fully underway, paperwork and coordination can be time-consuming.
Basic Marketing: Setting up social media posts, sending introductory emails, and creating simple flyers.
Consider tasks that are repetitive or don't require your direct, licensed expertise.
Your First Support System: Who to Consider
You're not ready for a whole team yet, but considering where your biggest time drains are will help you decide if and when to bring in support.
Rule of thumb: Once you're juggling ≥5 active buyers or your first two listings, you're ready for at least five virtual assistant hours/week.
Considering an Administrative Assistant (Part-Time/Virtual)
If your calendar is a mess, your inbox is overflowing, or you're spending too much time on data entry, even a few hours a week from a virtual administrative assistant could be a game-changer. Typical hourly rates for a virtual assistant are reasonable depending on where they are located.
They can handle:
Managing emails and phone inquiries.
Scheduling appointments and organizing your calendar.
Basic data entry and CRM maintenance.
Exploring a Real Estate Transaction Coordinator (Part-Time/Per Transaction)
Once you start getting escrows going, you'll quickly realize the sheer volume of paperwork and deadlines. A transaction coordinator (TC) specializes in this, even on a per-transaction basis. A TC typically charges around $350−$450 per deal. They can be invaluable for: Managing contracts, disclosures, and legal documents.
Ensuring all deadlines are met.
Communicating with lenders, title companies, and other parties.
If you go back 20 years the concept of a transaction coordinator wasn’t as wide spread as it is today. The thought was that agents should instead handle their first few deals themselves. Working every step—contract, disclosures, deadlines, contingencies, and escrow—gives them real-world insight no classroom can match. That hands-on immersion sharpens problem-solving, reveals common pitfalls, and builds confidence. After running a couple of transactions solo, they’ll have the practical know-how to supervise a TC effectively and deliver truly informed service to clients.
Work with your broker or manager to determine the right path for your first few deals.
Clear Expectations: Even for a simple task, be clear about what to do.
Finding Help: Look for local college students seeking internships or explore online platforms for virtual assistants. Networking with other agents might also reveal good recommendations.
Basic Onboarding: When you hire someone, even for a limited role, clearly explain your business, your processes, and what you expect. A simple checklist of their responsibilities can go a long way.
Tools to Make Delegation Easier
You don't need fancy software to start. Simple tools can help you manage tasks and communicate effectively:
Your CRM: Use your CRM to track client interactions and set follow-up reminders. Many CRMs have basic task management features.
Shared Documents/Cloud Storage: Tools like Google Drive or Dropbox can help you share documents and keep everything organized for anyone assisting you.
Simple Automation: Even setting up automated email responses for basic inquiries can save you time.
As you grow, you might look into more specialized task management tools, but for now, focus on what helps you keep things organized. Having clear, written steps for everyday tasks (Standard Operating Procedures or SOPs) is also constructive, even if they're just notes for yourself.
Mini SOP Example:
New Lead Intake Process (5 steps, 10 min total):
Receive Lead: Check email/CRM for new lead notifications.
Initial CRM Entry: Input name, contact info, lead source, and initial notes.
Automated Welcome Email: Trigger pre-written welcome email from CRM.
Calendar Invite: Schedule the initial call/meeting on the agent's calendar.
Task Assignment: Create a follow-up task for an agent in CRM.
Developing Your Support (and Yourself!)
Even with a small amount of delegated work, consider it a partnership.
Learn and Grow Together: Encourage whoever is helping you to learn more about the real estate industry. Your success is their success.
Feedback is Key: Provide clear and constructive feedback. This helps them improve and ensures tasks are completed to your standards.
Daily Focus: Even for a new agent, creating a "Daily Action Checklist" helps you stay focused on revenue-generating activities, knowing that other tasks are being handled.
A daily action checklist is crucial for new real estate agents because it maintains focus on revenue-generating activities, preventing distraction by administrative tasks. By knowing other responsibilities are delegated, agents can prioritize client interactions, lead generation, and showings. This structured approach builds discipline and efficiency, ensuring consistent progress toward closing deals. Ultimately, it maximizes productivity during a critical learning phase, establishing habits essential for long-term success.
The "Admin" Side of Having Help
Even for small engagements, think about:
Compensation Models: How will you compensate them? Hourly? Per task?
Legal Considerations: For very small, casual engagements, it might be simple, but as you grow, you'll want to understand the difference between independent contractors and employees. This is something you'll learn more about as your business expands.
Trusting the Process
As a new agent, wanting to control every detail is tempting. However, the essence of delegation is to train someone on a task and then trust them to do it. This frees you up to focus on what you're truly licensed to do: connect with clients, show properties, and negotiate deals.Your real estate license was the first step. Mastering delegation, even in its earliest stages, is how you truly begin to build a successful and sustainable real estate career. Don't wait until you're overwhelmed; start thinking about how to work smarter from day one.
Love,
Kartik
|

As a real-estate professional, your gross commission income (GCI) is the single most revealing number in your business. Nail it, and you’ll know exactly how every listing appointment, buyer tour, or Read more...
As a real-estate professional, your gross commission income (GCI) is the single most revealing number in your business. Nail it, and you’ll know exactly how every listing appointment, buyer tour, or marketing dollar converts to cash in your pocket. Miss it, and you’ll bounce between big months and famine months with no idea why.
.commission, th, td{
border:1px solid gray !important;
border-style: dashed !important;
border-collapse: collapse !important;
margin:10px !important;
padding:10px !important;
}
Below is a quick primer—plus practical tactics—for understanding, calculating, and growing your GCI. Wherever you are on the journey, remember that the first step is a solid education. If you still need to earn your license (or want better continuing-ed), check out the live, online, and self-paced options at ADHI Schools.
What Is Gross Commission Income?
Gross Commission Income is the total commission you earn on a transaction before any splits with a co-op agent, your brokerage, or taxes. Think of it as your top-line revenue—the raw fuel that powers the rest of your business.
Pro tip: Because GCI is pre-expense, it’s not your spendable income. Always account for splits, marketing costs, and Uncle Sam.
How to Calculate Gross Commission Income
Simple math, big insight:
GCI = Sales price x Commission Rate
Example: A $500,000 sale at a 2.5 % commission rate
$500,000 × 0.025 = $12,500 GCI
If your brokerage split is 70/30, you keep $8,750 before expenses. Knowing this formula lets you reverse-engineer goals: need $150k in GCI this year? Divide by your average GCI per deal and you’ll see exactly how many closings you need.
Five Proven Ways to Boost Your GCI
Close More TransactionsMore marketing → more leads → more closings. Diversify beyond your sphere: online leads, open houses, FSBOs, expireds, community events—anything that fills your pipeline.
Aim for Higher Price Points Selling in a higher-end market (or adding a luxury niche) instantly lifts your income per transaction. ADHI can help you level-up your branding for that space.
Negotiate a Better SplitTop producers have leverage. If your volume is climbing, discuss improved cap structures—or even a 100 % model—with your broker.
Invest in Marketing & BrandingConsistent social media, video, and geographic farming keep your name in front of prospects. Agents who brand relentlessly enjoy stronger lead flow and referral business.
Get a Real-Estate Coach Nothing accelerates income like coaching. Structure, accountability, and battle-tested systems can take agents from five figures to multiple six or seven. (ADHI offers private and group coaching for graduates—ask about it when you enroll.)
Commission Basics You Can’t Ignore
Variable
Typical Range
Why It Matters
Side of Deal
2 %–3 % per side
Double-ending can boost GCI but may limit referrals if not handled with care.
Brokerage Split
60/40, 70/30, 80/20, or caps
Splits (and desk/tech fees) dramatically affect your net. Negotiate wisely.
Fees & Overhead
Varies
Transaction coordination, MLS dues, marketing spend—all eat into net income.
Track Every Dollar
You can’t grow what you don’t measure. Use your CRM, a spreadsheet, or budgeting software to log:
GCI per deal
Brokerage splits & fees
Lead-gen and marketing costs
Transaction expenses
Net profit per month
Treat your real-estate practice like a business, not a hustle.
Ready to Earn More?
Understanding GCI is just step one. The agents who consistently hit—and exceed—their income goals follow a plan, track metrics, and invest in education.
If you’re still pre-license (or need post-license CE), start with a school that’s trained tens of thousands of California agents since 2003. Enroll today in ADHI Schools’ Real-Estate License Program (free 7-day trial available) and get the knowledge, tools, and support to maximize your GCI from day one.
Your commissions—and your future—begin with the right education. Let’s build that six- or seven-figure real-estate career together.
|

Generating real estate leads can feel overwhelming, but did you know that you can generate business without solely relying on online ads. By focusing on real estate networking and building your referral Read more...
Generating real estate leads can feel overwhelming, but did you know that you can generate business without solely relying on online ads. By focusing on real estate networking and building your referral program, you can strengthen your real estate business through genuine connections. In-person meetings, community involvement, and strong relationships with centers of influence are crucial in generating real estate leads and creating a steady flow of clients. These personal connections will help you become a local expert on home values and market trends.
Mastering Real Estate Networking at Events
Attending local industry events, community fairs, and neighborhood gatherings is a proven way to attract real estate clients. The effectiveness of face-to-face interactions at these events allows you to build trust, stand out among other real estate agents, and ultimately generate leads that can turn into profitable referrals.
Prepare a Strong Elevator Pitch
Keep It Short: In 30 seconds, explain who you are, what you do, and who you help.
Highlight Your Specialty: If you’re a buyer’s agent specializing in first-time homebuyers or a seller’s agent focusing on property listings, mention it.
Example: “Hi, I’m Jane Smith, a local real estate agent helping first-time homebuyers navigate the market and find their dream homes.”
Make Meaningful Connections
Ask Questions: Inquire about their needs, such as buying a first home or exploring market trends in the area.
Listen Carefully: Show genuine interest, and offer a helpful tip about local home values or popular neighborhoods.
Quality Over Quantity: Focus on a few strong contacts rather than simply handing out dozens of business cards.
Follow Up Promptly
Send a Friendly Note: A short email or social media message referencing what you discussed.
Offer Value: Share a helpful article on local property listings or a guide to understanding market trends.
Build Trust Over Time: Consistent follow-ups turn a casual chat into a reliable referral source.
Building Relationships With Centers of Influence (COIs)
Centers of influence—like mortgage brokers, attorneys, and financial advisors—can guide their clients to you, helping you generate real estate leads with less effort. By forming strong connections with these trusted professionals, you gain access to their client base and raise your profile as a go-to real estate agent.
Tips for Working With COIs
Offer Value First: Refer a client needing a home loan to a dependable mortgage broker.
Frequent Contact: Set up monthly coffee meetings or send regular updates on home values, property listings, and local market trends.
Provide Useful Resources: Share guides on buying or selling homes, and keep them updated on zoning changes or community developments that influence real estate marketing.
Over time, your centers of influence will recognize you as a trustworthy partner who can handle their clients’ real estate needs.
Building a Strong Real Estate Referral Network
Cultivating a strong referral network is essential for sustained growth in the real estate business. It's about building genuine relationships and providing exceptional service that naturally encourages clients, friends, and family to recommend you. A well-structured system for nurturing these relationships can become a cornerstone of your marketing strategy, consistently generating valuable real estate leads.
Strategies for Encouraging Referrals:
Exceptional Client Service: The most powerful driver of referrals is providing outstanding service that exceeds client expectations. When clients are truly satisfied with their experience, they are naturally more inclined to recommend you to others. Focus on clear communication, proactive problem-solving, and going the extra mile.
Stay Top-of-Mind: Regularly connect with past clients through various touchpoints:
Personalized Check-ins: Send personalized emails, phone calls, or handwritten notes on anniversaries, birthdays, or other relevant occasions.
Valuable Content: Share helpful content such as market updates, home maintenance tips, or local community guides. This keeps you top-of-mind and positions you as a trusted resource.
Social Media Engagement: Engage with past clients on social media by liking, commenting, and sharing their posts. This helps maintain a connection without being overly intrusive.
Client Appreciation Events: Host client appreciation events, such as holiday gatherings, open house previews, or community events. These events provide opportunities to connect with past clients in a relaxed setting and strengthen relationships. These events must be free to attend and not contingent on referrals.
Request Feedback and Testimonials: Actively solicit feedback from clients after a transaction. Positive feedback can be used as testimonials on your website and marketing materials, further building your credibility and attracting new clients. This can also open the door for a conversation about referrals.
Express Gratitude: Always express sincere gratitude to anyone who refers you, whether with a handwritten thank-you note, a small gift (of nominal value and not contingent on a closed transaction), or simply a heartfelt verbal acknowledgment.
Increasing Visibility Through Community Involvement
Being active in the community shows you care and helps you generate real estate leads through trust and visibility. By volunteering, sponsoring local teams, or joining community groups, you meet people who value personal connections.
Community Involvement Ideas
Sponsor a Local Sports Team: Get your name on jerseys and connect with families who may need a buyer’s agent or seller’s agent.
Volunteer at a Local Charity: Build relationships with local leaders, who often become key centers of influence.
Host a Neighborhood Workshop: Teach residents about market trends, home values, and smart buying or selling strategies.
Example: One agent volunteered at a local food drive. While sorting donations, they met a range of people—small business owners, teachers, and young professionals—several of whom later approached the agent for help with property listings and to understand the current market trends.
Staying Connected With Past Clients
Past clients are a treasure trove of real estate referrals. By keeping these relationships warm, you remain top-of-mind when they—or their friends and family—need to buy or sell.
Follow-Up Methods
Personal Emails or Calls: Check in on their home’s value, update them on market trends, or see if they need any contractor referrals.
Handwritten Notes: Send a thank-you card or congratulate them on a home anniversary. A personal touch makes you memorable.
Social Media Engagement: Comment on their posts, share helpful articles on property listings, and offer tips about maintaining or increasing home values.
Example: An agent who helped first-time homebuyers regularly emailed them a yearly “Home Health Check” update, adding a personal touch to each message. This update included recent home values and market trends for their neighborhood. As a result, several past clients felt the warmth of the agent's communication and contacted them when family members started looking for homes, thus generating real estate leads without extra advertising.
At the heart of real estate lies the power of human connection. As a real estate professional, you'll create a thriving ecosystem of leads by prioritizing genuine networking, building trust with centers of influence, cultivating a strong referral network, actively participating in your community, and nurturing relationships with past clients. These personal connections not only open doors to unique property listings and enable you to serve buyers and sellers effectively but also establish you as a trusted and valued community member, deeply attuned to local market trends and home values.
So, what are your top strategies for attracting and retaining real estate clients through networking and referrals? Don't be shy, share your tips in the comments below!
Love,
Kartik
|

Buying a home involves many moving parts—financing, property searches, negotiations, inspections, and closing steps. For clients, it can be an exciting yet sometimes confusing experience. As a real estate Read more...
Buying a home involves many moving parts—financing, property searches, negotiations, inspections, and closing steps. For clients, it can be an exciting yet sometimes confusing experience. As a real estate professional, a well-planned home-buying checklist is one of the most effective tools available to guide buyers smoothly through the process.
A thoughtful checklist keeps everyone on the same page, clarifies responsibilities, and ensures no step is overlooked. You demonstrate your organizational skills, show a genuine commitment to client success, and create a more streamlined, stress-free transaction.
In this guide, I will break down each phase of the home-buying journey and explain how to incorporate a checklist that supports your clients and elevates your practice. By the end, you’ll know how to build and share a custom checklist that distinguishes you as a forward-thinking, service-driven agent.
Why Checklists Are Essential
A professionally crafted home buying checklist achieves several goals at once. It:
Encourages Transparency: Clients can see each stage of the process, reducing uncertainty and misunderstandings.
Instills Confidence: By mapping out every step, you help buyers feel secure in the path ahead.
Promotes Efficiency: Having a reference guide at your fingertips helps you manage tasks and timelines more effectively.
Sets a Higher Standard: Providing a checklist is a simple way to show that you’re not just knowledgeable—you’re also prepared, proactive, and ready to go the extra mile.
Stage 1: Pre-Approval and Financing
Why This Matters:
Securing financing early gives buyers a clear price range and strengthens their bargaining power when making an offer.
How Agents Can Help:
Suggest Reputable Lenders: Offer clients a short list of trusted lenders, so they don’t waste time searching.
Explain Key Concepts: Clarify differences between pre-qualification and pre-approval. Help clients gather the right documents so they can move forward quickly.
Key Checklist Items:
Get pre-approved for a mortgage
Collect and organize financial documents (W-2s, tax returns, bank statements)
Compare loan products and interest rates
Stage 2: Defining Needs and Wants
Why This Matters:
A clear picture of must-haves and nice-to-haves ensures clients focus on properties that genuinely fit their goals.
How Agents Can Help:
Facilitating Priorities: Have clients separate essential features (like a certain school district or a minimum number of bedrooms) from extras (such as a finished basement).
Aligning Expectations with Reality: If a client wants a large yard but has a limited budget, show them examples of comparable listings that might mean considering a slightly smaller lot or a home a bit farther from the city center.
Key Checklist Items:
Create “Must-Have” and “Nice-to-Have” lists
Set a realistic budget after reviewing desired features
Discuss market conditions and common trade-offs
Stage 3: Finding a Real Estate Agent
Why This Matters:
The right agent provides guidance, insights, and local knowledge that clients can’t always get from online searches.
How Agents Can Help (Positioning Yourself):
Highlight Expertise: Show clients that you use a well-structured checklist to keep everything organized and on track.
Establish Credibility: Present testimonials, success stories, and your track record so they know they’re in capable hands.
Key Checklist Items:
Research agents’ experience, market knowledge, and communication style
Seek referrals and read reviews
Interview a few agents to find the right fit
Stage 4: House Hunting and Viewings
Why This Matters:
With multiple homes to consider, clients can quickly lose track of which property offered what benefits.
How Agents Can Help:
Streamlined Showings: Prepare a viewing schedule and a simple rating sheet (e.g., House Hunting Checklist) for each property.
Encourage Note-Taking: Advise clients to take photos and jot down pros and cons. After tours, help them sort through details to find the best matches.
Specific Example:
If clients are torn between a downtown condo and a suburban home, use a rating system to compare key factors: commute, amenities, school districts, and property condition.
Key Checklist Items:
Arrange showings with clear property details
Use a House Hunting Checklist to compare homes
Take notes and review findings to narrow down options
Stage 5: Making an Offer
Why This Matters:
When it’s time to make an offer, a methodical approach ensures buyers put their best foot forward and protect their interests.
How Agents Can Help:
Market-Based Advice: Provide recent comparable sales data to determine a fair offer price.
Contingency Guidance: Suggest sensible contingencies (like an inspection or appraisal) that safeguard the buyer’s position.
Prompt Action: Have all documents ready so you can submit the offer quickly, especially if time is critical in a competitive market.
Key Checklist Items:
Review comparable sales and price trends
Determine offer details and contingencies
Submit a well-prepared offer promptly
Stage 6: Inspections and Appraisal
Why This Matters:
No one wants unpleasant surprises. Inspections and appraisals confirm the property’s condition and value.
How Agents Can Help:
Recommending Professionals: Provide a shortlist of quality inspectors. Explain what clients can expect from the inspection process.
Navigating Results: If the inspection reveals issues, discuss options—such as requesting repairs or a price adjustment.
Handling Low Appraisals: Offer strategies for renegotiation if the appraisal comes in lower than expected.
Key Checklist Items:
Schedule and attend the home inspection
Review the inspection report and negotiate if needed
Confirm the appraisal and address any discrepancies
Stage 7: Closing the Deal
Why This Matters:
The final step involves paperwork, legal details, and timing. It’s essential to stay organized to prevent last-minute stress.
How Agents Can Help:
Track Key Dates: Keep clients informed of all deadlines and requirements leading up to closing day.
Clarify Closing Costs: Break down what to expect in terms of fees, taxes, and insurance so clients aren’t caught off guard.
Final Checks: Remind buyers to complete a final walkthrough to ensure the home is in the agreed-upon condition.
Key Checklist Items:
Obtain final mortgage approval
Review the Closing Disclosure
Conduct a final walkthrough before signing
Sign all documents and receive the keys
Stage 8: Moving In
Why This Matters:
Support doesn’t end at closing. Helping clients get settled cements your role as a caring, full-service advisor.
How Agents Can Help:
Moving Tips: Provide a checklist for transferring utilities, updating addresses, and finding reputable movers.
Post-Closing Follow-Up: Check in after they move to show genuine care and maintain a positive relationship. This attention often leads to referrals and repeat business.
Key Checklist Items:
Arrange for movers and label boxes
Transfer utilities and update address records
Unpack and enjoy the new home
Sample Home Buying Checklist (For Agents to Customize)
Consider offering a detailed version as a branded PDF that you can email to clients or make available on your website. Include your logo, contact info, and any special tips to add value.
Stage
Key Tasks
Pre-Approval
Get pre-approved, gather financial docs, compare loan rates
Needs & Wants
List must-haves vs. nice-to-haves, review budget & market
Find an Agent
Research experience, read reviews, interview potential agents
House Hunting
Schedule showings, use a rating sheet, compare pros/cons
Making an Offer
Check comps, set offer terms, add contingencies
Inspections/Appraisal
Schedule inspections, review report, negotiate repairs, confirm appraisal
Closing
Finalize loan, review disclosures, do a final walkthrough
Moving In
Arrange movers, set up utilities, update addresses, unpack
Educational Value for Your Career
Integrating a home-buying checklist into your approach gives you more than just an organizational tool. You’re refining how you serve clients, setting yourself apart as a resource providing clarity rather than confusion. Your efficiency and preparedness showcase your professionalism, making you the kind of agent clients eagerly recommend to friends and family.
As you continue to use and adapt your checklist, you’ll fine-tune your process, improve your time management, and stay one step ahead of potential challenges. This systematic method strengthens your reputation, enhances client satisfaction, and fosters long-term success in your real estate career.
Your Next Step: Create Your Own Branded Checklist
Now that you’ve seen the advantages of a structured, transparent roadmap, it’s time to develop your own. Customize it to reflect your style, local knowledge, and the unique needs of your market. Provide it to clients upfront so they know what to expect and recognize that they work with a dedicated, detail-oriented professional.
By implementing this simple yet impactful tool, you’ll enhance the client experience and solidify your reputation as a trusted, organized expert. Over time, this approach will help you stand out, earn more referrals, and ensure your clients reach their home-buying goals confidently and efficiently.
A home-buying checklist can transform your clients' experiences and your own workflow. It clarifies a complex process, showcases your professionalism, and empowers buyers to understand each step. By making it a central part of your service, you set a strong foundation for lasting client relationships, repeat business, and a thriving real estate career.
Love,
Kartik
|

In today’s competitive real estate market, merely getting your real estate license and hoping clients come knocking on your door is not enough. Buyers and sellers alike have access to countless online Read more...
In today’s competitive real estate market, merely getting your real estate license and hoping clients come knocking on your door is not enough. Buyers and sellers alike have access to countless online resources, and they often seek social proof before entrusting a professional with one of the most significant financial transactions of their lives. This is where client testimonials come into play. By strategically gathering and showcasing authentic praise from past clients, you can boost your credibility, attract new business, and ultimately grow your real estate practice.
Below, I’ll explore why testimonials are so powerful, how to obtain high-quality endorsements, where to place them for maximum impact, and how to integrate them into your broader marketing strategy. You’ll also see example wording to inspire your testimonial requests and learn strategies for professionally addressing negative feedback.
Why Testimonials Are Powerful
Social Proof and Trust-Building: Testimonials are not just about showcasing your past successes, they are about building trust. They harness the power of social proof, a psychological phenomenon where individuals look to others to determine appropriate behavior or decisions. When a potential client reads about someone else’s positive experience with you, it signals that you are a trustworthy and capable professional. Testimonials help build a sense of reliability—qualities essential in a field where clients entrust agents with monumental personal and financial decisions.
Humanizing Your Brand: Real estate clients want to know that the person guiding them understands their needs. Testimonials are not just about showcasing your skills, they are about creating a personal connection. You transform yourself from a faceless salesperson into a relatable guide by sharing testimonials highlighting your market knowledge gained in the field and from your real estate license school. This comfort level can give buyers and sellers the confidence to engage with you before a face-to-face meeting.
Gathering High-Quality Testimonials
Timing Is Key: The best time to ask for a testimonial is shortly after closing when your client feels appreciative and excited about their experience. This ensures their feedback is authentic, vivid, and positive, enhancing the credibility of your business.
Method of Request: Consider a variety of methods to gather testimonials:
Email: A follow-up “thank you” email after closing is a natural time to request a brief written testimonial.
Video: A short video testimonial can be incredibly impactful if the client is enthusiastic and comfortable on camera.
Online Forms: Create a simple form with questions to guide clients through sharing their experiences. This straightforward process will make your clients feel at ease and comfortable with sharing their thoughts.
Questions to Ask (with Example Answers):
What concerns did you have before working with me, and how did I address them?”
Example Client Response: “Before meeting [Agent’s Name], we were worried about navigating the inspection process. Thanks to their knowledge (undoubtedly sharpened by bypassing the real estate exam) and clear explanations, we felt prepared and confident every step of the way.”
“How did I help make the buying or selling process smoother or more enjoyable for you?”
Example Client Response: “[Agent’s Name] took all the stress out of selling our home. They handled everything efficiently and kept us informed every step of the way.”
“Would you recommend my services to friends and family, and if so, why?”
Example Client Response:“We’ve already told several friends about [Agent’s Name]. Their professionalism, warmth, and knowledge made the experience exceptional.”
By asking open-ended, targeted questions and showcasing potential answers, you encourage clients to move beyond generic praise. This allows you to feature testimonials that highlight your unique strengths, such as your comprehensive real estate license education, market expertise, and negotiation skills, resonating with future leads and emphasizing your value.
Where to Display Testimonials
Your Website:
Your website is often the first place potential clients will look. Create a dedicated “Testimonials” or “Client Reviews” page featuring a mix of written quotes and short video clips. To make this page more engaging, consider adding photos of the clients or the properties they purchased. Highlighting names, neighborhood locations, and property types helps potential clients relate more easily. Include featured testimonials throughout the site—on your homepage, services page, and contact page—to reinforce credibility at every stage of the visitor’s journey.
Social Media Platforms:
Utilize the power of social media platforms like Facebook, Instagram, and LinkedIn to showcase short, visually appealing testimonial graphics or brief video clips. The casual nature of these platforms allows testimonials to feel organic and personal, thereby strengthening trust and making a significant impact on your marketing strategy.
Marketing Materials:
Printed brochures, flyers, and listing presentations are powerful tools in your marketing arsenal. Incorporating snippets of testimonials into these materials can provide a sense of reassurance to prospective clients, helping you stand out from competitors and build trust.
Online Review Sites:
Encourage clients to leave reviews on reputable third-party review sites like Google My Business, Yelp, or Zillow. These platforms add an extra layer of credibility to your business. Potential clients who find you through these portals will be exposed to positive feedback before even reaching your website, enhancing your reputation.
Types of Testimonials and How to Use Them
Written Testimonials:
Written endorsements are incredibly versatile and easy to display. To spark interest, use concise excerpts—one or two sentences—on social media and marketing collateral. For those who want to delve deeper, reserve longer, more detailed testimonials for your website, where potential clients can invest time reading them in-depth. This flexibility allows you to cater to different audience preferences.
Video Testimonials:
Video Testimonials: Video testimonials bring a dynamic, human element to your marketing. The visual and auditory experience of seeing and hearing a client speak positively about your services can have a profound effect, surpassing the impact of text alone. Include these videos on your website’s testimonial page and share short clips on social media. High-quality video testimonials can also be included in listing presentations, allowing prospective clients to witness genuine satisfaction.
Audio Testimonials:
Though less common, audio testimonials (e.g., short recordings or podcast snippets) can be surprisingly impactful, especially if you already produce audio or video content. They add variety and help you stand out in a crowded marketplace, showing the potential of this form of endorsement.
Addressing Potential Concerns
Ethical Considerations:
When sharing testimonials, always prioritize truth and accuracy. Avoid any form of misrepresentation by refraining from editing client’s words. It's also advisable to seek written permission before using their testimonials publicly, as this demonstrates your commitment to ethical practices.
Handling Negative Feedback:
When faced with negative or lukewarm reviews, view it as an opportunity to showcase your professionalism and dedication to customer service. Instead of ignoring or dismissing the feedback, consider the following approach:
When responding to feedback, always do so with a calm and empathetic tone. Acknowledge the client's experience and express regret that it didn’t meet their expectations. This approach shows respect for the client's experience and can help defuse a potentially negative situation.
Take It Offline: Suggest discussing the matter privately to gain insight and possibly rectify the situation. “I’d love the opportunity to understand what went wrong and make it right. Please get in touch with me at [phone number] or [email address].”
Commit to Improvement: Emphasize the value of continuous learning and improvement in your professional journey. Use the feedback to enhance your skills and later, you can proudly mention how your additional training and courses through real estate license school enable you to serve future clients better.
Lack of Testimonials:
If you’re new to the industry, consider asking past employers or colleagues for character references that speak to your work ethic and integrity. As you build your clientele, you will gain testimonials from buyers and sellers that reflect your unique strengths.
Integrating Testimonials into Your Marketing Strategy
Email Campaigns:
Include brief testimonial snippets in your email newsletters or drip campaigns. These testimonials, when sent as a follow-up message after an open house, add a short quote from a satisfied buyer. This subtly reinforces your credibility and real estate expertise, reassuring your audience of your capabilities.
Social Media Posts:
Regularly share new testimonials on your social media channels. It's crucial that these testimonials are authentic and reflect real experiences. Pair them with a friendly headshot of the client (with their permission) or a picture of the property they purchased or sold. These personal details, when authentic, build trust and remind your audience that others have had great experiences with you.
Advertising:
Consider using testimonials in your paid advertising, both online and in print. A well-placed testimonial in a targeted Facebook ad campaign can make your message more compelling and credible, convincing your audience of your value.
Client testimonials are powerful tools that can significantly enhance your credibility and attract new business. By skillfully asking for feedback, choosing the right platforms for display, and integrating testimonials into your overall marketing plan, you’ll not only leverage the trust and social proof needed to stand out, but also attract new business. Whether you’re just earning your real estate license or have been practicing for years, these methods help ensure that your hard-won expertise—honed through real estate license school and validated by success on the real estate exam—translates into continued growth and a thriving career.
Love,
Kartik
|

Embarking on a journey in the real estate industry doesn’t end once you’ve completed your real estate school courses and earned your license. Graduating from a reputable real estate school is the first Read more...
Embarking on a journey in the real estate industry doesn’t end once you’ve completed your real estate school courses and earned your license. Graduating from a reputable real estate school is the first step in establishing yourself as a successful, full-time professional. The path from the classroom to closing your first ten deals requires a clear vision, strategic planning, consistent learning, and a willingness to adapt to the evolving market.
This 12-month real estate career roadmap breaks down the steps you must take after finishing real estate license school— from fine-tuning your exam preparation and connecting with a brokerage to building a thriving client base and celebrating post-license success. By following this timeline, you’ll understand precisely what to do after real estate school, making it easier to transform your real estate license into a sustainable, flourishing career.
Month 1-2: Solidifying Your Foundation After Real Estate School
Focus: Exam Prep, Brokerage Research, Personal Branding
As soon as you’ve finished your real estate school coursework, it’s time to focus on passing the state exam. The sooner you conquer this hurdle, the quicker you can start working with clients. Don’t overlook exam prep; this step is critical to your post-license success. Revisit your course materials, utilize any available online practice exams, and engage with peers from your real estate school study groups.
Simultaneously, start researching brokerages in your area. Look for a company that aligns with your values, offers robust training, provides mentorship opportunities, and emphasizes ongoing development. The right brokerage can accelerate your success by supplying valuable resources and market insights. While you’re at it, begin building your brand. Claim social media handles, set up a professional website, and consider a logo that reflects your target audience and niche.
Month 3-4: Passing the Real Estate Exam & Joining a Brokerage
Focus: Licensing, Mentorship, Initial Marketing
By now, you should have passed your real estate exam. This is a significant achievement that transforms you from a real estate student into a licensed professional. Next, it’s time to finalize your association with a brokerage. Ideally, choose one known for its supportive culture, ongoing training, and history of nurturing new agents. A brokerage that offers a mentorship program is invaluable, as seasoned agents can guide you through the nuances of transactions, local regulations, and building client relationships.
Start marketing yourself to your sphere of influence—friends, family, and acquaintances. Share your new role, highlight your affiliation with a reputable brokerage, and position yourself as a reliable point of contact for buying, selling, and investing in real estate. This initial outreach establishes the foundation of your database and can lead to early referrals.
Month 5-6: Developing Market Knowledge & Setting Goals
Focus: Local Market Research, Niche Specialization, Real Estate Tools
In the next couple of months, immerse yourself in your local market. Study neighborhood price trends, track recent sales, and learn to analyze the factors influencing property values. The more intimately you understand your territory, the easier it will be to advise clients, earn their trust, and negotiate favorable deals.
This period is also an excellent time to define your niche.
Consider what type of properties or clients you want to serve. You may excel working with first-time homebuyers, luxury listings, or investment properties. Specializing can help you stand out in a crowded field and streamline your marketing efforts, giving you a clear direction and focus in your career.
Invest in tools and software to boost efficiency—customer relationship management (CRM) platforms, digital marketing services, and transaction management systems. Mastering these tools not only helps you deliver a better client experience but also allows you to maintain an organized pipeline of leads, showings, and closings, empowering you to manage your business more efficiently.
Month 7-8: Lead Generation & Expanding Your Network
Focus: Prospecting, Real Estate Networking, Community Engagement
At this stage, your primary aim is to ramp up lead generation. Prospecting doesn’t have to be daunting; it can be as simple as hosting open houses, attending local events, or joining networking groups for professionals in complementary industries (mortgage brokers, interior designers, or home inspectors). The relationships you build now will pay dividends down the line.
Leverage your brokerage’s marketing resources. Participate in workshops, webinars, and coaching sessions on lead-generation strategies. Consider optimizing your online presence by creating content that answers common client questions, such as “How to select the right property?”
Month 9-10: Refining Your Skills & Building Client Relationships
Focus: Communication Skills, Negotiation, Client Referrals
By now, you’ve likely closed a few deals and gained experience working with different types of clients. Reflect on your successes and identify areas where you can improve. Consider enrolling in additional training or continuing education courses offered by your real estate school alumni network or professional associations. Improving your negotiation, presentation, and communication skills sets you apart from competitors who may rely solely on basic training.
Client satisfaction matters more than ever. Follow up with past clients for testimonials or referrals. Positive word-of-mouth can expand your client base without costly advertising. Personal touches—like a handwritten thank-you note after closing—reinforce your professionalism and dedication. These small gestures help foster long-term relationships that bring repeat business and consistent referrals, contributing to your post-license success.
Month 11: Scaling Your Real Estate Business & Diversifying Services
Focus: Listing Presentations, Real Estate Marketing Strategy, Continuing Education
With nearly a year under your belt, it’s time to consider scaling your business. If you’ve been primarily representing buyers, start targeting more listings. Listings often create a multiplier effect: representing a seller can attract multiple buyers from a single property, boosting lead generation.
Refine your real estate marketing strategy to showcase your listings through professional photography, video tours, and social media promotions. Explore partnerships with local businesses, such as interior designers or moving companies, that can elevate your brand's visibility. Continuously invest in your education—take advanced real estate and marketing courses, attend industry seminars, and earn certifications that strengthen your credibility and skill set.
Month 12: Celebrating Your Success & Planning Ahead
Focus: Review, Refine, Set New Goals
After 12 months in the industry, it’s time to review your progress. Have you reached your goal of closing your first ten deals? Reflect on what worked well and what could be improved. Review your lead sources—were some more fruitful than others? Did your brokerage relationship meet your expectations? Are you attracting the clients and listings you aimed for when you left real estate school?
Use this analysis to set new, more ambitious goals for the following year. Perhaps you’ll double your transaction volume, earn a specialized certification, or expand your team. The key is to remain adaptable and committed to ongoing growth. Real estate is dynamic, and professionals who embrace change are best positioned to thrive.
From Classroom to Closing: A Sustainable Real Estate Career
Completing real estate school and earning your license is only the beginning of a long, rewarding journey. Following this 12-month real estate career roadmap, you’ve learned precisely what to do after real estate school to transition smoothly from a new licensee into a confident, skilled agent who can handle any market challenge.
From acing your exam and choosing a supportive brokerage to mastering local market knowledge, boosting lead generation, and refining your negotiation skills, each step moves you closer to post-license success. Embrace continuous learning, prioritize client relationships, and keep a finger on the industry’s pulse. With dedication, strategy, and resilience, you can turn your initial investment in real estate school into a thriving career that lasts for years.
Love,
Kartik
|